Configure and use Ada Glass for Intercom
Overview
Ada Glass for Intercom helps you create a seamless handoff from your chatbot to a live agent in Intercom, all from within Ada. To use Ada Glass for Intercom, you must have an Intercom account.
The number of handoff platforms your organization can use varies depending on your subscription package. For more information, see Ada's Pricing page, or contact your Ada team.
Configure your Intercom instance
Prepare Intercom for the Ada Glass integration by completing the following steps in Intercom:
Create a private app in Intercom
-
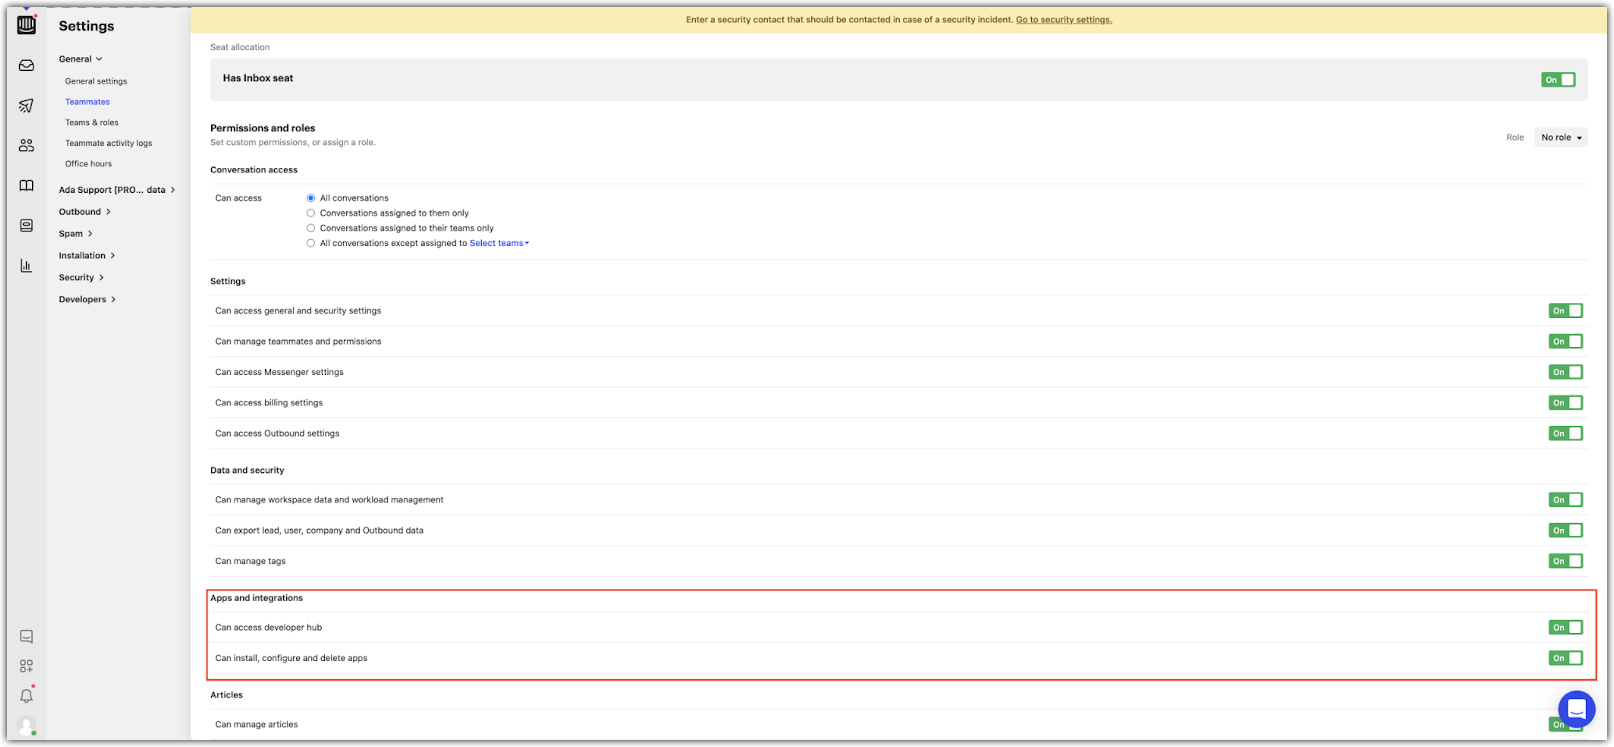
To set up a private app in Intercom, you need to have access to the Intercom developer hub. To grant access to the developer hub, navigate to Settings > General > Teammates (Select the user here) > Permissions and Roles > Apps and Integrations. Then turn on the following permissions for the desired user:
-
Can access developer hub
-
Can install, configure and delete apps
-
-
Ada Glass for Intercom supports private apps in Intercom that are v2.4 or below. To confirm your version, go to Developer Hub > Configure > API Version in Intercom.
-
Navigate to Settings > Developers > Developer Hub. This will open up the Developer Hub page.
-
Click New App.
-
Create a new private app, and call it “Ada Integration.”
Grant permissions
-
Navigate to Settings > Developers > Developer Hub. This will open up the Developer Hub page.
-
Under People and conversation data and Workspace data, grant the appropriate Permissions—select the following (reference the screenshot below).

Add webhooks
Configure only one app with the Ada webhook URL. Having multiple apps configured results in duplicated agent messages and Intercom events, even if the additional apps aren't used.
-
Navigate to Settings > Developers > Developer Hub. This will open up the Developer Hub page.
-
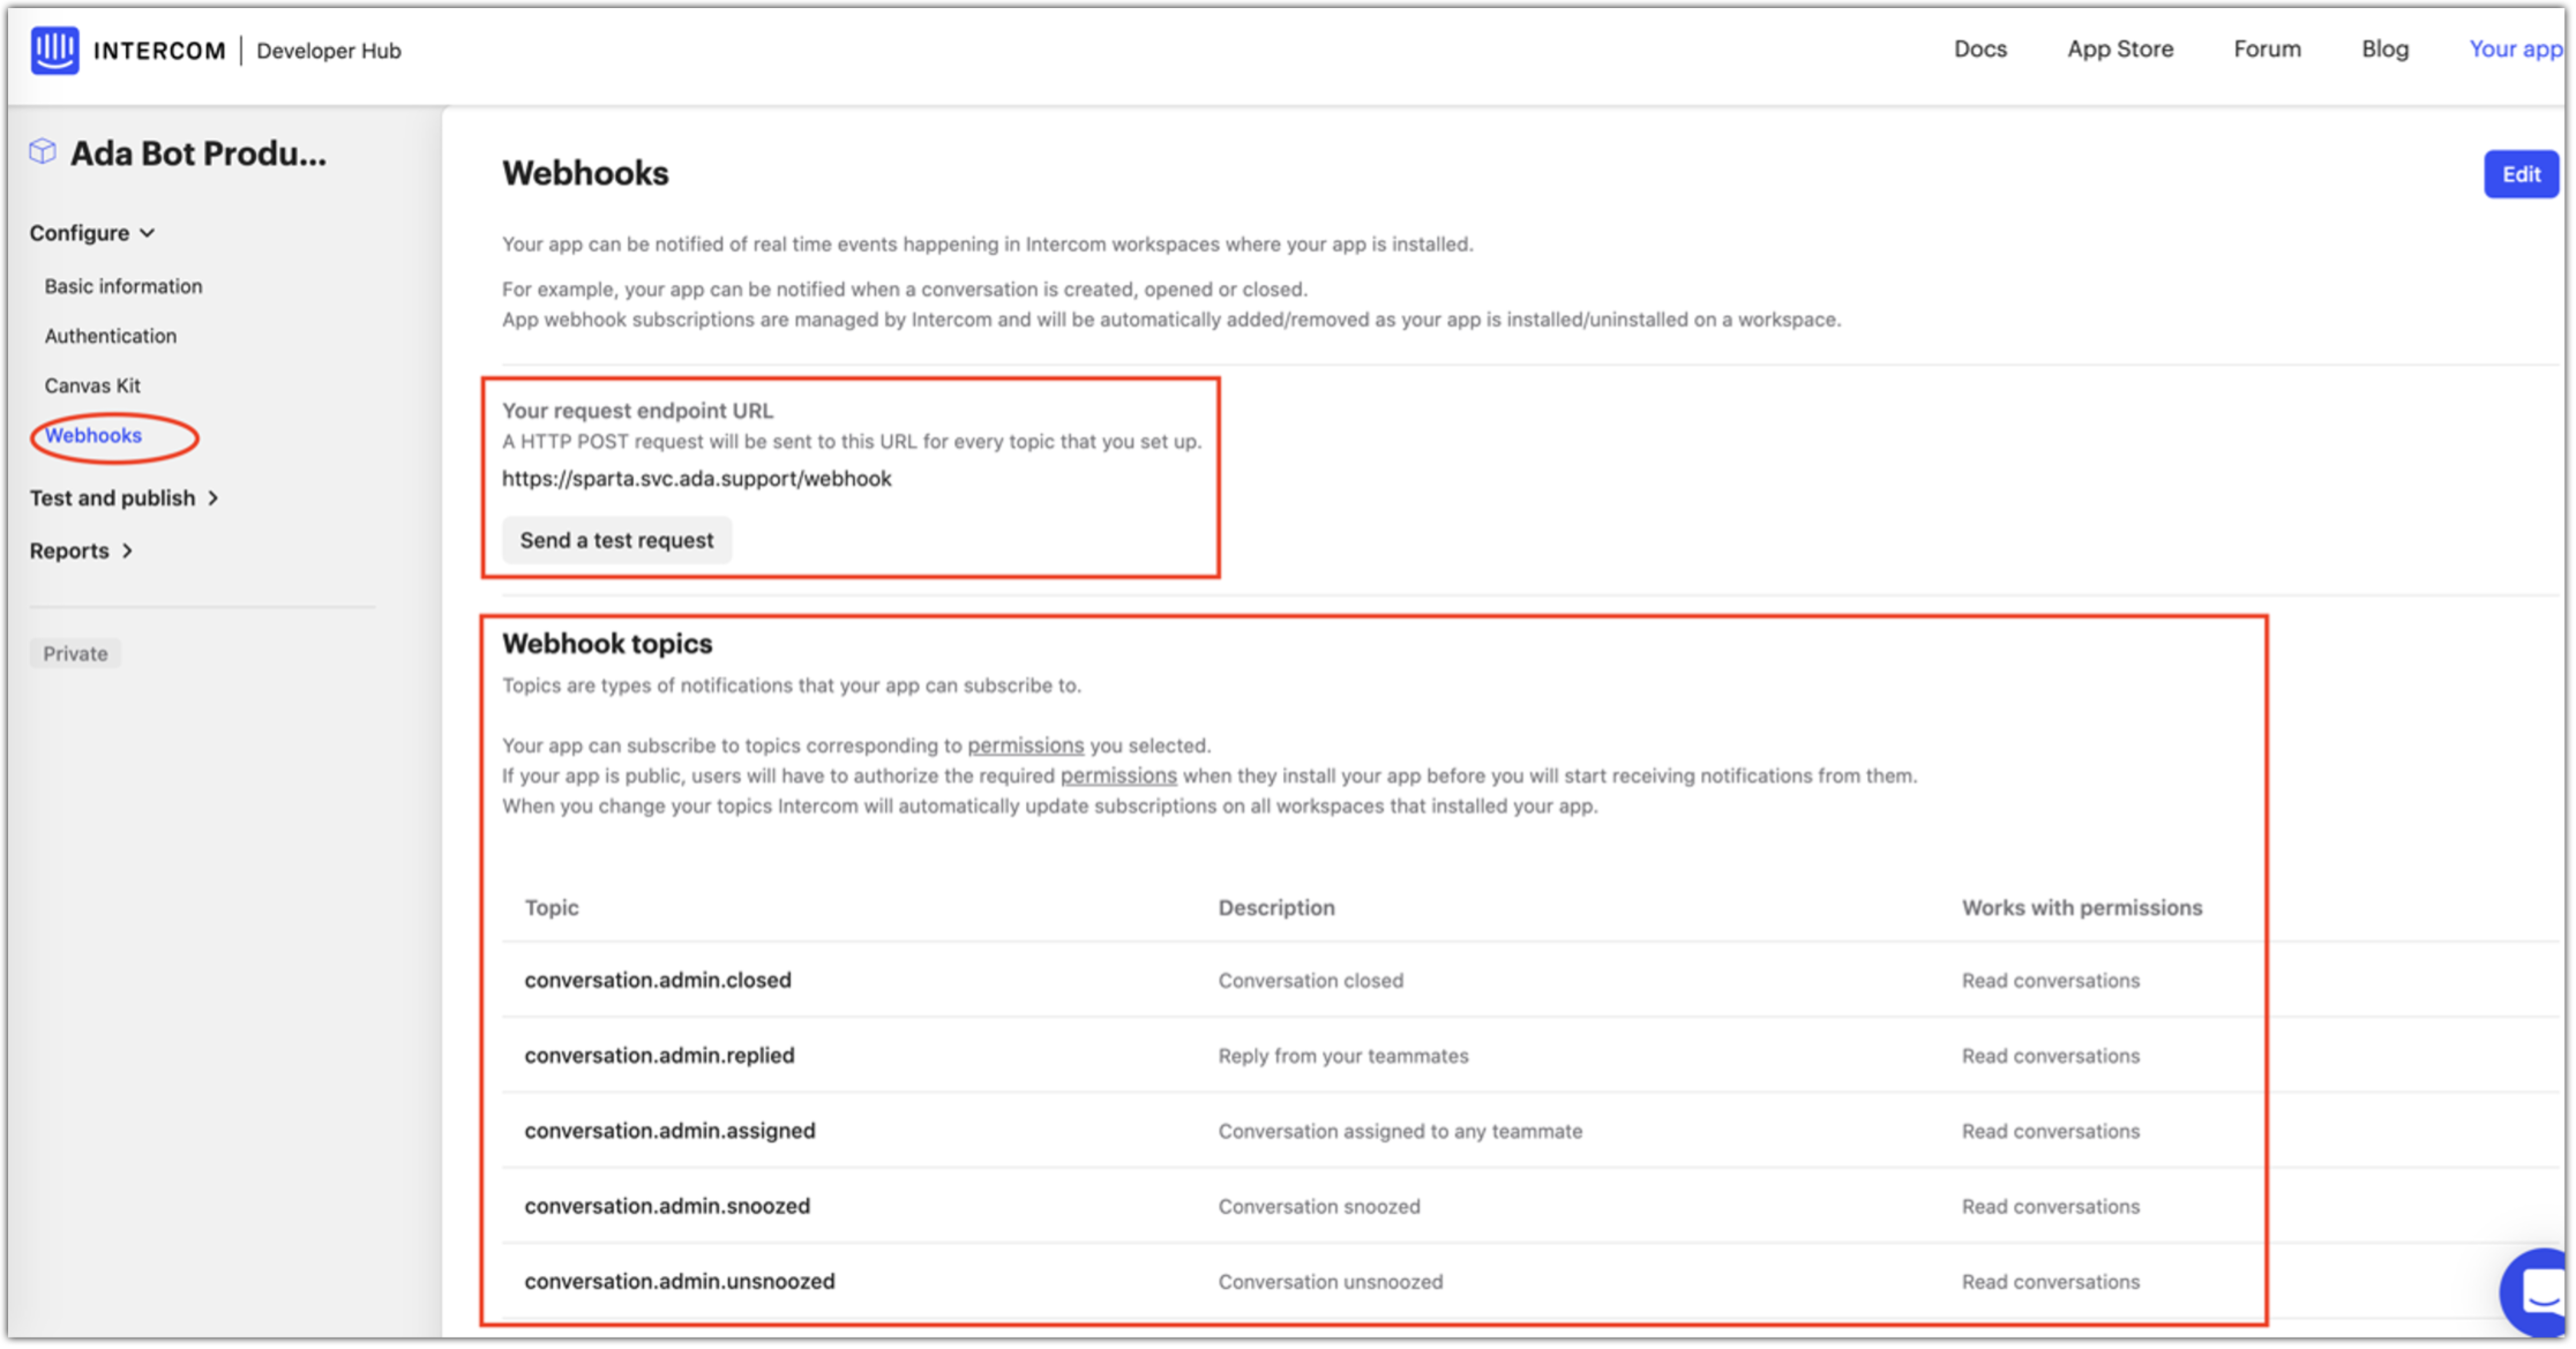
Go to Configure > Webhooks to view your Intercom Webhooks.
-
Click Edit and enter these details:
-
Your Request Endpoint URL (Ada Webhook URL): https://sparta.svc.ada.support/webhook
-
Webhook topics:
-
conversation.admin.closed
-
conversation.admin.replied
-
conversation.admin.assigned
-
conversation.admin.snoozed
-
conversation.admin.unsnoozed
-
-
Add an Ada conversation attribute
For an Intercom handoff, Ada uses custom attributes as identifiers for the various elements of a conversation. Examples of these elements include the conversation ID, the chatter ID, and the client handle. But don't worry! You only need to add a single universal attribute (ada_custom_attributes) that encompasses all these elements automatically.
-
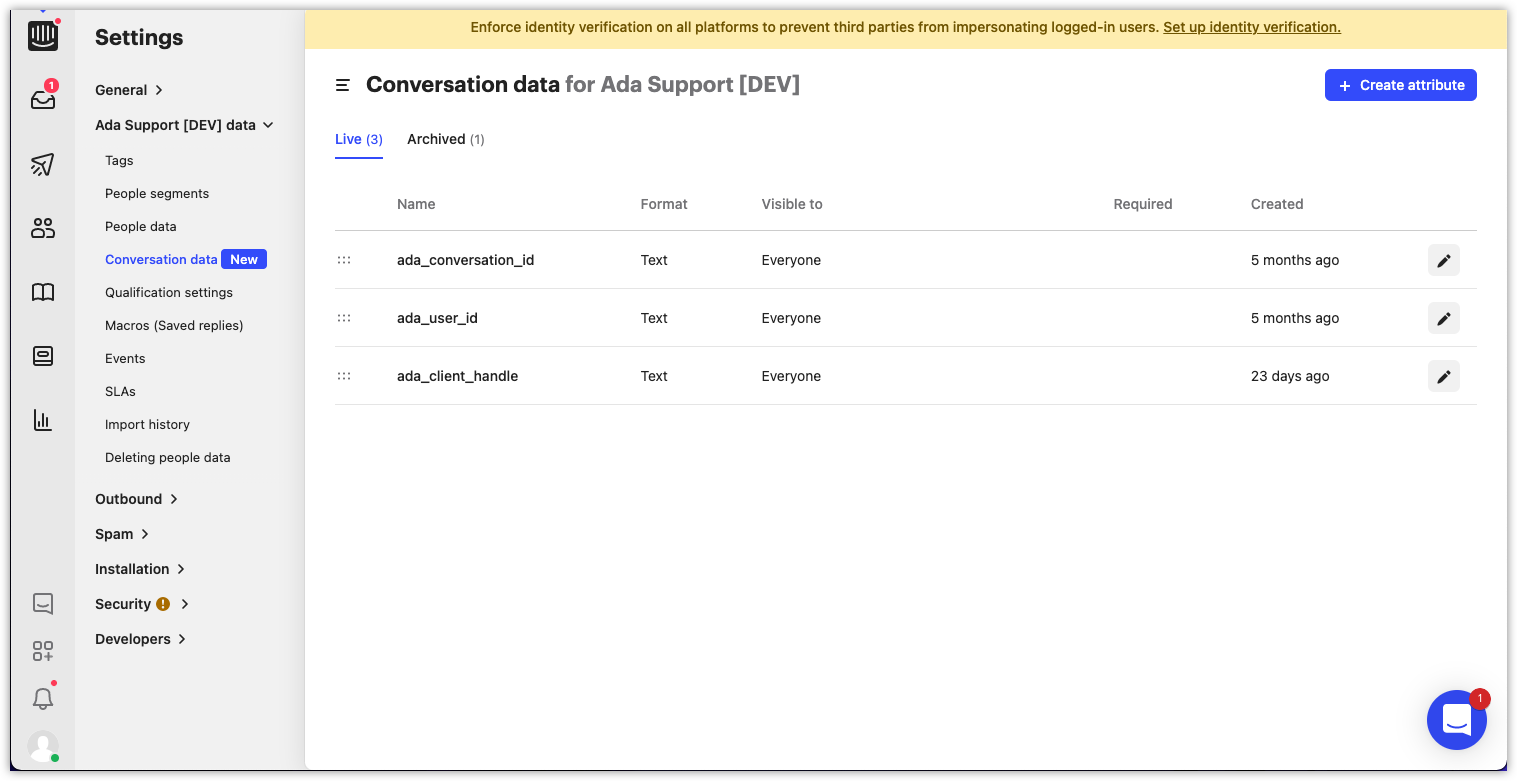
In Intercom, go to IntercomAgent Workspace > Settings > Instance Name > Data > Conversation data.
-
Click the Create Attribute button to add a new attribute.
-
In the Name field, enter ada_custom_attributes.
-
Click the Format drop-down menu, then select Text.
-
Click Save.
Create tags in Intercom
-
Navigate to the Settings page.
-
Under the *Your Workspace Name* data tab, click on the Tags item.
-
Create your first tag by clicking the New tag button.
noteIf you have pre-existing tags created, you may find the New tag button on the top right corner of the Tags screen.
-
After you name your new tag, click the checkmark beside the input field or press Enter to save it.
The tag is now ready to use in Intercom and the Intercom block in Ada.
Configure conversation assignments
Ada's Intercom integration only supports single-agent assignment. If a conversation is assigned to a team rather than a single agent, the chatter and the agent can't reliably send each other messages.
To ensure agents and chatters can speak to each other without interruptions, configure your Intercom integration to assign a single agent to every incoming conversation from Ada. For more information, see Assign conversations to teammates and teams at Intercom's documentation.
Configure Ada Glass for Intercom
To configure the Ada Glass for Intercom integration in Ada:
-
Navigate to the Settings page.
-
Click Integrations, then scroll down to Handoff Integrations.
-
Next to Intercom, click Configure.
-
In the Connect Ada to Intercom window, click Connect.
-
If a prompt to log into your Intercom account appears, log in. A window that says "Ada Chat wants to access [your Intercom account name]" appears.
-
Verify that the Intercom account listed is the correct one to connect to Ada, and click Authorize access.
Use the Ada Glass for Intercom Live Agent block
-
Create a new Answer to handle handoffs to Intercom live agents.
-
Click and drag the Intercom block from the block bar into the Answer.
-
Add any applicable tags, such as "Ada." (These tags will be mapped to the conversation in Intercom.)
-
Select the appropriate department from the Department dropdown.
-
Click the Save button at the bottom of the screen.
-
Train the Answer so that it is surfaced when chatters require a live agent.
Configure tags in the Intercom block
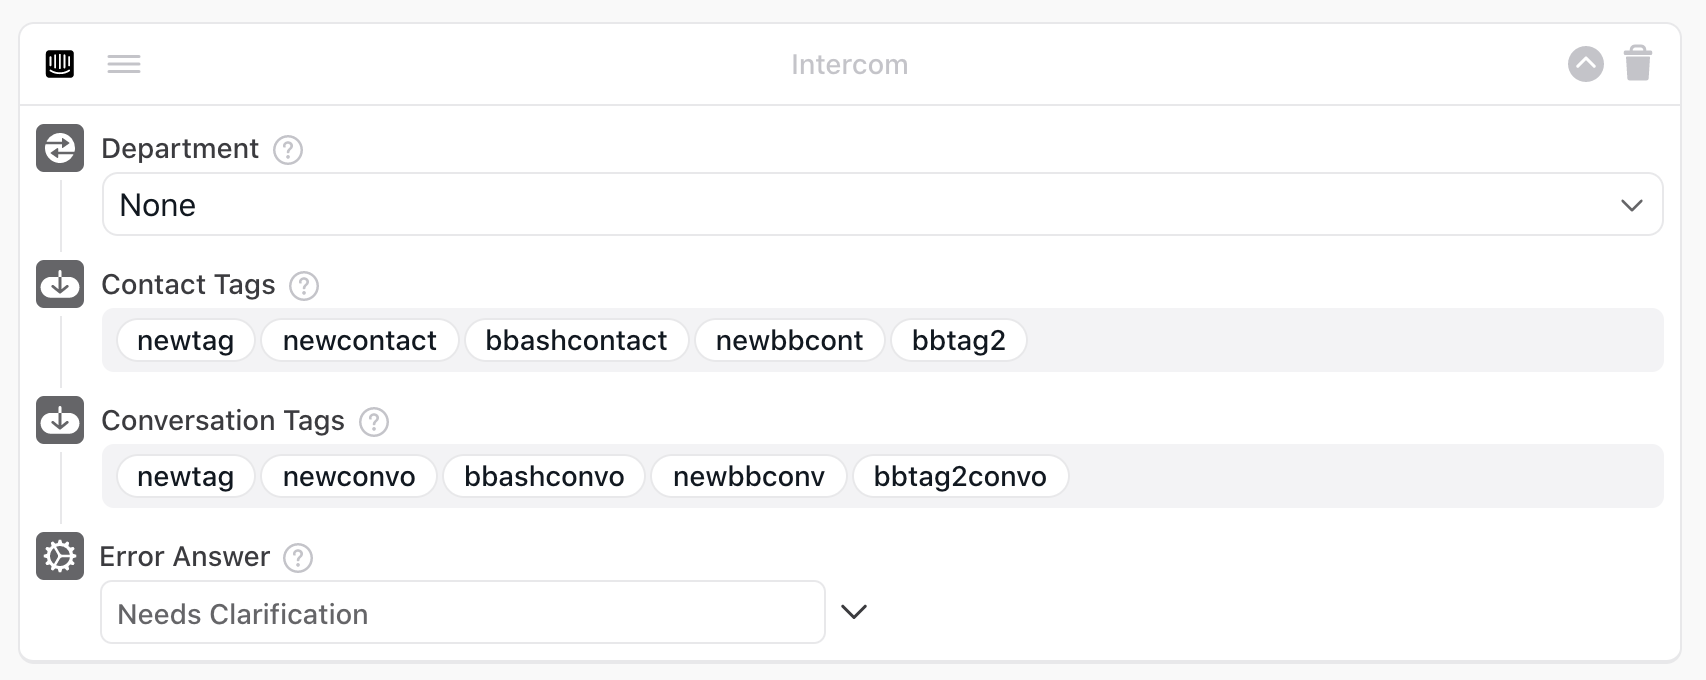
The Intercom block supports the ability to add tags that will be attributed to Contacts (represented by the “People” column in Intercom’s tags interface) and Conversations. These are separated by two fields: Contact Tags and Conversation Tags.
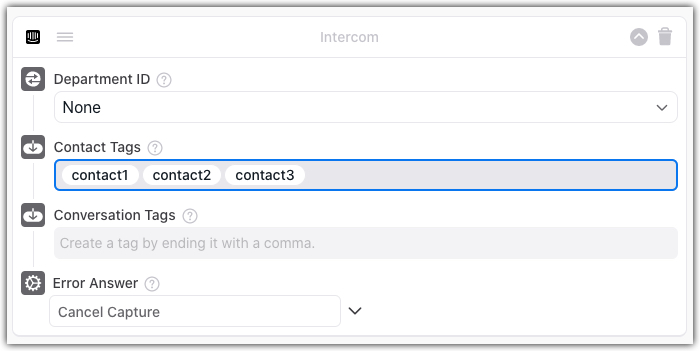
In the above image, the Contact Tags field has been filled with three tags that will be attributed to the contact: contact1, contact2, and contact3. Adding a tag in this field will reference an existing tag created in Intercom with the same name. If a tag with the same name does not exist in Intercom, a new tag will be created in Intercom and automatically attributed to the contact.
To add a new tag, type in the name of the tag, then add a comma (,).
The Conversation Tags field functions identically to the Contact Tags field, the only difference being that the tags will be attributed to the conversation created during the handoff. A tag can be used in both Contact Tags and Conversation Tags, and will attribute both the contact and conversation with the same tag. As a rule of thumb, while conversations will be transferred from Ada to Intercom immediately, tags will be delayed 30-60 seconds.
Configure off hours
The Intercom API does not support automatic off-hours routing, so we recommend using the Scheduled block to ensure that chatters are routed effectively. If chatters try to connect to agents before or after business hours, the Scheduled block will redirect them to a process that will handle an off-hours requests. Talk to your Ada team for more info.
Chatter experience
Once the chatter has confirmed they would like to speak with an agent, they will receive a message informing them to wait while they are connected a support agent.
When the chat is assigned to an agent, the agent's name is provided to the chatter to identify who they are chatting with. The chatter will continue the conversation with the live agent in the same chat window that they were corresponding with the bot in, resulting in a seamless experience for the chatter.
Intercom live agent experience
If you would like to have your chatter identified in Intercom, you can collect chatter's personal information and save them as variables. Below are the variables that are supported:
-
first_name/firstname
-
last_name/lastname
-
email
-
phone_number/phonenumber/phone
If the bot has captured the specific information from the chatter, such as the info listed above, it will be mapped to the chat, along with tags. Agents will also see the conversation the chatter had with the bot leading up to the handoff.
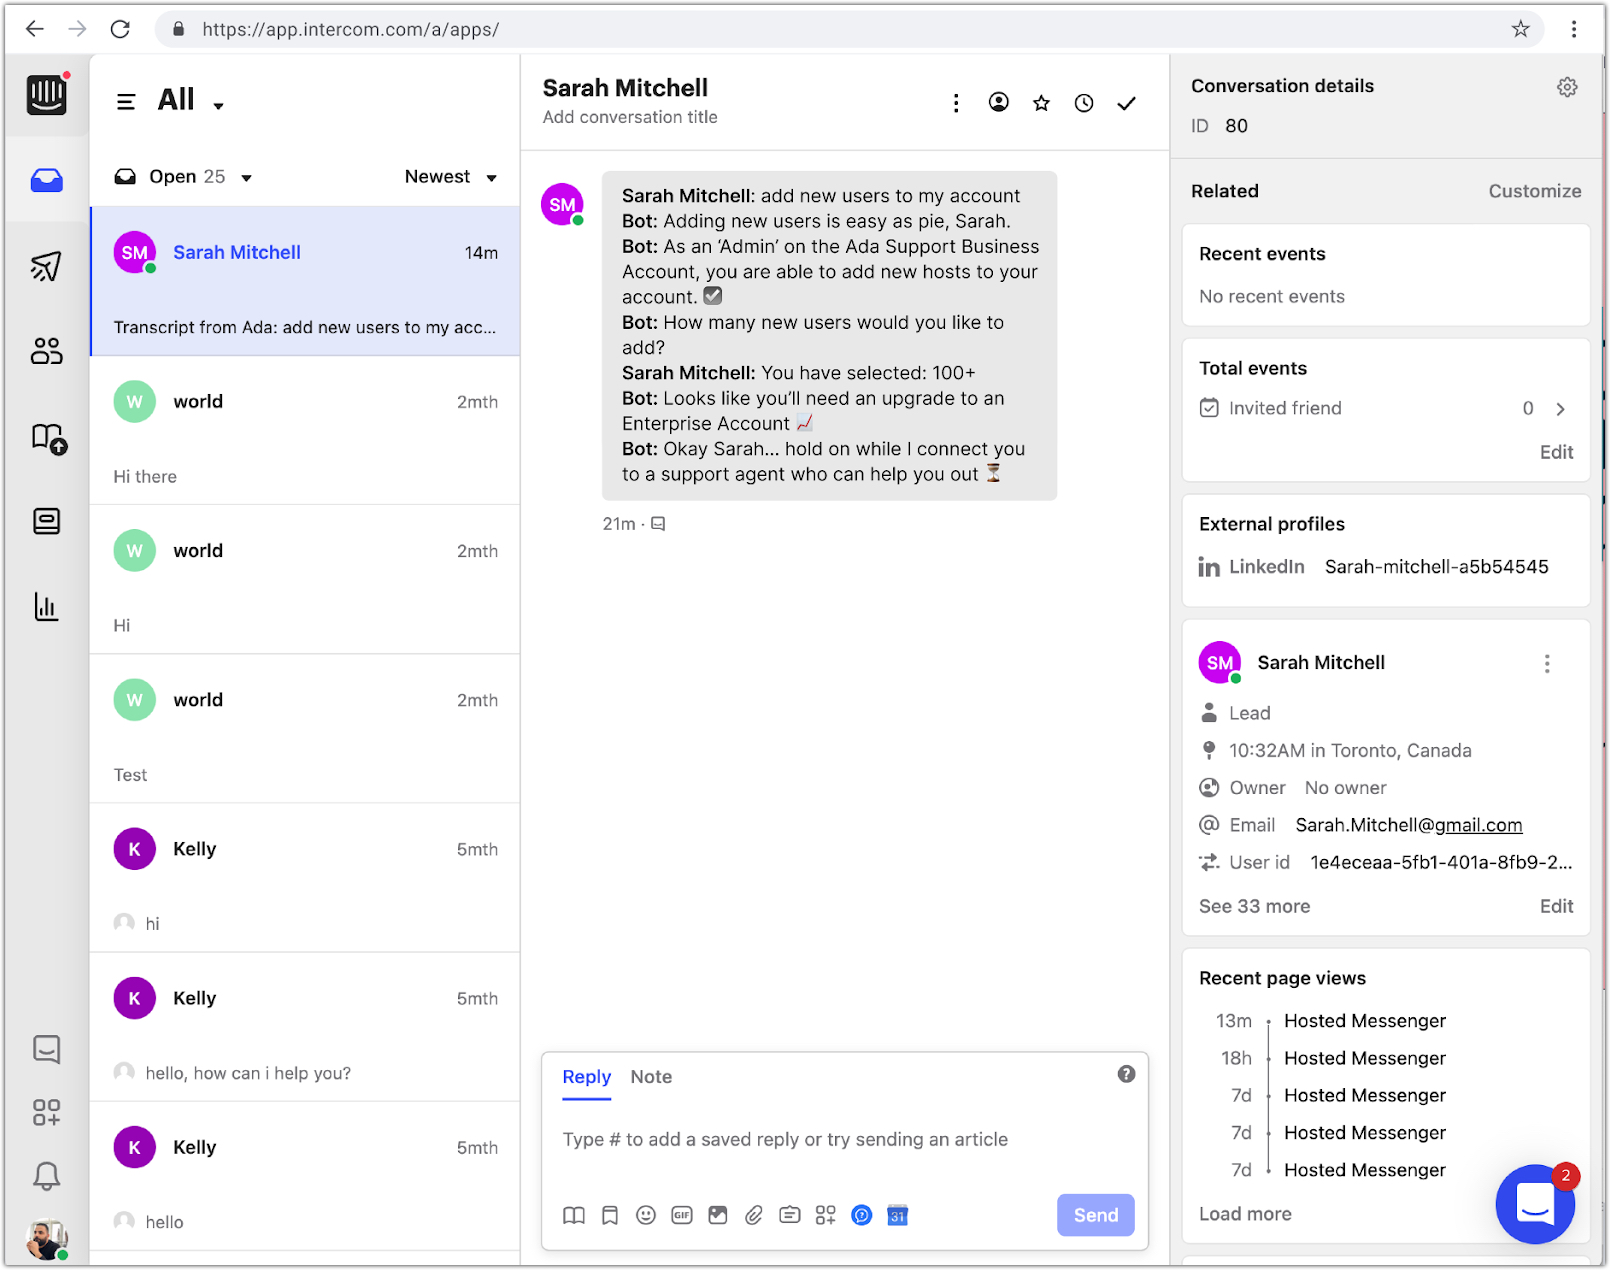
You can find the contact tags displayed in the bot transcript forwarded to the chat interface, as well as on the lead tags section in the right panel.
Transcripts
The full transcript of the chat is visible in the Intercom transcripts, so an agent can have the entire context of the conversation to help solve customer issues.

File transfers can only be done between the agent and the chatter at this time.
Have any questions? Contact your Ada team—or email us at [email protected].