

Initial NICE CXone configuration
Before your Ada team can enable the NICE CXone integration, complete the following prerequisite steps in your CXone instance. Once finished, share the collected information with your Ada representative.
This integration uses CXone’s Bring Your Own Channel (BYOC). Virtual Agent Hub (VAH) is not supported.
Collect your CXone identifiers
Two identifiers from your CXone instance are needed before anything else can be provisioned.
To collect your CXone identifiers:
- Business Unit ID — the identifier of your CXone business unit.
- Tenant ID — used to discover the API base URLs for your instance.
Register for Bring Your Own Channel access
Registering an application in the CXone developer portal produces the credentials the connector uses to authenticate against your instance.
To register for BYOC access:
- Register an application at CXone application registration, requesting access to the following APIs:
- Admin API
- Authentication API
- Real-Time API
- Digital Engagement API
- After registration completes, NICE sends the application key and secret by email. These form the Basic Authentication header the connector uses.
- Create an API user with Admin permissions and generate an access key ID and secret for the token endpoint.
- Create an employee account that your Ada team can use to sign in and test as an agent.
The exact set of APIs required can vary by instance. Your Ada team will confirm the final list with you during setup.
Create the BYOC channel integration
The channel integration tells CXone where to reach Ada. Creating it produces the Integration ID needed to create the chat channel itself.
To create the channel integration:
-
Sign in to your CXone instance.
-
Navigate to ACD → Digital → Bring Your Own Channel.
-
Click Add.
-
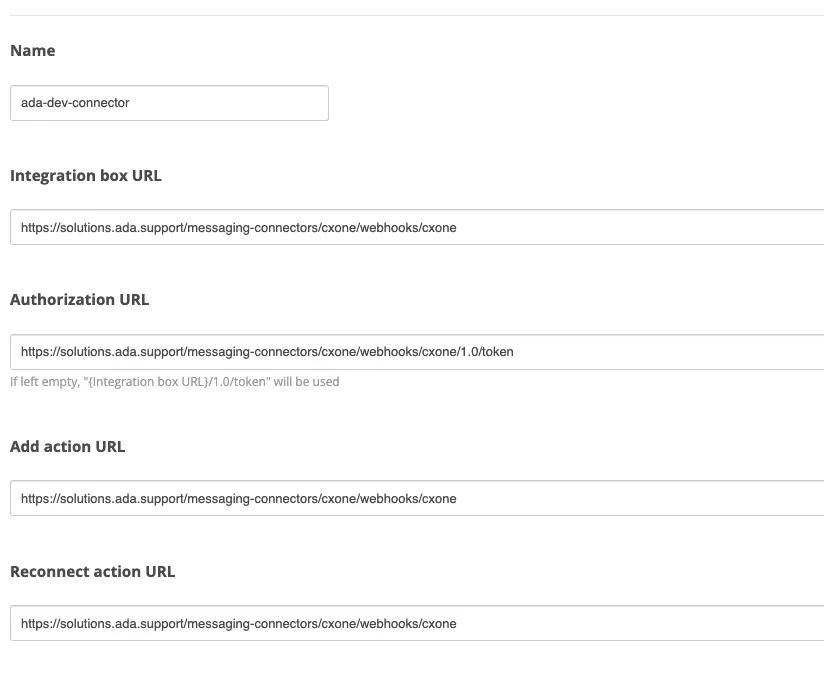
Enter a recognizable Name for the integration.
-
Set the URL fields to Ada’s webhook endpoint for your AI Agent’s cluster:
Replace
<base-url>with the value for your cluster:- US:
https://solutions.ada.support - EU:
https://solutions.eu.ada.support - Canada:
https://solutions.ca.ada.support
- US:
-
Save the integration, then note its Integration ID and Name.
Create the chat channel
A channel must exist on the integration before conversations can be routed to it. Channels are created through the CXone Digital API rather than the admin UI.
To create the chat channel:
- Obtain a bearer token for your CXone API user.
- Send the following request, replacing
<channel-name>with the name you want for the channel,<integration-id>with the Integration ID from the previous section, and<token>with your bearer token.
The API base URL in the request above is region-specific. If your instance is not hosted in North America, use the base URL returned by CXone discovery for your tenant. Your Ada team can run this request on your behalf if you prefer.
Enable channel access for roles
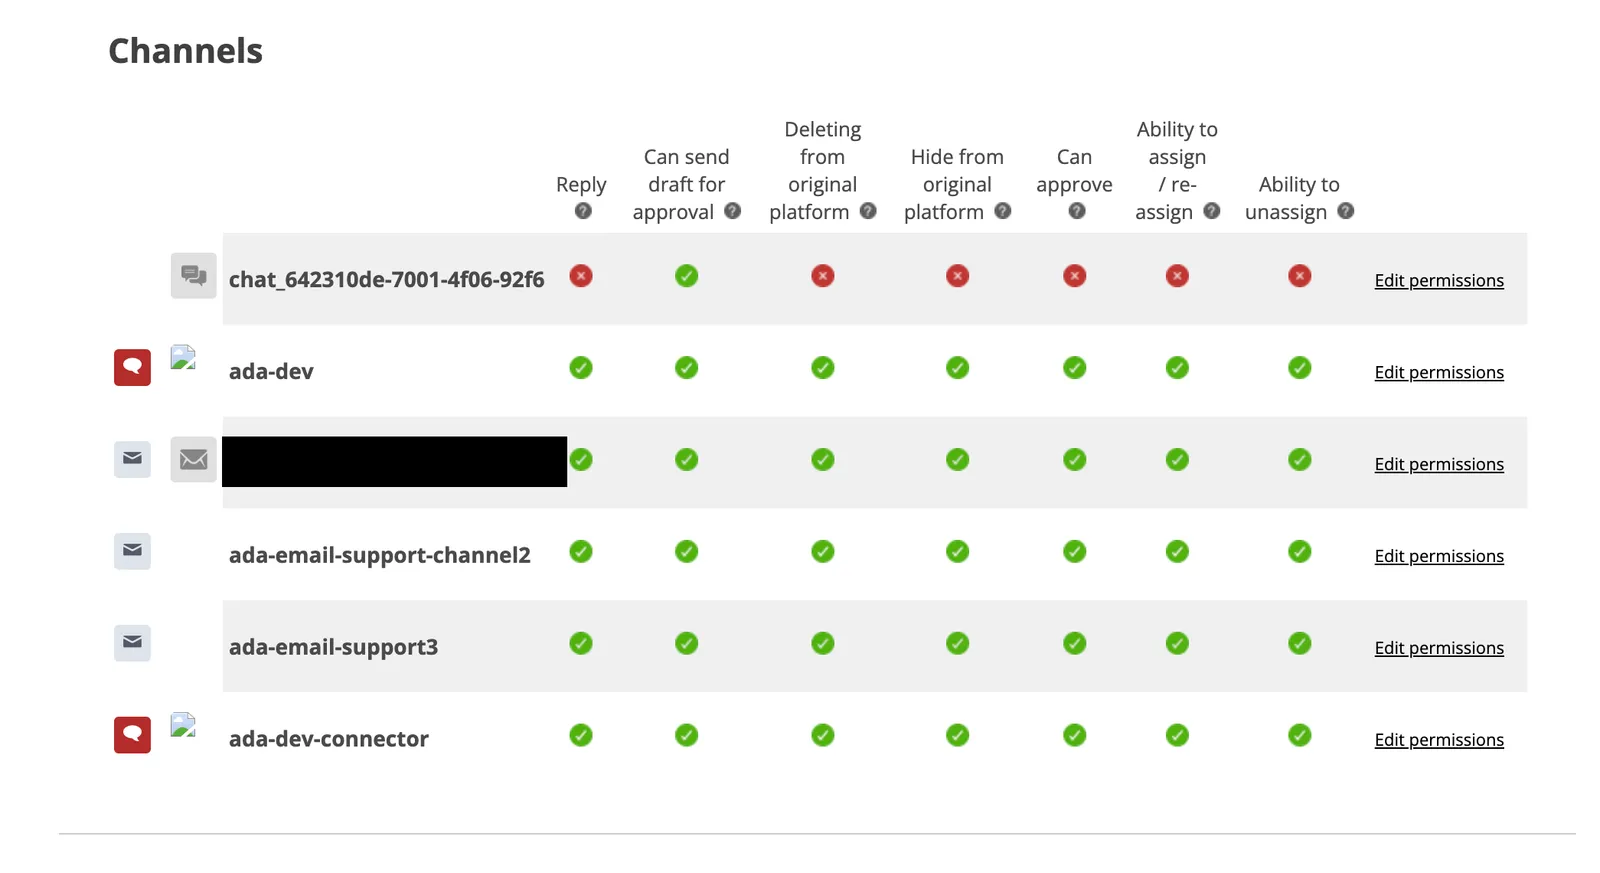
Agents can only work conversations on channels their role can access, so the new channel must be added to every role that handles escalations.
To enable channel access:
- Navigate to Digital → Roles.
- Select the role you want to update, such as an administrator or agent role.
- In the Channels list, grant the role the permissions it needs on the new channel.
Create the initialization workflow
Contacts arriving on the channel need a Studio workflow that assigns them to a CXone skill. Without it, escalated conversations are never routed to an agent.
To create the initialization workflow:
- In CXone, open Studio and create a new workflow.
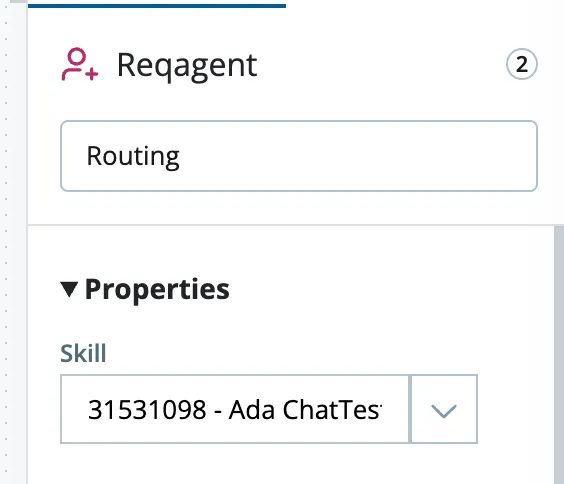
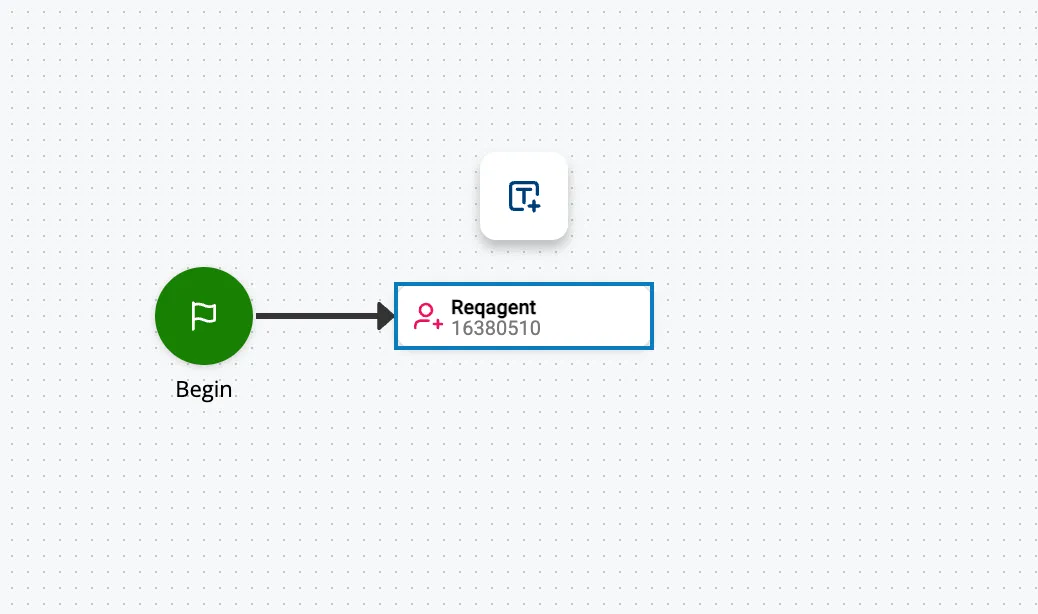
- Add a Reqagent action to the workflow.
- In the action’s Properties, set Skill to the CXone skill that should receive escalated conversations. Create the skill first if it does not exist.
Create the conversation close trigger
When an agent resolves or closes a contact in CXone, Ada needs to be notified so the end user can resume chatting with the AI Agent. An automation trigger sends that notification.
To create the close trigger:
-
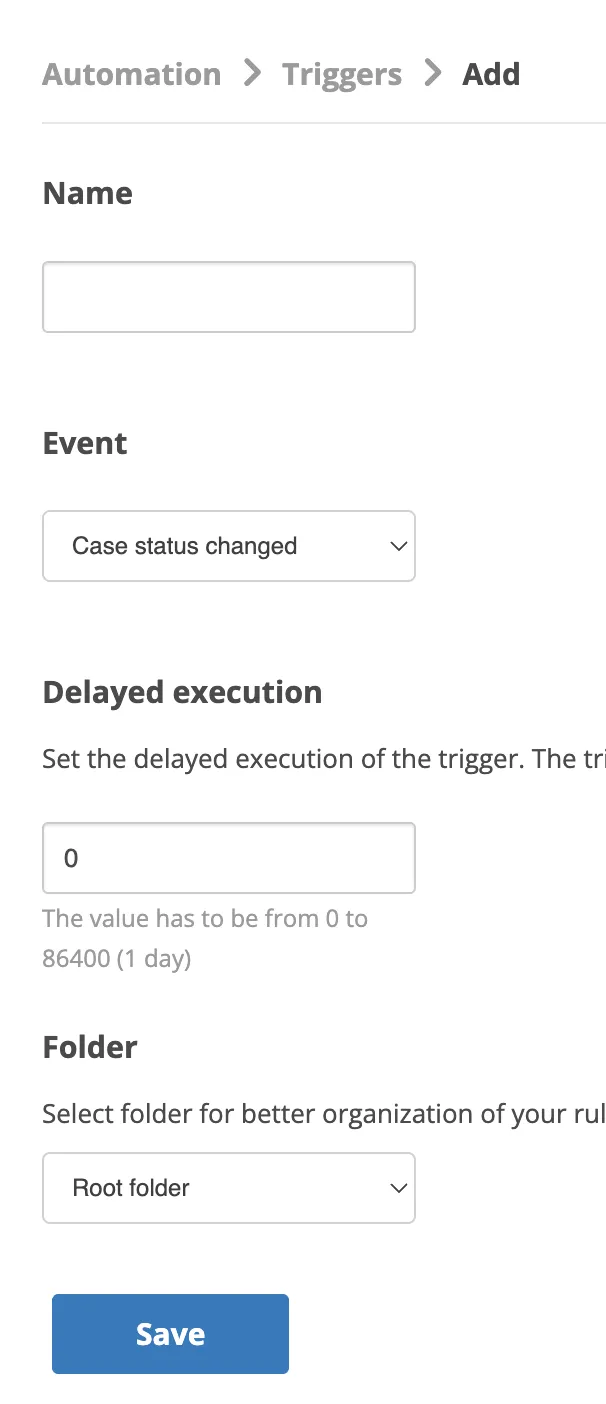
Navigate to Digital → Automation Triggers and create a new trigger.
-
Set Event to Case status changed.
-
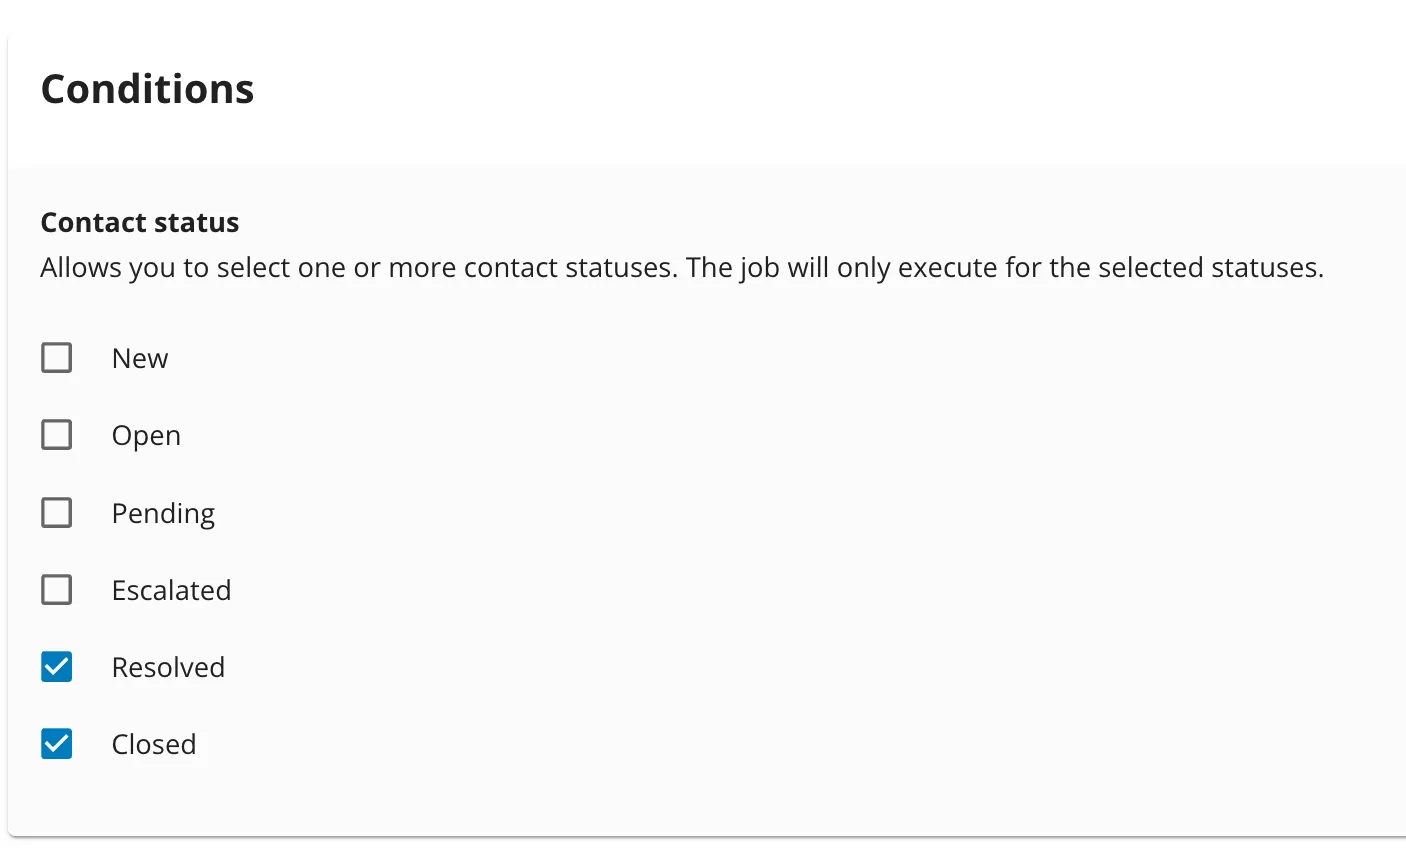
Under Conditions, select the Resolved and Closed check boxes for Contact status.
-
Add a Job to the trigger and set its URL to Ada’s close-conversation endpoint for your cluster:
- US:
https://solutions.ada.support/messaging-connectors/cxone/webhooks/cxone/close-conversation - EU:
https://solutions.eu.ada.support/messaging-connectors/cxone/webhooks/cxone/close-conversation - Canada:
https://solutions.ca.ada.support/messaging-connectors/cxone/webhooks/cxone/close-conversation
- US:
Configure custom fields
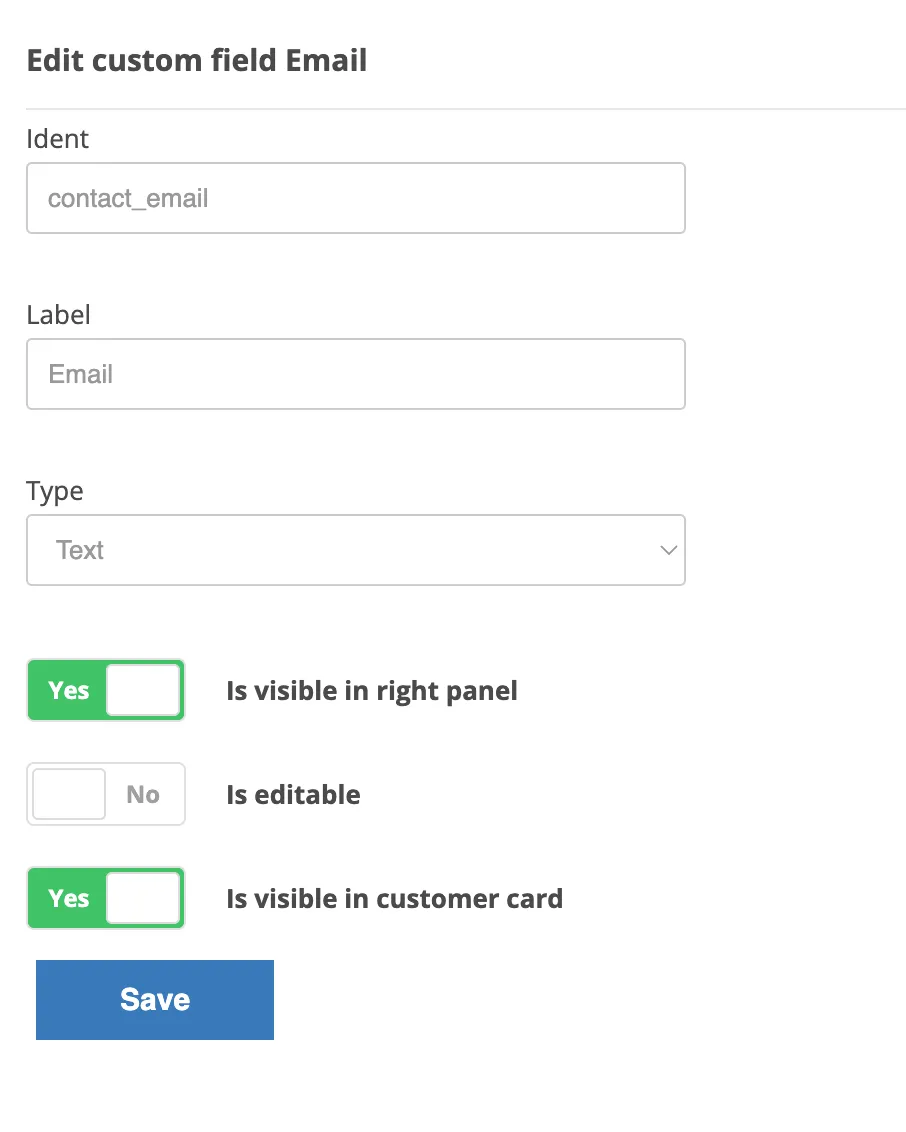
Custom fields define which attributes a handoff can set on the CXone contact and on the end user’s customer card. Each field’s Ident is the key used when passing values from Ada.
To configure custom fields:
-
Navigate to Digital → Custom Fields.
-
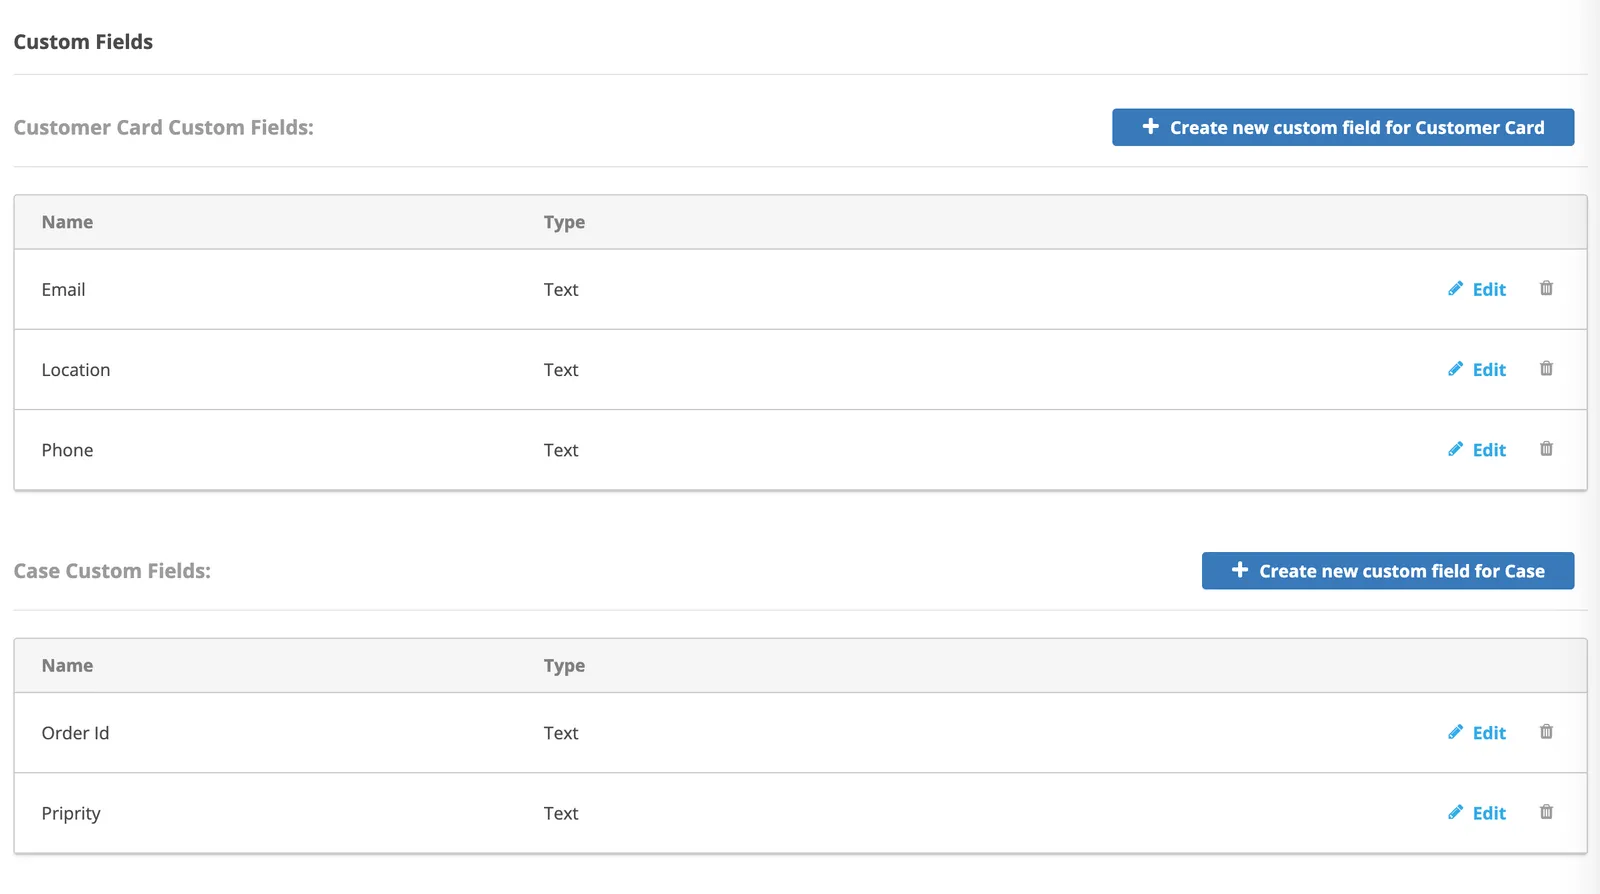
Under Customer Card Custom Fields, create the fields you want to set on the end user.
-
Under Case Custom Fields, create the fields you want to set on the contact.
-
Open each field and note its Ident. The Ident is the key you pass from the Handoff in Ada, and it is distinct from the display Label.
Configure skills and routing
Routing determines which CXone skill receives each escalated conversation. Custom attribute values can be used to route conversations from a single channel to different skills.
To configure routing:
- In Studio, create a routing script for the channel.
- Use the channel ID and any custom contact attributes as routing criteria to select the target skill.
Share with your Ada team
Once the steps above are complete, share the following with your Ada representative. Your Ada team will complete the remaining backend configuration.
- Business Unit ID
- Tenant ID
- Application key and secret from BYOC registration — share these securely, not in a shared channel
- API user access key ID and secret — share these securely, not in a shared channel
- Channel Integration ID and Name
- Channel ID of the chat channel you created
- Credentials for the employee account created for agent-side testing