

Live chat handoff
The Dixa live chat handoff escalates an AI Agent conversation to a live agent in Dixa. In Dixa, each conversation is associated with a contact and appears in the conversation timeline alongside emails, callback requests, and phone calls.
An AI Agent can have only one Dixa handoff configuration, but other handoffs (such as Gladly or Salesforce) can be configured alongside it. Multiple AI Agents can connect to the same Dixa instance; in that case, each AI Agent is connected separately.
Configure the webhook
The live chat handoff relies on a webhook to relay messages in both directions between the end user and the Dixa agent. This webhook is required — without it, agent replies and conversation events are not sent back to the end user, and the live chat cannot function. Configure the webhook in your AI Agent’s dashboard, using the URL for your cluster.
To configure the webhook:
- In your AI Agent, go to Platform → Webhooks.
- Add a webhook using the URL for your AI Agent’s cluster:
- US:
https://solutions.ada.support/messaging-connectors/dixa/webhooks/ada - EU:
https://solutions.eu.ada.support/messaging-connectors/dixa/webhooks/ada
- US:
Your Ada team completes the remaining backend setup during the integration — the per-AI Agent handoff configuration and the corresponding webhook created in Dixa, both of which require your Ada and Dixa tokens. In a multi-agent setup where several AI Agents connect to the same Dixa instance, each AI Agent is connected separately. Contact your Ada representative to proceed.
Configure the handoff in your AI Agent
Once the backend configuration is complete, add and configure the Dixa Utilities app in the answer that handles the handoff.
To configure the live chat handoff:
- In the answer that hands off to support, add the Dixa Utilities block.
- (Optional) To retrieve the allowed values of a Select type custom attribute, select the List Nested Attribute Choices action.
- In the Tech Identifier field, enter the technical identifier of the Select attribute to retrieve its list of allowed values.
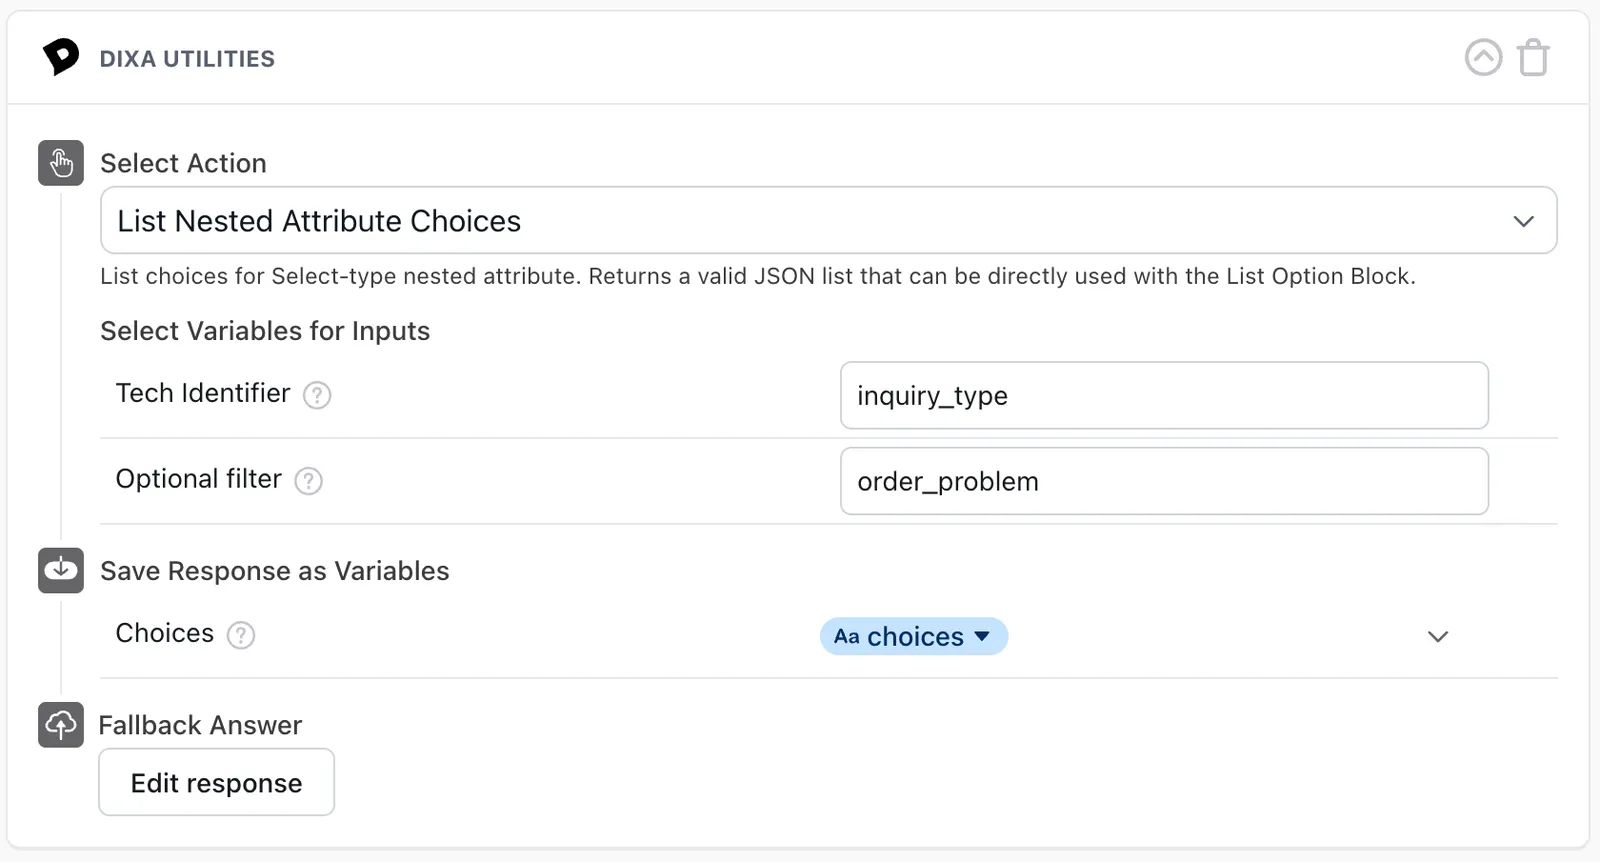
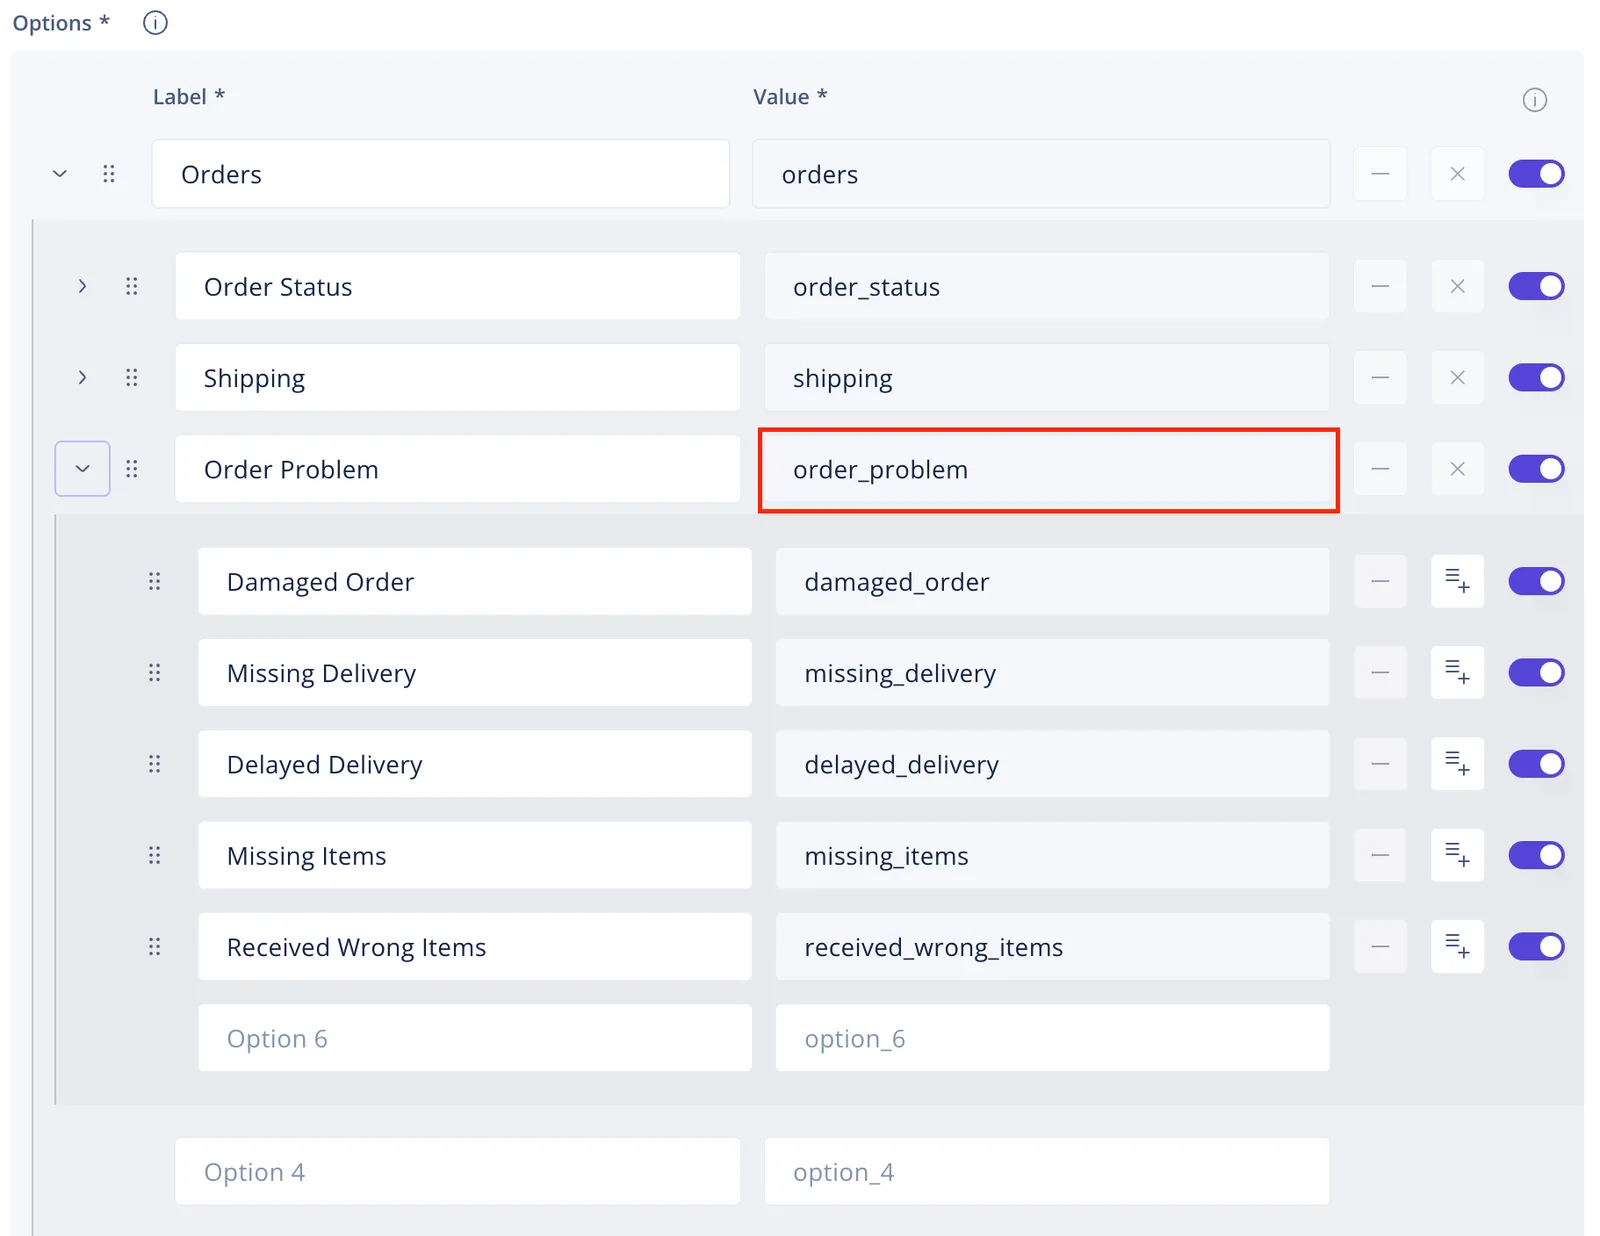
- (Optional) In the Optional filter field, enter the value of an option to return only the options nested within it. For example, entering
order_problemreturns only the options nested under that value.
Only active options are returned in the list.
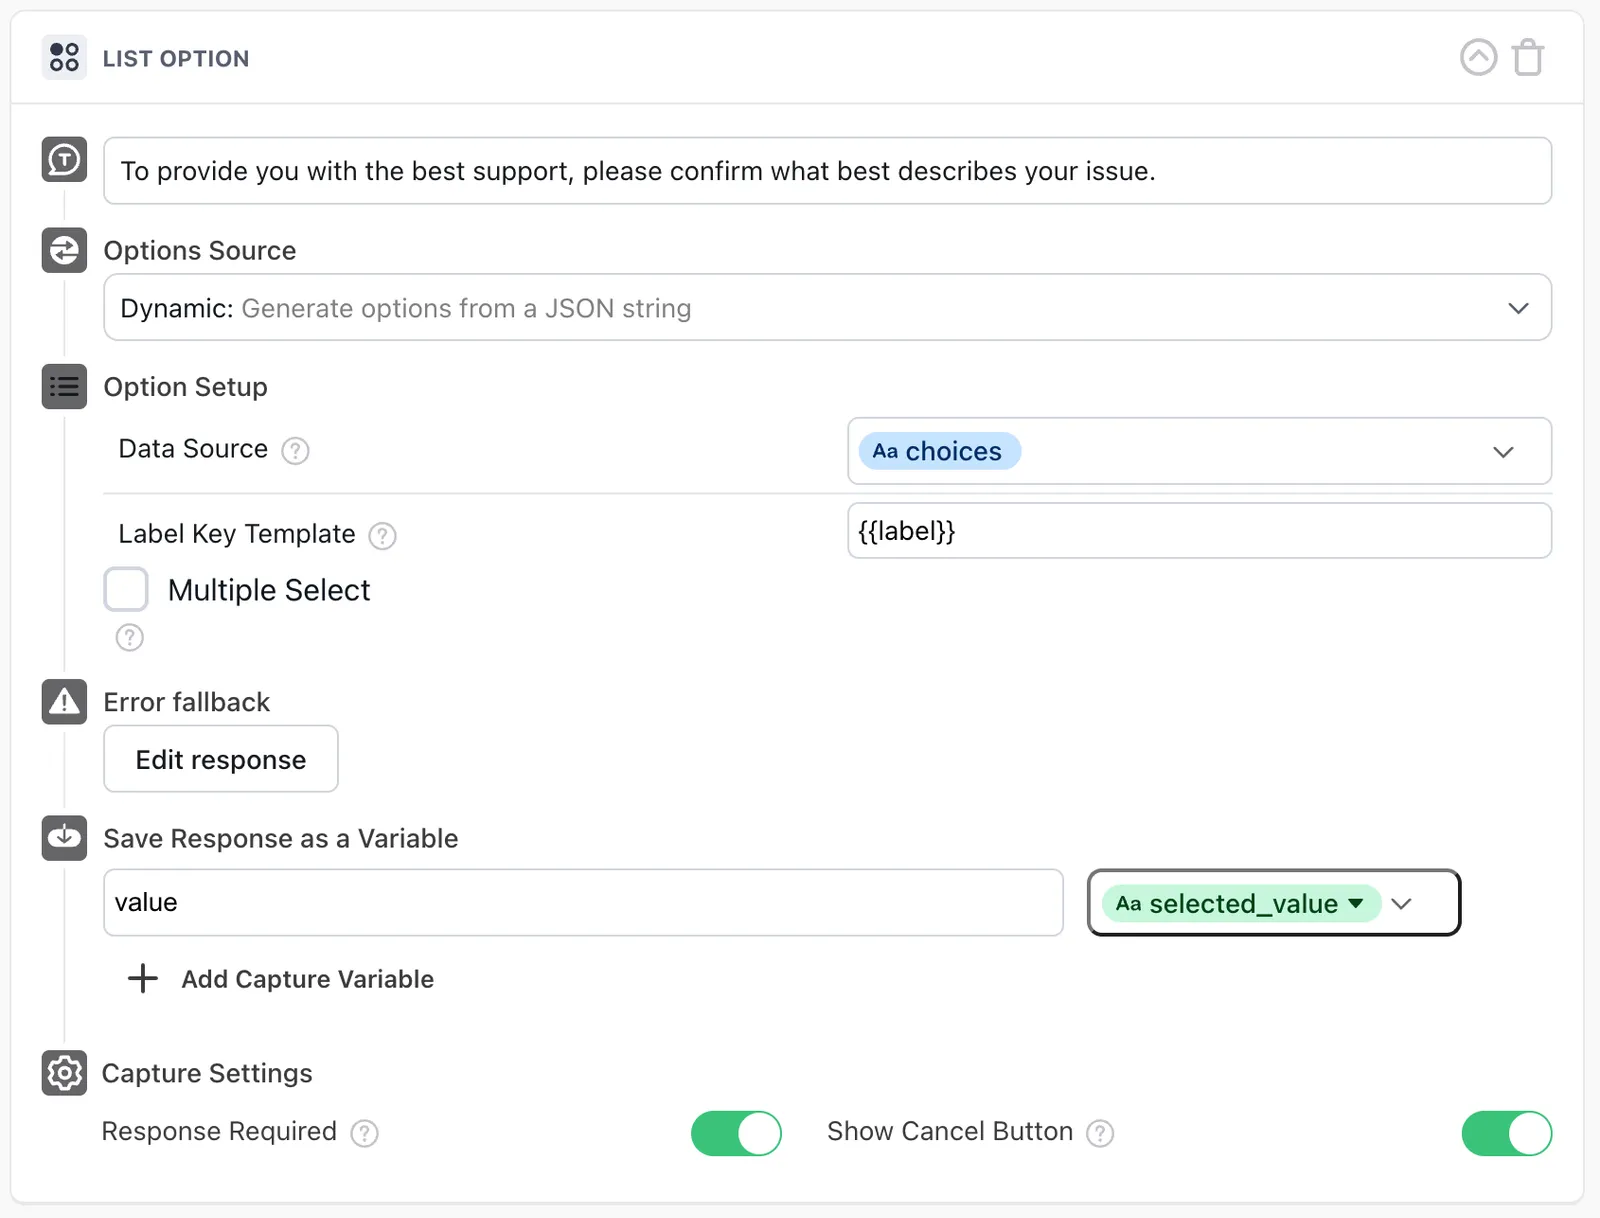
- Save the returned options into a variable.
- Use the returned options with a Dynamic List Option block to let the end user select from the list.
- Set the label key template to
{{label}}. - Save the data key
valueas a variable to store the selected option.
- Set the label key template to
-
Repeat these steps for each Select type custom attribute you want to retrieve values for.
-
Each saved selection can be passed to Dixa using the corresponding custom attribute field when the handoff is created.
-
Select the Handoff to agent action and populate the required inputs:
- Ada conversation ID
- Ada user ID
- Widget ID is no longer required; it remains as an optional field for backward compatibility.
- Queue ID (optional) transfers the conversation to a specific queue. If it is not set, the conversation is transferred to the default queue.
All other inputs — including tags, User Email Address, User First Name, User Last Name, User Display Name, User Phone Number, and any custom attributes you configured — are optional.
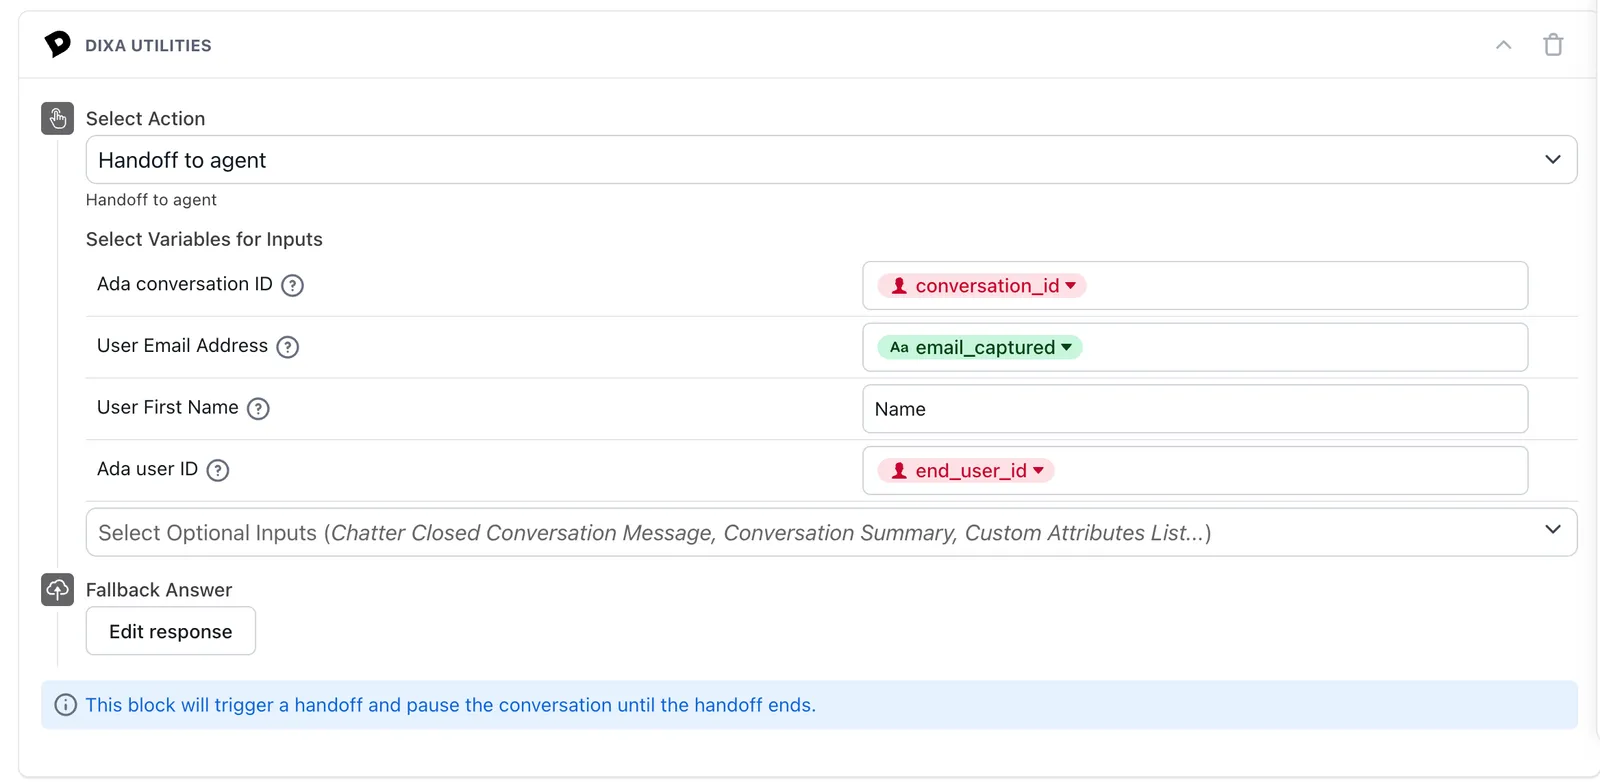
Custom attributes can also be passed as a list when they are not explicitly configured as fields. Select Custom Attributes List from the dropdown and provide a JSON array of attributes, where each id is the technical identifier of a top-level attribute.

If you add tags to a conversation, pass a comma-separated list of tag names in the Tags field. All tags must already be defined in Dixa; any tag that is not defined is not applied.
If you collect the User Email Address from the end user, configure the capture block to use Email validation.
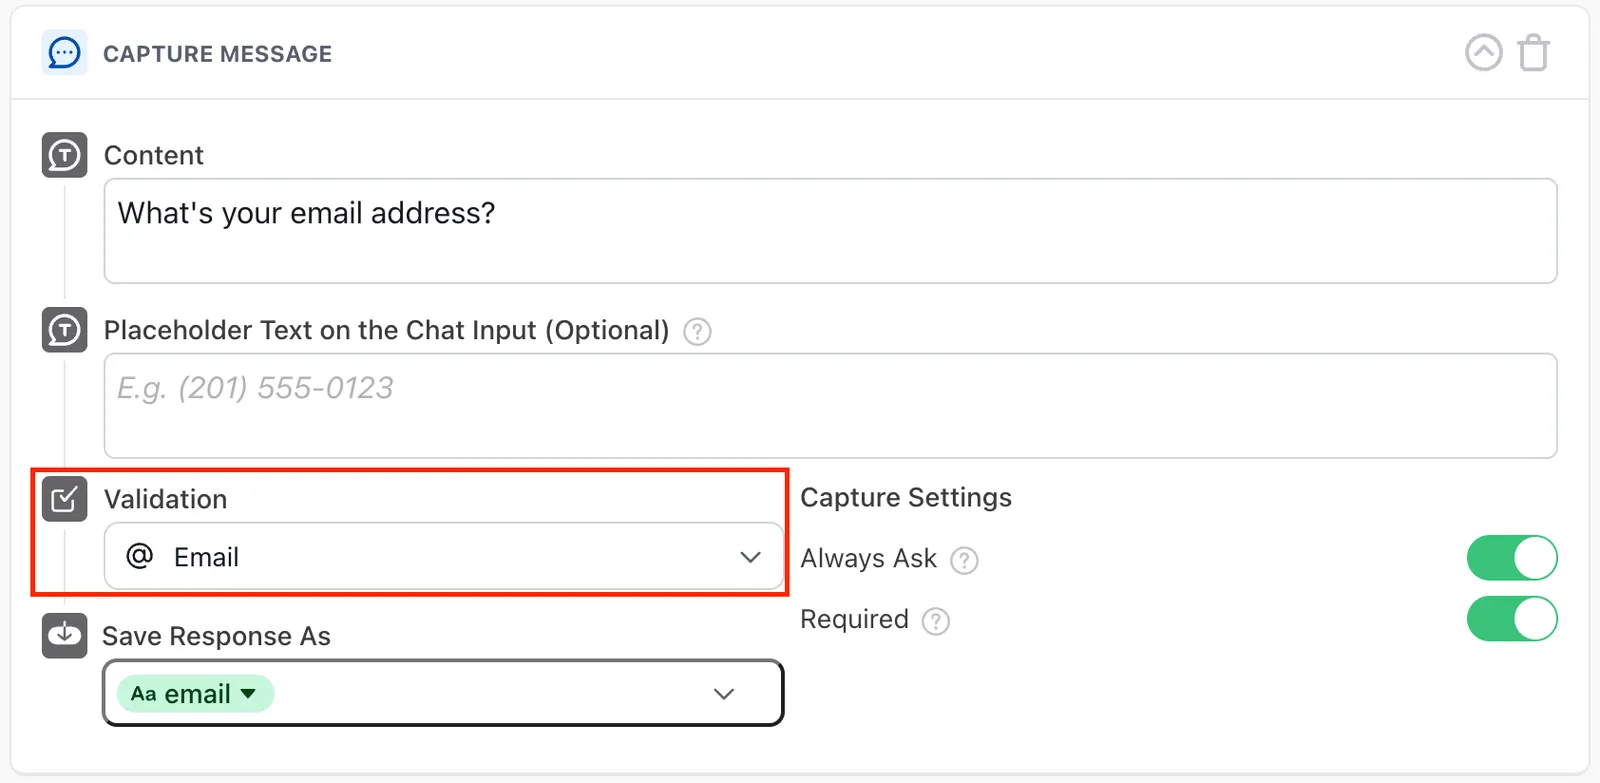
The User Email Address cannot match an agent’s email address in your Dixa instance, and must be a valid email address.
If you provide a User Email Address along with any of User First Name, User Last Name, User Display Name, or User Phone Number, and a contact already exists in Dixa with that email address, the existing contact is not updated. These values are only used when a contact does not already exist for the provided email address.
- Ensure no blocks are placed after the Dixa Utilities block in the answer. Any blocks placed after it are displayed before the handoff rather than after it.
Queue length notifications
To improve the chat experience, you can let end users know their position in the queue while they wait to be connected to an agent. This is triggered from a Dixa automation and requires no configuration on the Ada side. See Dixa’s article on triggering a queue position message to end users through external chatbot partners.