

Amazon Connect email handoff
The Amazon Connect email integration lets an AI Agent create an inbound Email Contact in Amazon Connect. Use it when a conversation needs follow-up by email instead of a live chat. The Email Contact routes in Amazon Connect like any other inbound email, and agents work it as a ticket.
The email integration is a separate app from the Amazon Connect live chat integration. It uses its own credentials and its own block. You can install one or both.
Capabilities
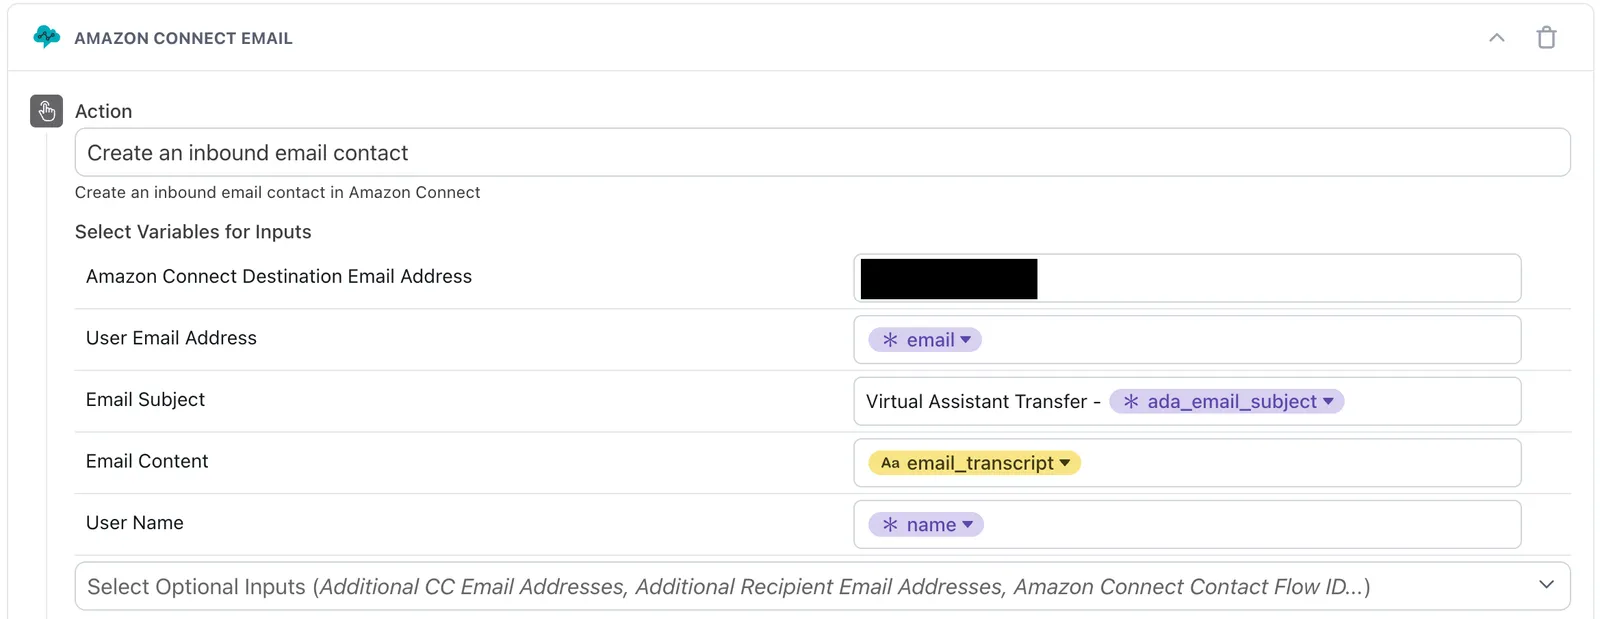
The Amazon Connect Email block has one action, Create an inbound email contact. The action sends an email to an inbound address in your Amazon Connect instance, which creates an Email Contact.
The action accepts the following inputs:
Collect your AWS details
The app calls the Amazon Connect API with an IAM user. Create the user and collect the values that you enter when you connect the app.
To collect your AWS details:
- In the AWS IAM console, create an IAM user for the integration.
- Give the user the
connect:StartEmailContactpermission. - Create an access key pair for the user in Security credentials > Create access key.
- Record the following values:
- Amazon Connect Instance ID: the UUID after
/instance/in the instance ARN. - AWS Access Key ID
- AWS Secret Access Key
- AWS Region: the region of your Amazon Connect instance, for example
us-east-1.
- Amazon Connect Instance ID: the UUID after
Your Ada team installs the Amazon Connect Email app on your AI Agent. Contact your Ada representative to confirm when this step is complete before you continue.
Connect the app
After your Ada team installs the app, enter your AWS details so that the AI Agent can create Email Contacts.
To connect the Amazon Connect Email app:
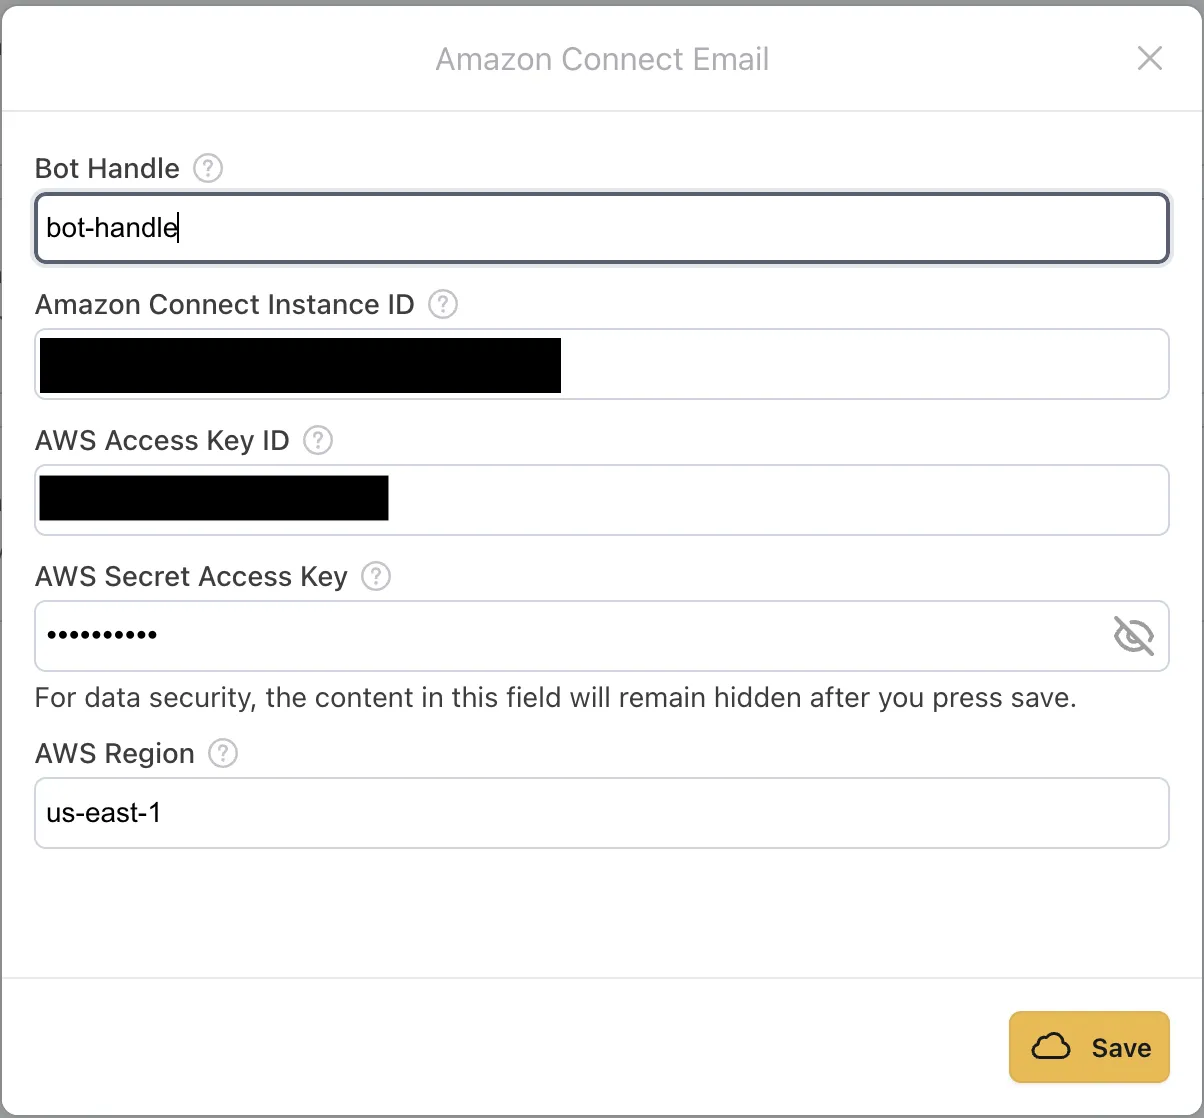
- In your AI Agent dashboard, go to Config > Apps. The Amazon Connect Email app appears in the list.
- Click Connect.
- Enter your AI Agent handle in Bot Handle, then enter the values from Collect your AWS details.
- Click Save.
Configure the email Handoff block
Add the block to a Handoff so that the AI Agent creates an Email Contact when the conversation escalates.
To configure the Amazon Connect email Handoff block:
- In your Handoff, add the Amazon Connect Email block.
- In Action, select Create an inbound email contact.
- Set the four required inputs. Map AI Agent variables into the inputs where the value changes per conversation.
- Optional: add more inputs from Select Optional Inputs.
- Select the Track as Handoff check box. This step is recommended.
Pass contact attributes
Contact Attributes carry data from the conversation to the Email Contact. The Contact Flow in Amazon Connect can read them, for example to route the Email Contact.
You can pass Contact Attributes in two ways:
- Attributes input: Enter a JSON object of one or more key-value pairs in the Attributes input. Use this for attributes that change per conversation.
- Named inputs: Ask your Ada team to add a named input to the block for each attribute. Give your Ada team the attribute key that your Contact Flow expects and a display name for the block. After your Ada team deploys the change, the input appears in the block. The value you map into it is sent with the key you gave.
You can add more named inputs at any time.