Salesforce Messaging agent availability
Overview
Set up a Salesforce Flow to retrieve agent availability and wait time attributes. Use these values to display information to end users or apply conditional logic before a Handoff to Salesforce.
Quick start
Complete these steps to set up agent availability checking. See Implementation & usage for detailed instructions.
Implementation & usage
Configure Salesforce and Ada to check agent availability before Handoffs.
Set up the Connected App in Salesforce
Create a Connected App to allow Ada to authenticate and call the availability endpoint.
To set up the Connected App:
-
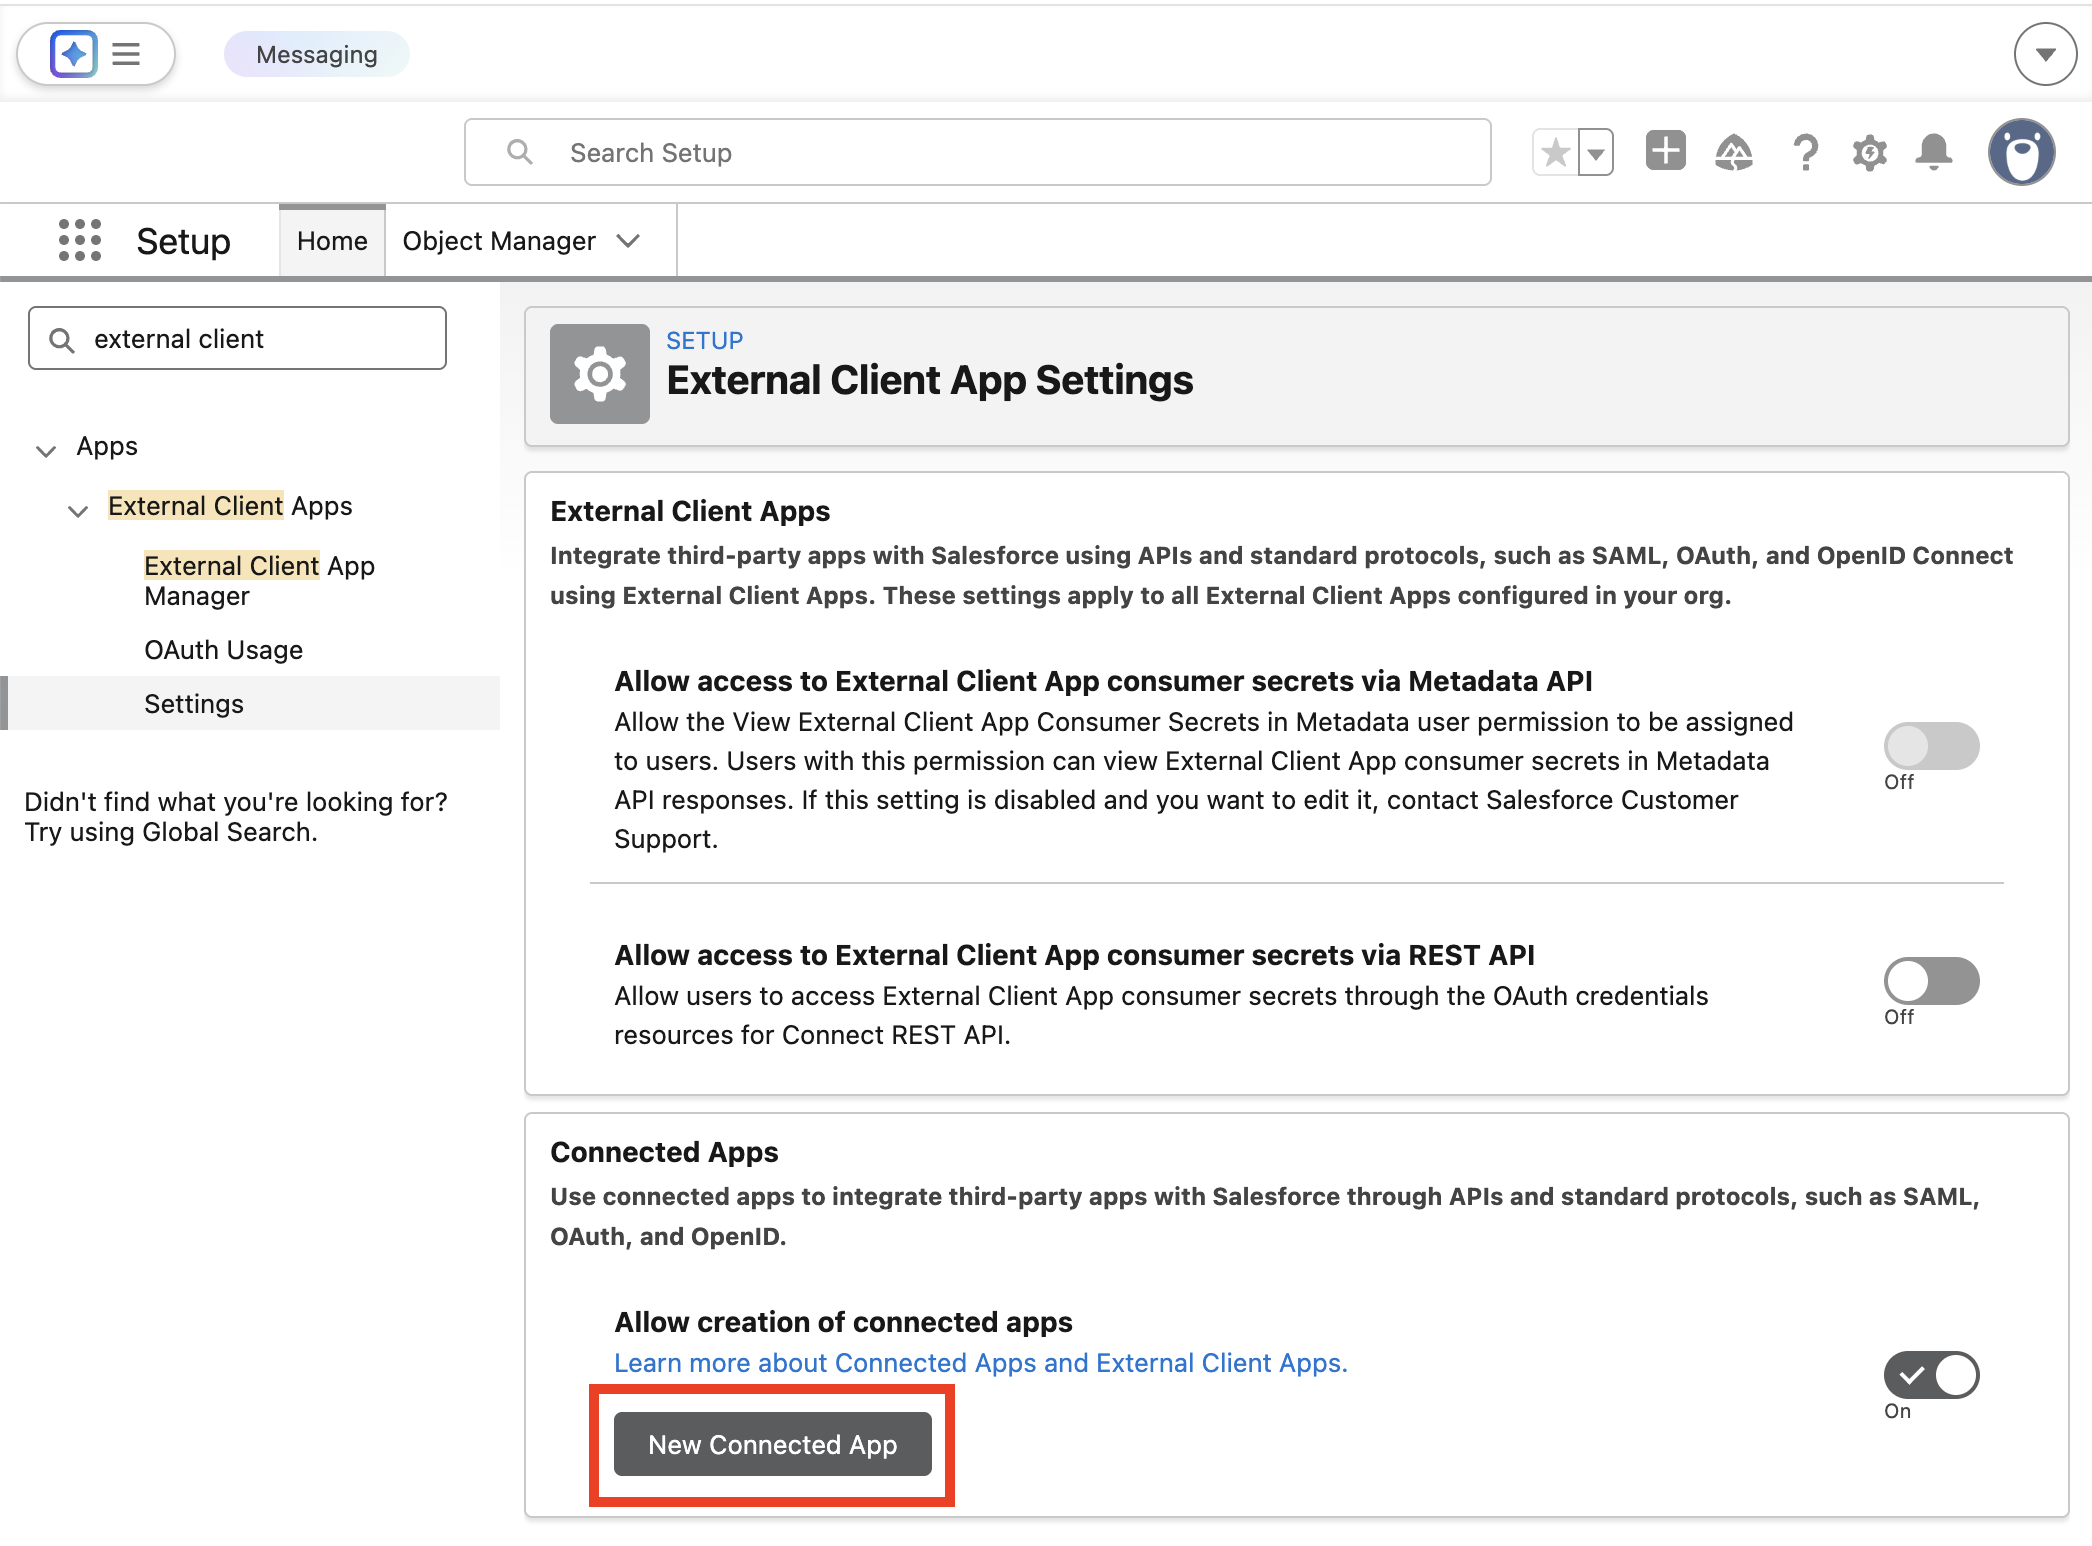
In the Quick Find search field, search for
External Client Apps. Then, under Apps > External Client Apps, select Settings. -
On the External Client App Settings page, under Connected Apps, click New Connected App.
-
On the New Connected App page, under Basic Information, complete the following fields:
-
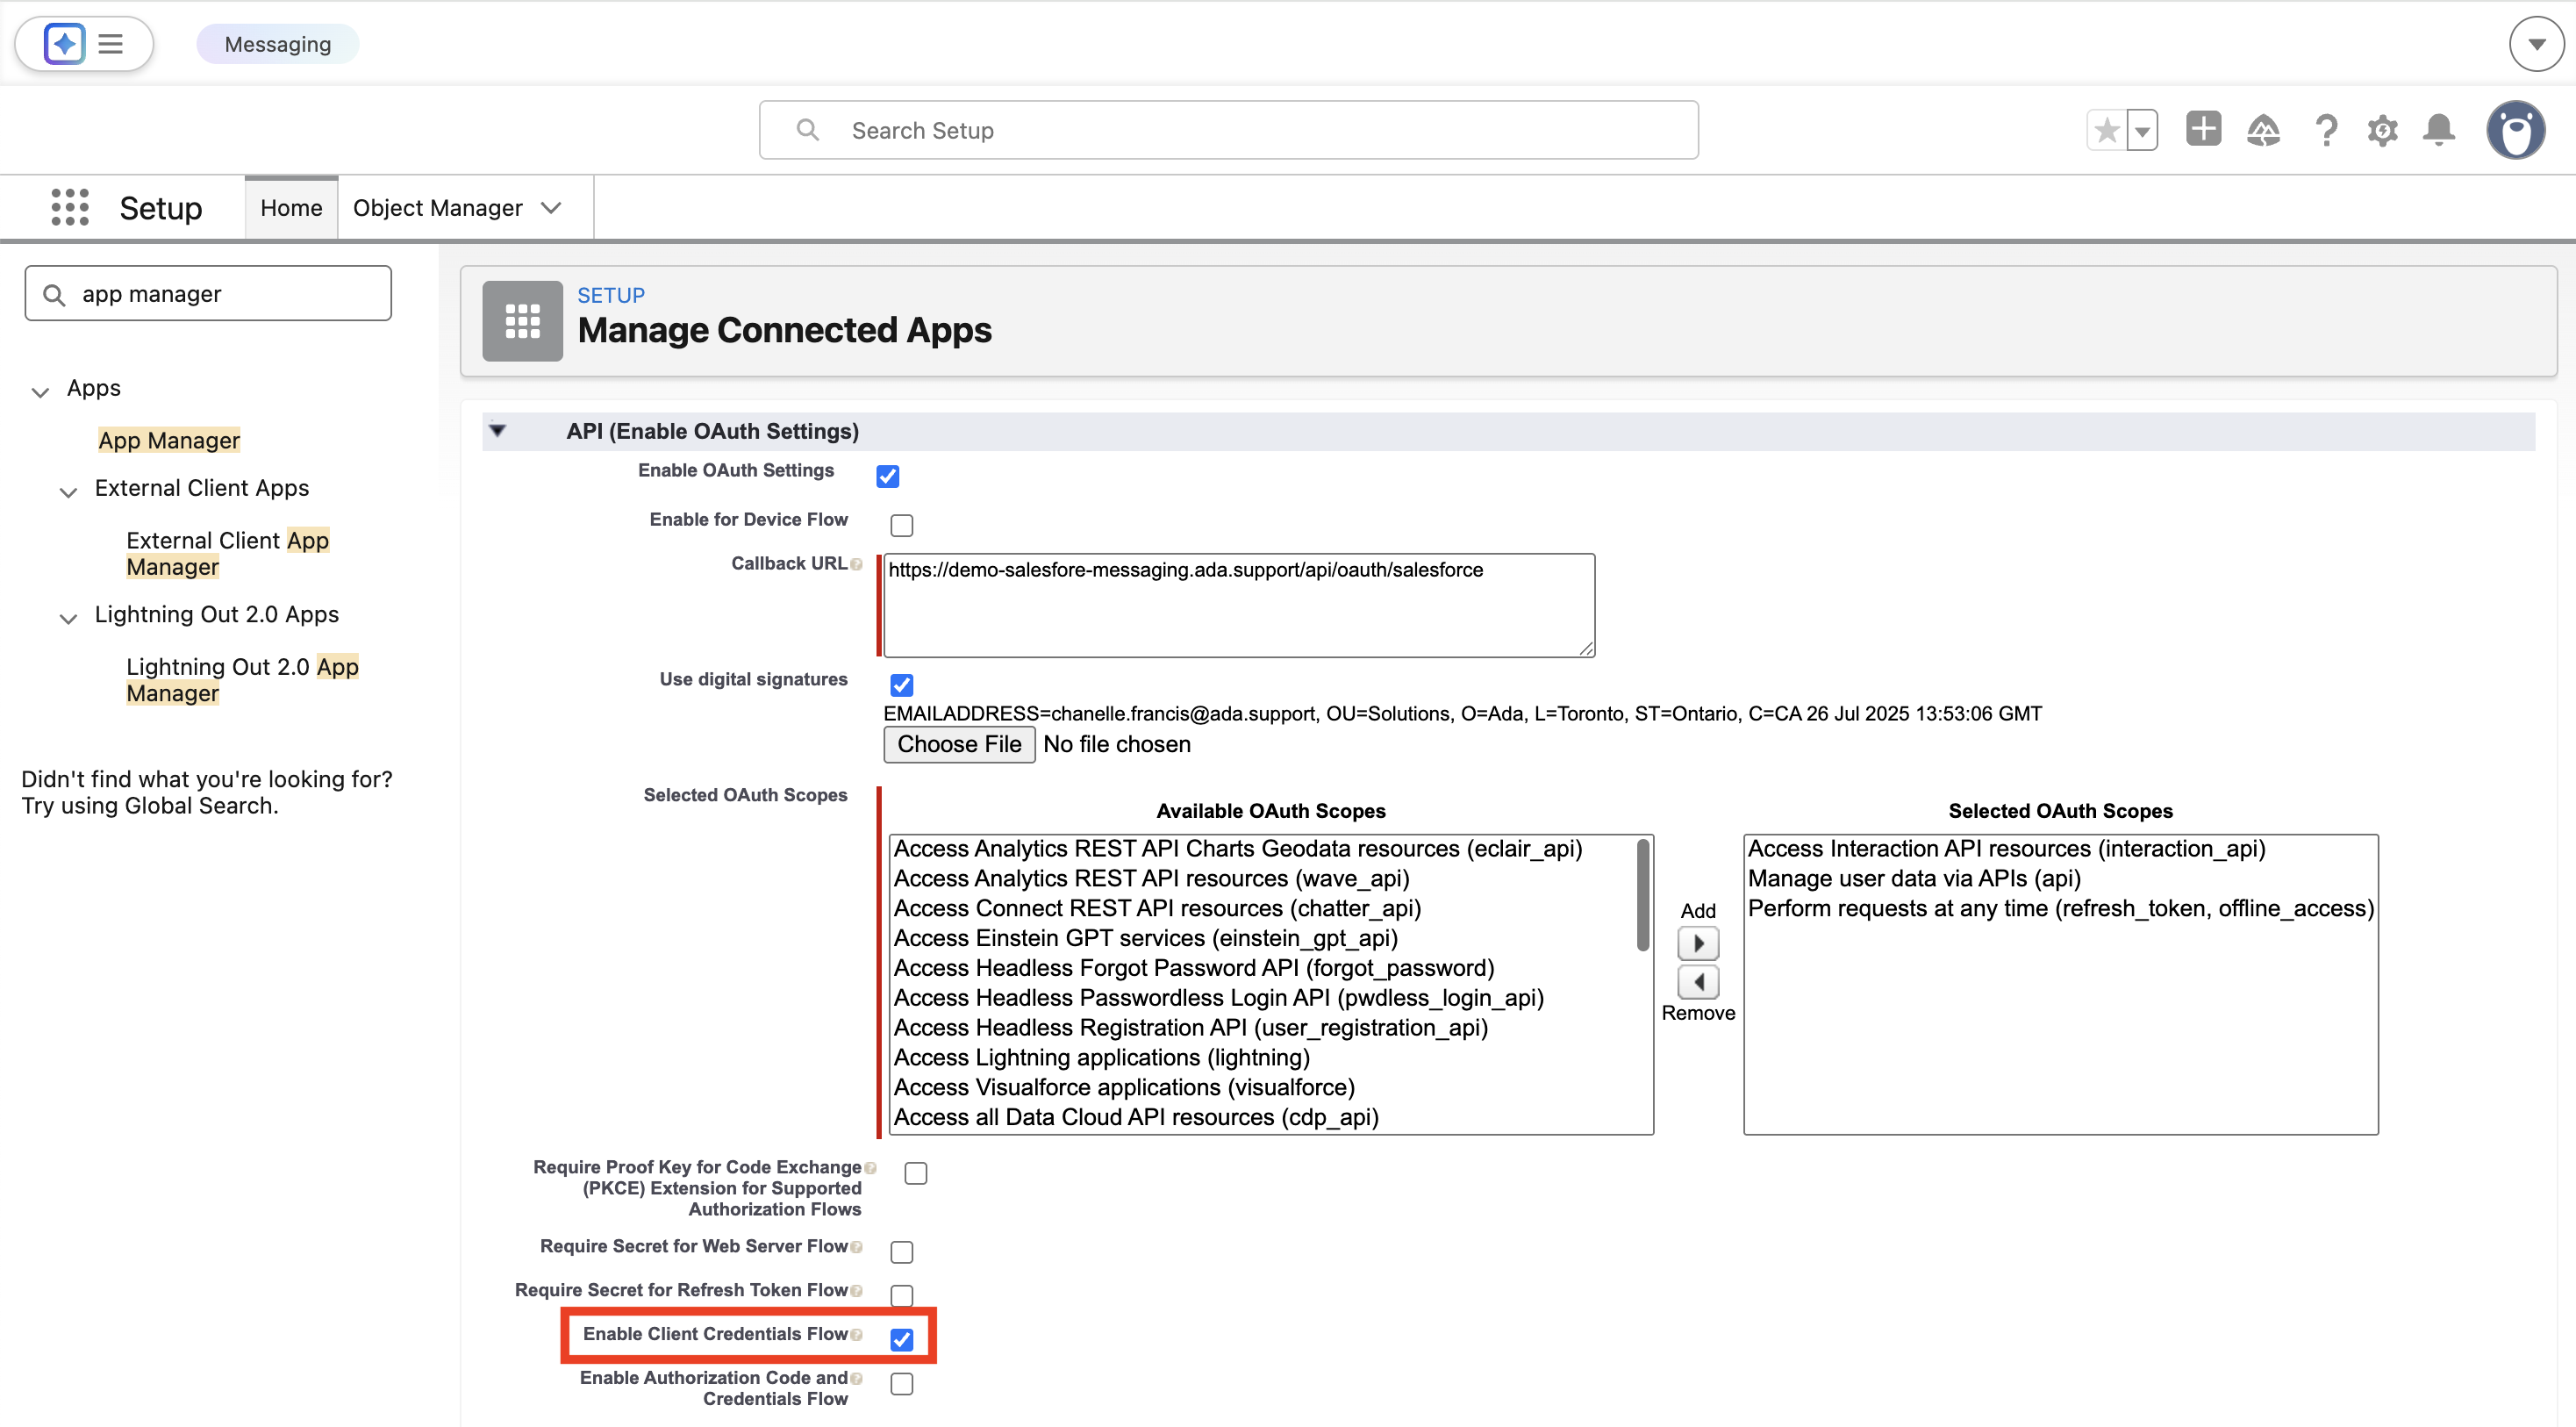
Go to Setup > Apps > App Manager, then go to the right drop-down of the respective Connected App and select Edit.
-
Under API (Enable OAuth Settings), toggle Enable Client Credentials Flow on. Click Save at the bottom.
-
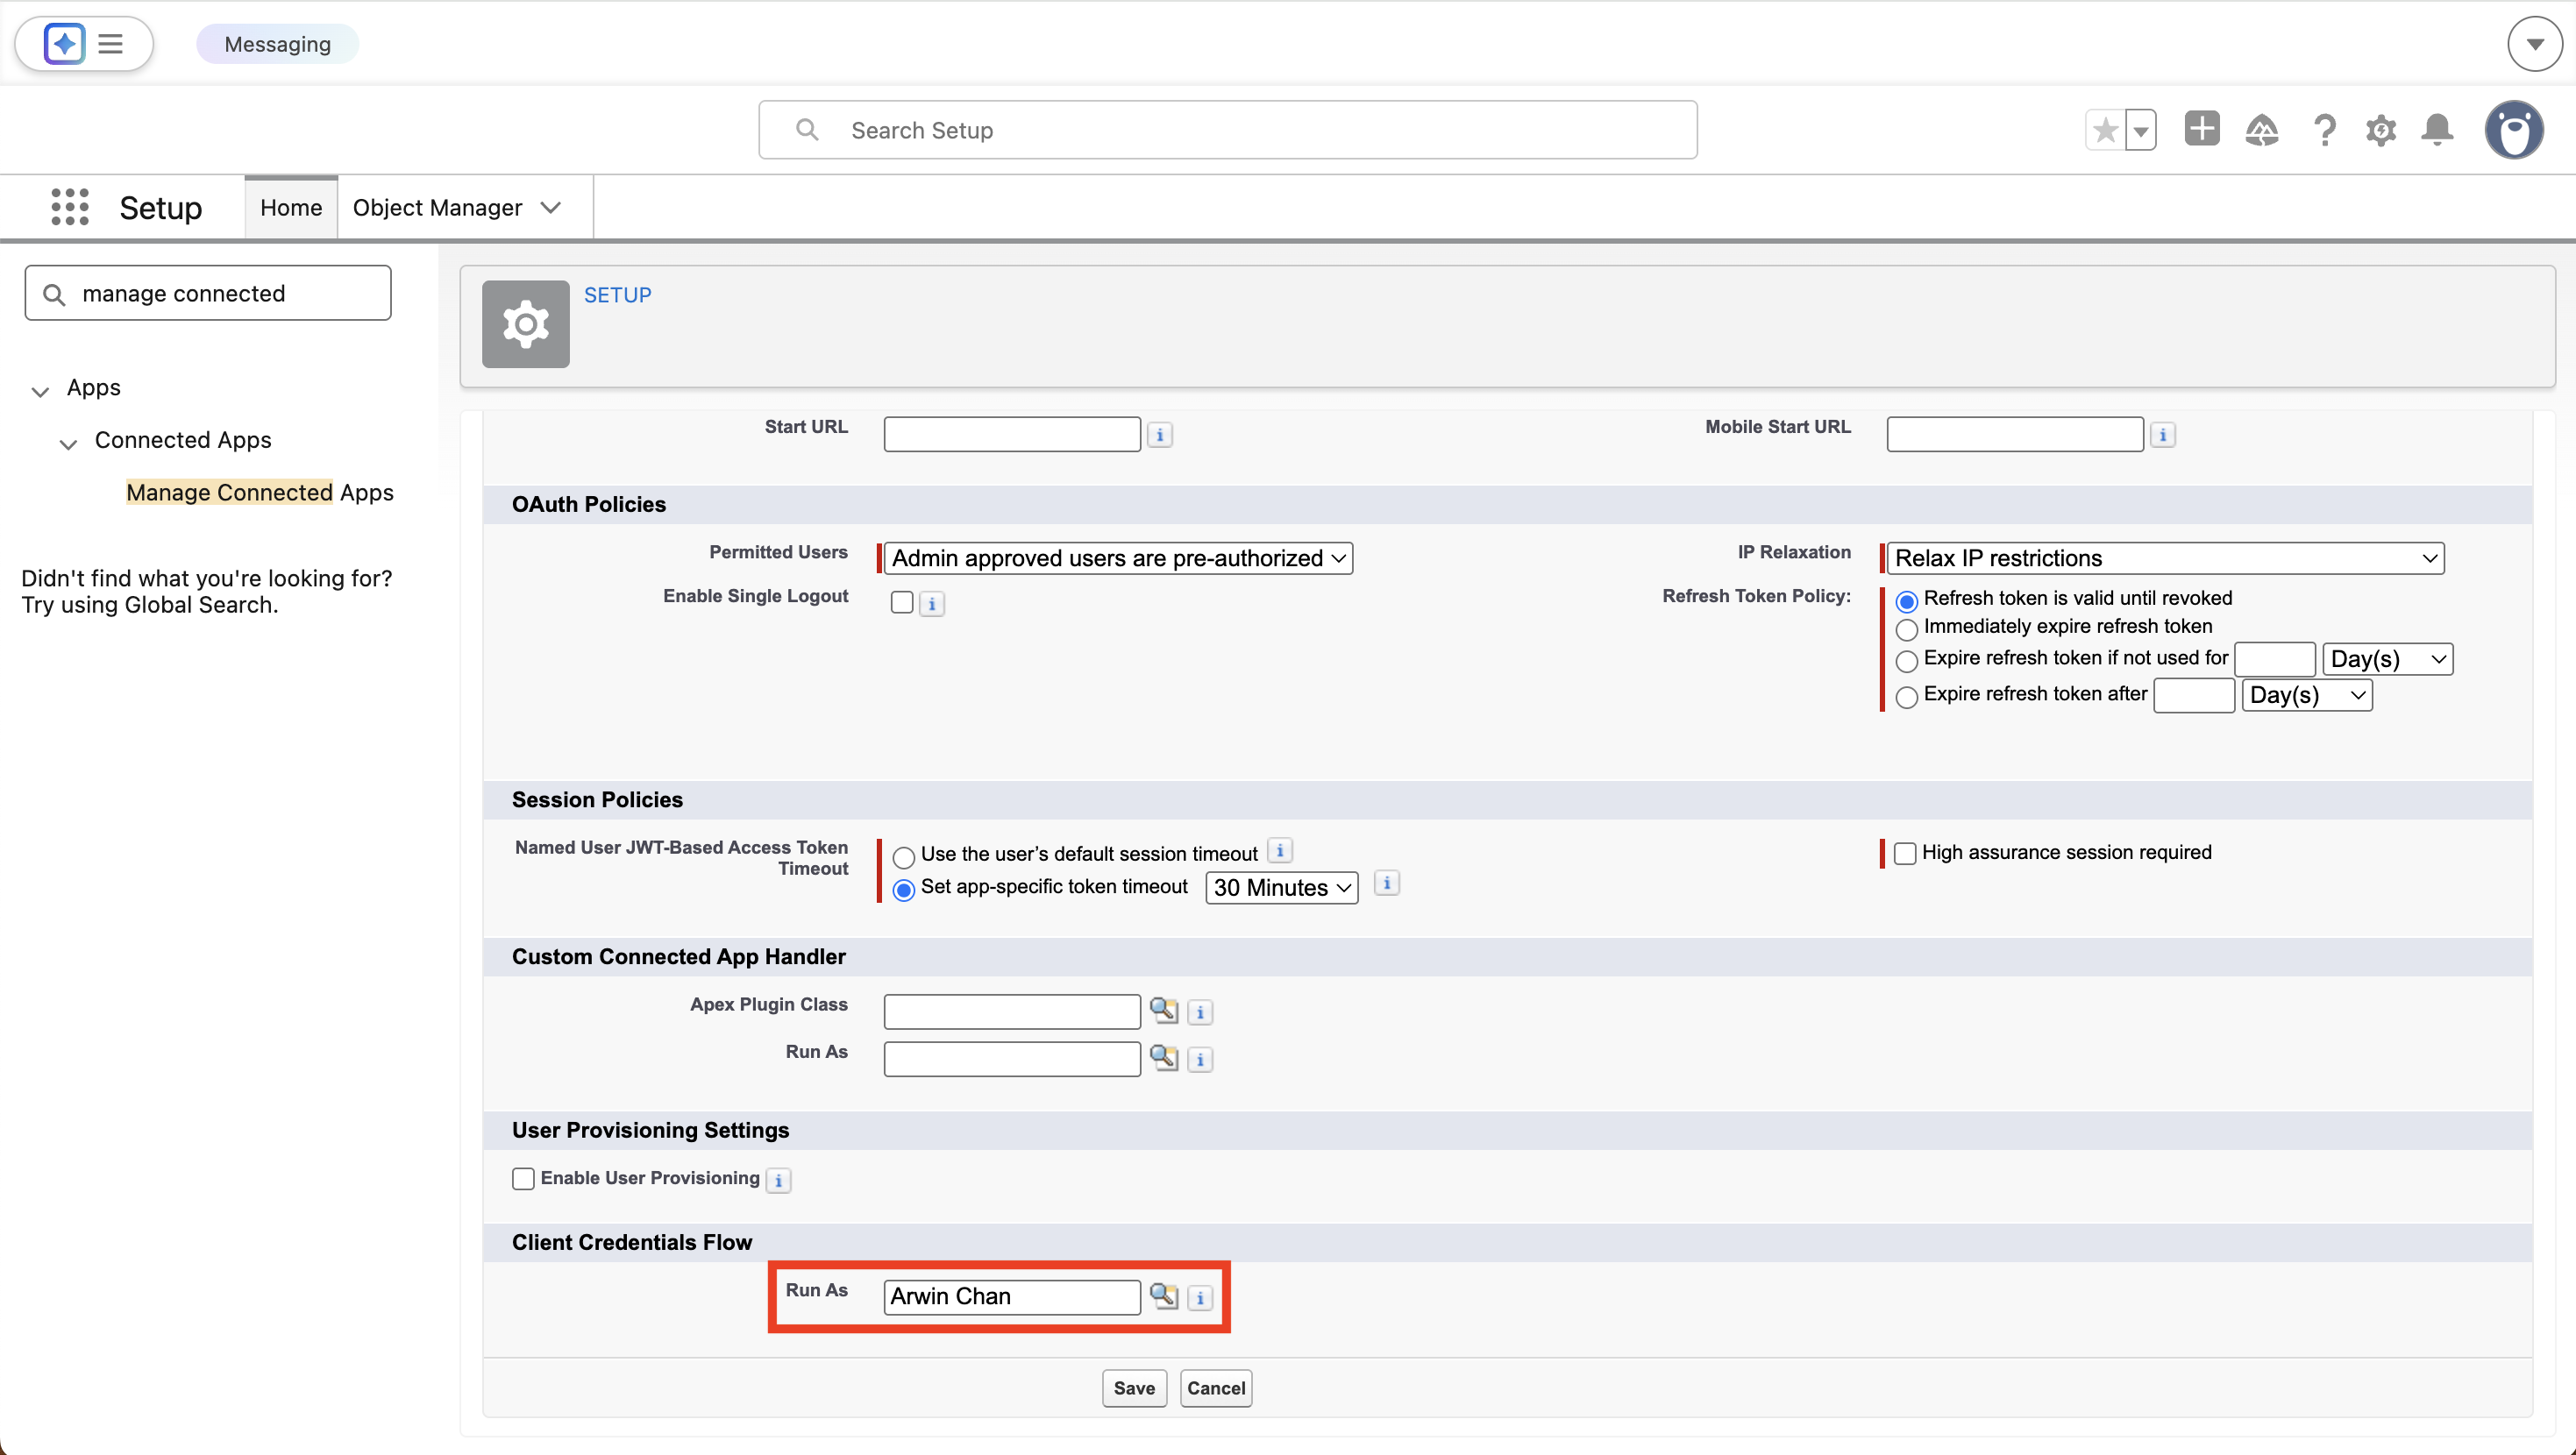
Go to Apps > Manage Connected Apps and select Edit on the respective app. Next, under Client Credentials Flow at the bottom, add your profile for Run As .
Set up the Flow in Salesforce
Create a custom Flow to return queue availability and wait time attributes.
To set up the Flow:
-
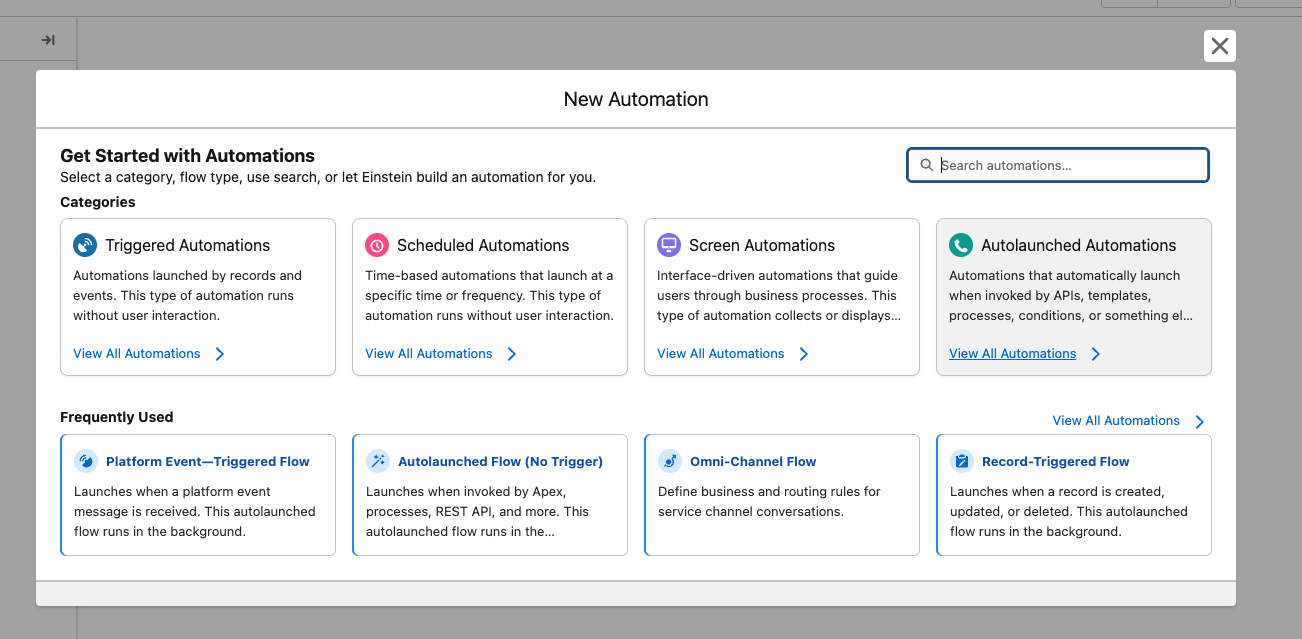
Go to Process Automation > Flows in Setup, and select New Flow
-
Select Autolaunched Automations > Autolaunched Flow (No Trigger)
-
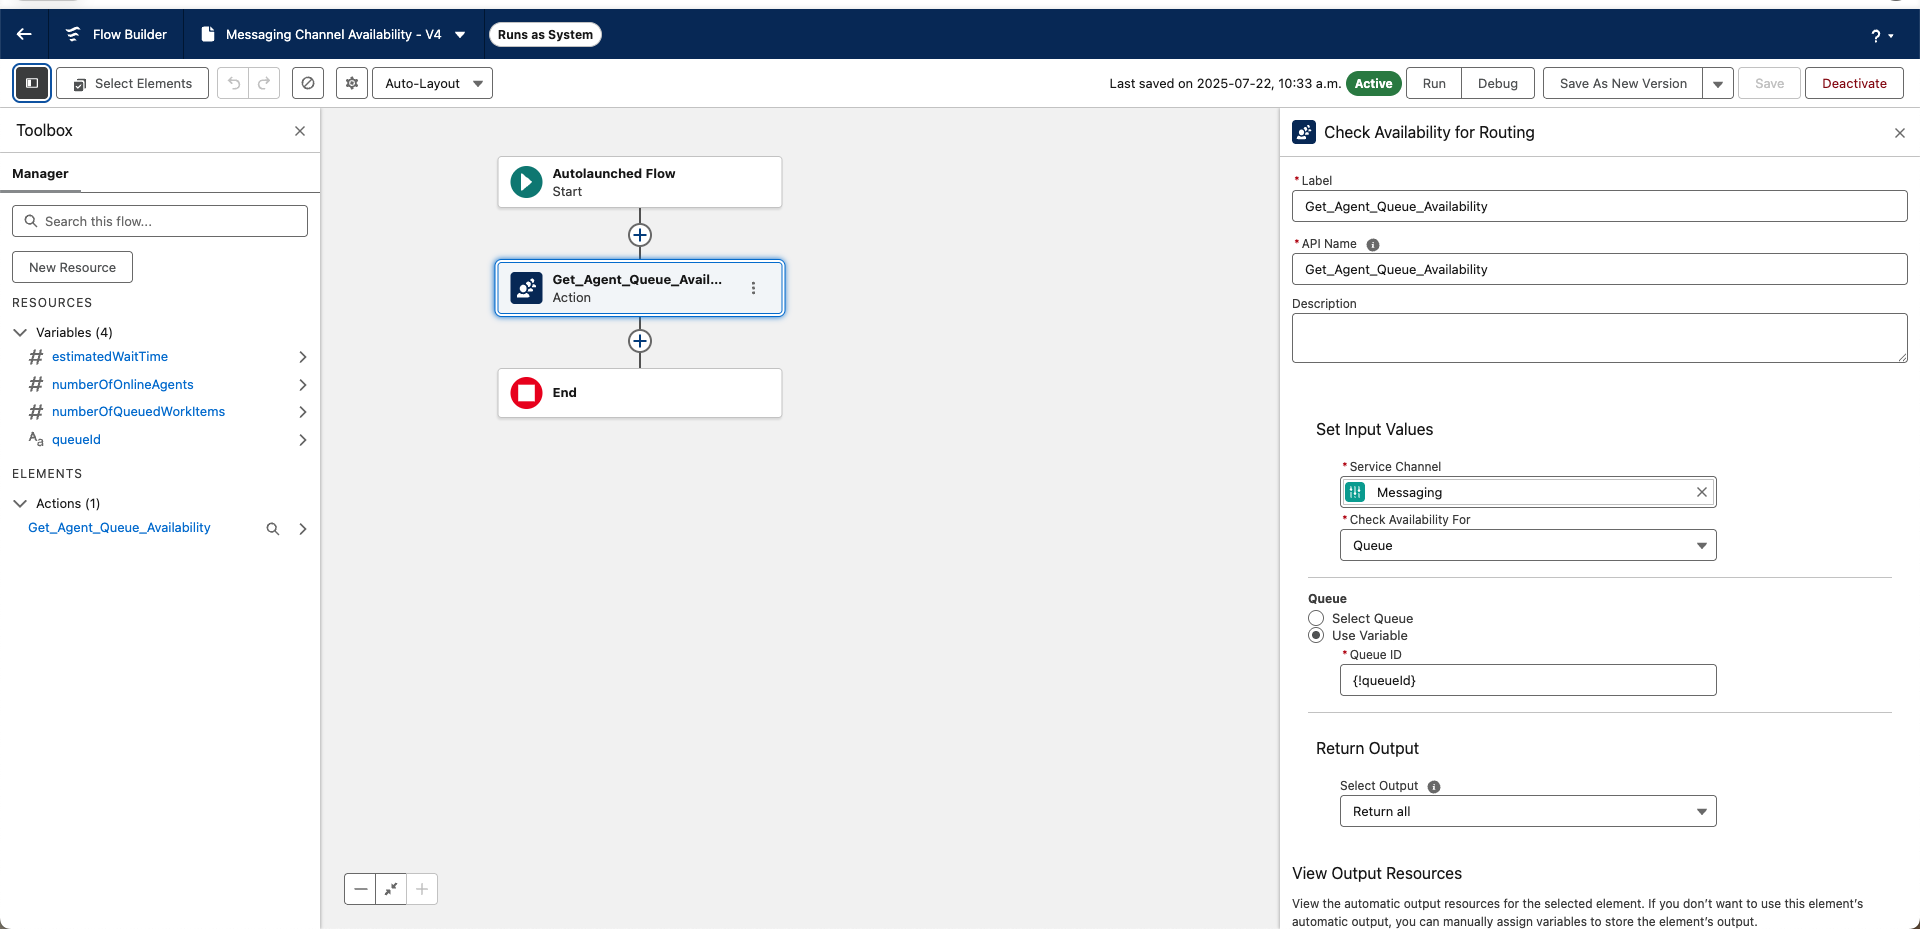
Between the Start and End elements, select the + symbol and add an Action element, selecting the Check Availability for Routing action. Select the following options:
-
Service Channel: Messaging
-
Check Availability for: Queue
-
Queue > Use variable: {!queueId}
You can also set a fixed queue with Select Queue. -
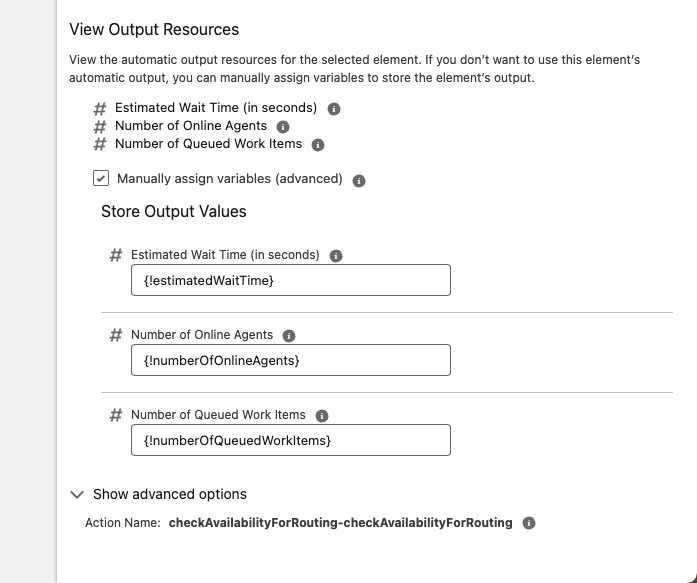
Select Output: Return all
-
Check Manually assign variables
-
Add variables to the respective fields.
-
-
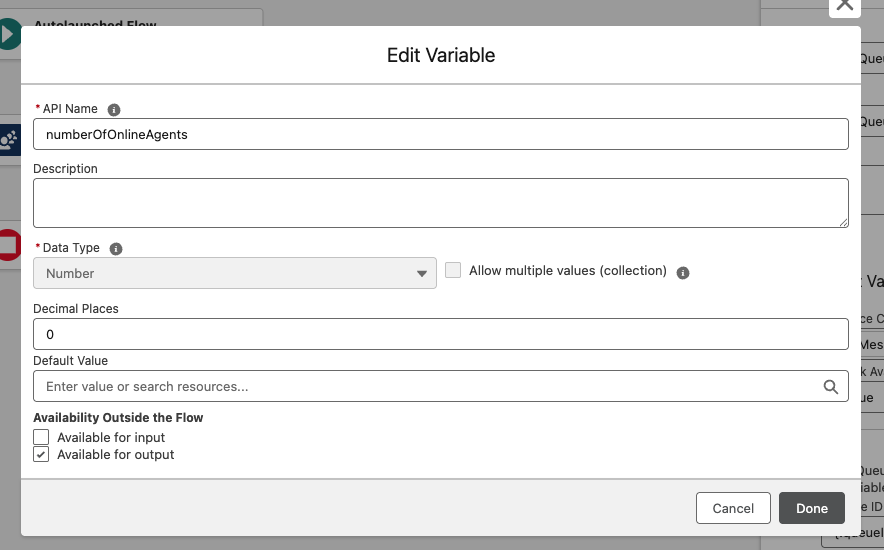
On the upper left, select Toolbox and go to Manager > Resources > Variables.
-
Ensure that queueId has Available for input selected.
-
Ensure that the other variables (from Store Output Values) has Available for output selected.
-
-
Set up the Handoff in Ada
Configure HTTP Request blocks in your Handoff to call the Salesforce endpoints.
To set up the Handoff:
-
The token endpoint: Add an HTTP Request block to generate an access token for calling the flow endpoint. Store the Client ID and Client Secret in the token vault, and save the access_token as a sensitive variable.
For example:
https://**{{subdomain}}**.sandbox.my.salesforce.com/services/oauth2/token?grant_type=client_credentials&client_id=**{{salesforce_client_id}}**&client_secret=**{{salesforce_client_secret}}**
-
The custom flow endpoint, called by adding the flow name to the URL and passing the access token as a bearer token in the request header.
If you’re using a variable to select the queue, pass the id in the body using this key:inputs[0].queueId.For example:
https://**{{subdomain}}**.sandbox.my.salesforce.com/services/data/v64.0/actions/custom/flow/**{{flow_name}}**.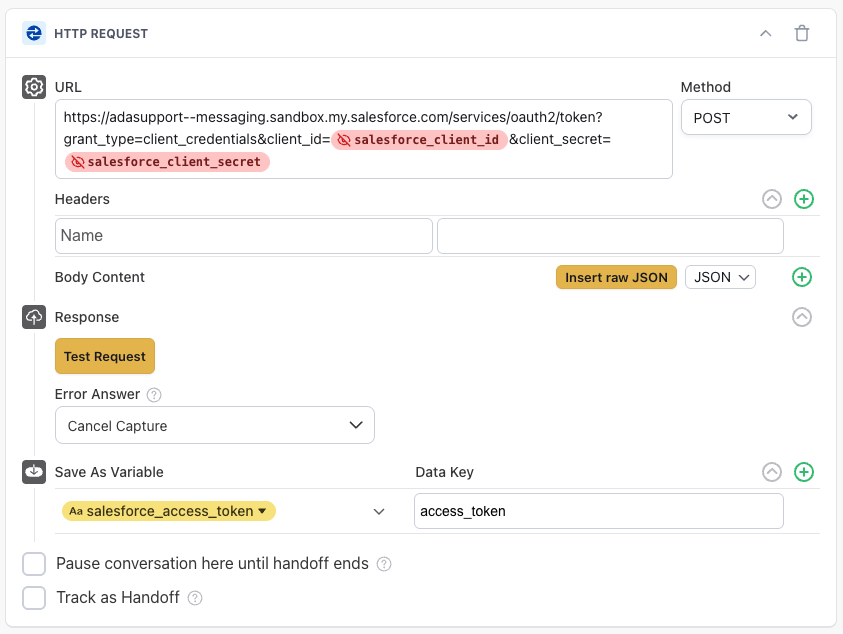
From there, you can store the relevant outputs using the key 0.outputValues.{{variableName}}. These values can then be used in conditional logic or surfaced to end users via a Text block before reaching the Salesforce Messaging Utils block.