Salesforce Messaging Handoff setup
Overview
Set up the Salesforce Messaging Handoff dialog in your Ada AI Agent after your Ada team confirms the configuration is complete.
Quick start
Complete these steps to set up the Salesforce Messaging Handoff. See Implementation & usage for detailed instructions.
Implementation & usage
Configure the Handoff dialog after your Ada team confirms the Salesforce Messaging integration is complete.
Set up the Handoff dialog
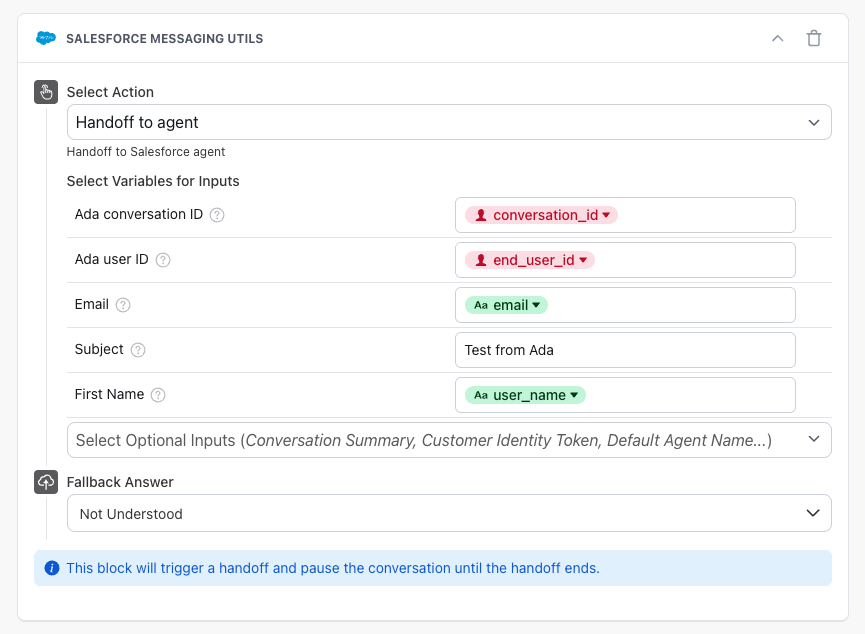
Add the Salesforce Messaging Utils block to your AI Agent and configure the required inputs.
To set up the Handoff dialog:
-
In the Handoff to Support answer, add the Salesforce Messaging Utils block to the answer.
-
Configure the required input variables. The Ada Conversation ID (
conversation_id) and End User ID (end_user_id) are mandatory fields. You can also map optional fields such as Email, Subject, and First Name. -
To pre-populate optional fields, use a Capture block or other Action blocks before the Salesforce Messaging Utils to collect values into variables.
-
Additional Optional Inputs that appear in the dropdown are the pre-chat fields configured in Salesforce.
To add other Salesforce fields to the block, you will need to set up the pre-chat fields in Salesforce and share the Field API names with your Ada team. This is covered in Updating fields in the Handoff block.
-
Ensure no blocks are placed after the Salesforce Messaging Utils block in your answer (these blocks will not be displayed after the Handoff).
-
Make sure to set a Fallback Answer in case of failed connection scenarios.
Best practices
- Test the handoff flow thoroughly before deploying to production
- Monitor handoff success rates to ensure proper configuration
- Keep pre-chat fields minimal to avoid overwhelming end users
- Use variables to pre-populate fields when possible to improve customer experience