Zendesk Chat configuration
Overview
Ada Glass for Zendesk allows customers to seamlessly transition from their conversation with the AI Agent to a conversation with one of your organization’s live agents when a Handoff occurs. The customer begins their conversation with the AI Agent in the Ada chat window, and when Ada Glass for Zendesk is triggered, the agent simply slides in where the AI Agent left off, providing the agent with the customer’s transcript and captured variables.

This article will walk you through the steps required to configure Ada Glass for Zendesk. Please note that establishing the integration between Ada and your Zendesk instance requires you to navigate back and forth between your Ada dashboard and Zendesk.
You must subscribe to the Zendesk Chat Enterprise plan to use Ada Glass for Zendesk Chat. For help identifying which plan you have, see Zendesk Help - About Zendesk Chat plan types.
Quick start
Complete these steps to configure Ada Glass for Zendesk. See Implementation & usage for detailed instructions.
Implementation & usage
Configure Ada Glass for Zendesk by completing the following steps. This requires navigating between your Ada dashboard and Zendesk.
Create department or group
Whether you create a department or group depends on which Zendesk platform you are using. If you are using Zendesk Chat, you must create a department. For Zendesk Agent Workspace, they’re called groups. Departments and groups have different configuration steps. The following two subsections cover the setup process for each.
Departments – Zendesk Chat
Create a department for live agents to enable Handoffs from the AI Agent.
To create a department:
-
On the Zendesk dashboard, click Settings.
-
Under Settings, click Departments.
-
Click Add Department.
-
Add a name and description.
-
Click each agent’s name to add them to the department.
-
Click Create Department.
If you are a new Zendesk customer or have the Enterprise tier account, you do not need to assign the AI Agent an agent seat, neither do you need to add the AI Agent to the departments.
Groups – Zendesk Agent Workspace
Create a group for live agents to enable Handoffs in Zendesk Agent Workspace.
To create a group:
-
In Zendesk Support, click the Admin icon (
 ) in
the sidebar, then select People.
) in
the sidebar, then select People. -
Click Add group.
-
Enter a group name and description.
-
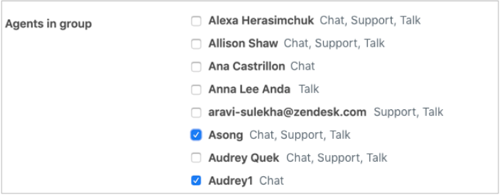
Select the agents you want to add to the group.
When you create a new group, you can see which agents have access to which products.
-
If you want this group to be the default group that all new agents are added to, select Make default group.
-
Click Create group.
-
Once created, you will need to enable your group in Zendesk Chat. To do this, in Zendesk Chat, select Settings from the menu on the left and then select Departments.
-
Locate your newly created group in the list and click on its name.
-
Next to Enabled in chat?, click Enabled. Click Save changes.
Define operating hours
Configure when live agents are available to receive Handoffs.
In Zendesk Chat
To define operating hours for your entire Zendesk Chat function:
-
In the menu to the left, click Settings.
-
Under Settings, click Account.
-
Click Operating Hours.
-
Next to Set schedule, click Account.
-
Set the online schedule to Daily.
-
Select the check box for each day of the week.
-
Modify the hours of operation to a time of your choosing.
-
Uncheck Display operating hours.
-
Click Save changes.
To define operating hours for a specific department or group:
-
In the menu to the left, click Settings.
-
Under Settings, click Account.
-
Click Operating Hours.
-
Next to Set schedule, click Department.
-
Click +Add schedule.
-
Give your new schedule a name, likely including the department or group’s name.
-
Set the online schedule to Daily.
-
Select the check box for each day of the week.
-
Modify the hours of operation to a time of your choosing.
-
Click Add or remove departments.
-
Select the department or group from the list provided.
If you are adding a Zendesk Agent Workspace group, you must ensure that chat has been enabled for the group in order for it to appear.
-
Click Save changes.
Configure Zendesk Live Chat in Ada
Start the configuration process in Ada to obtain the redirect URL.
In Ada
To configure Zendesk Live Chat in Ada:
-
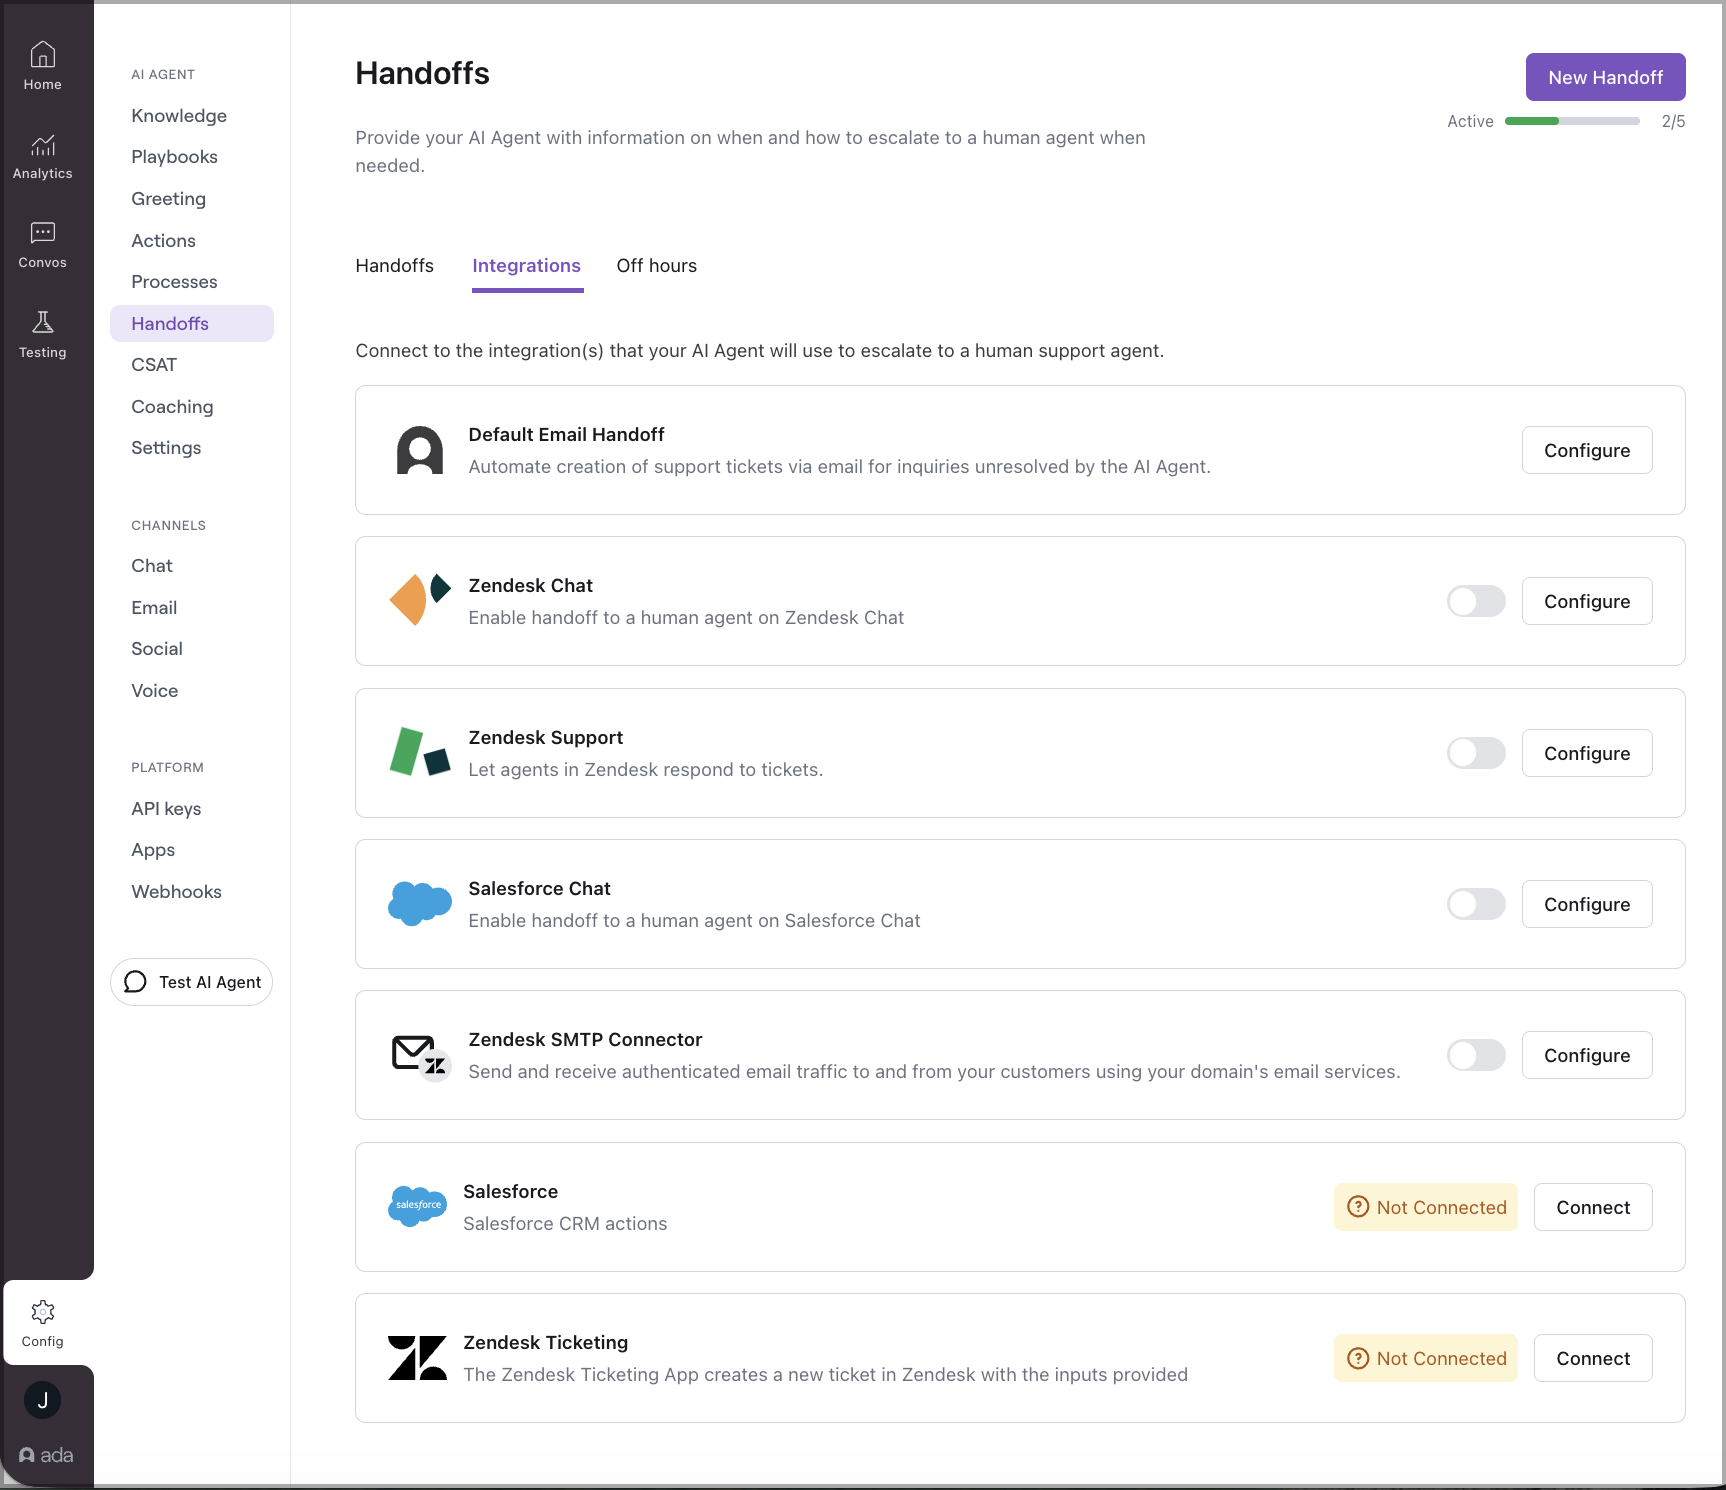
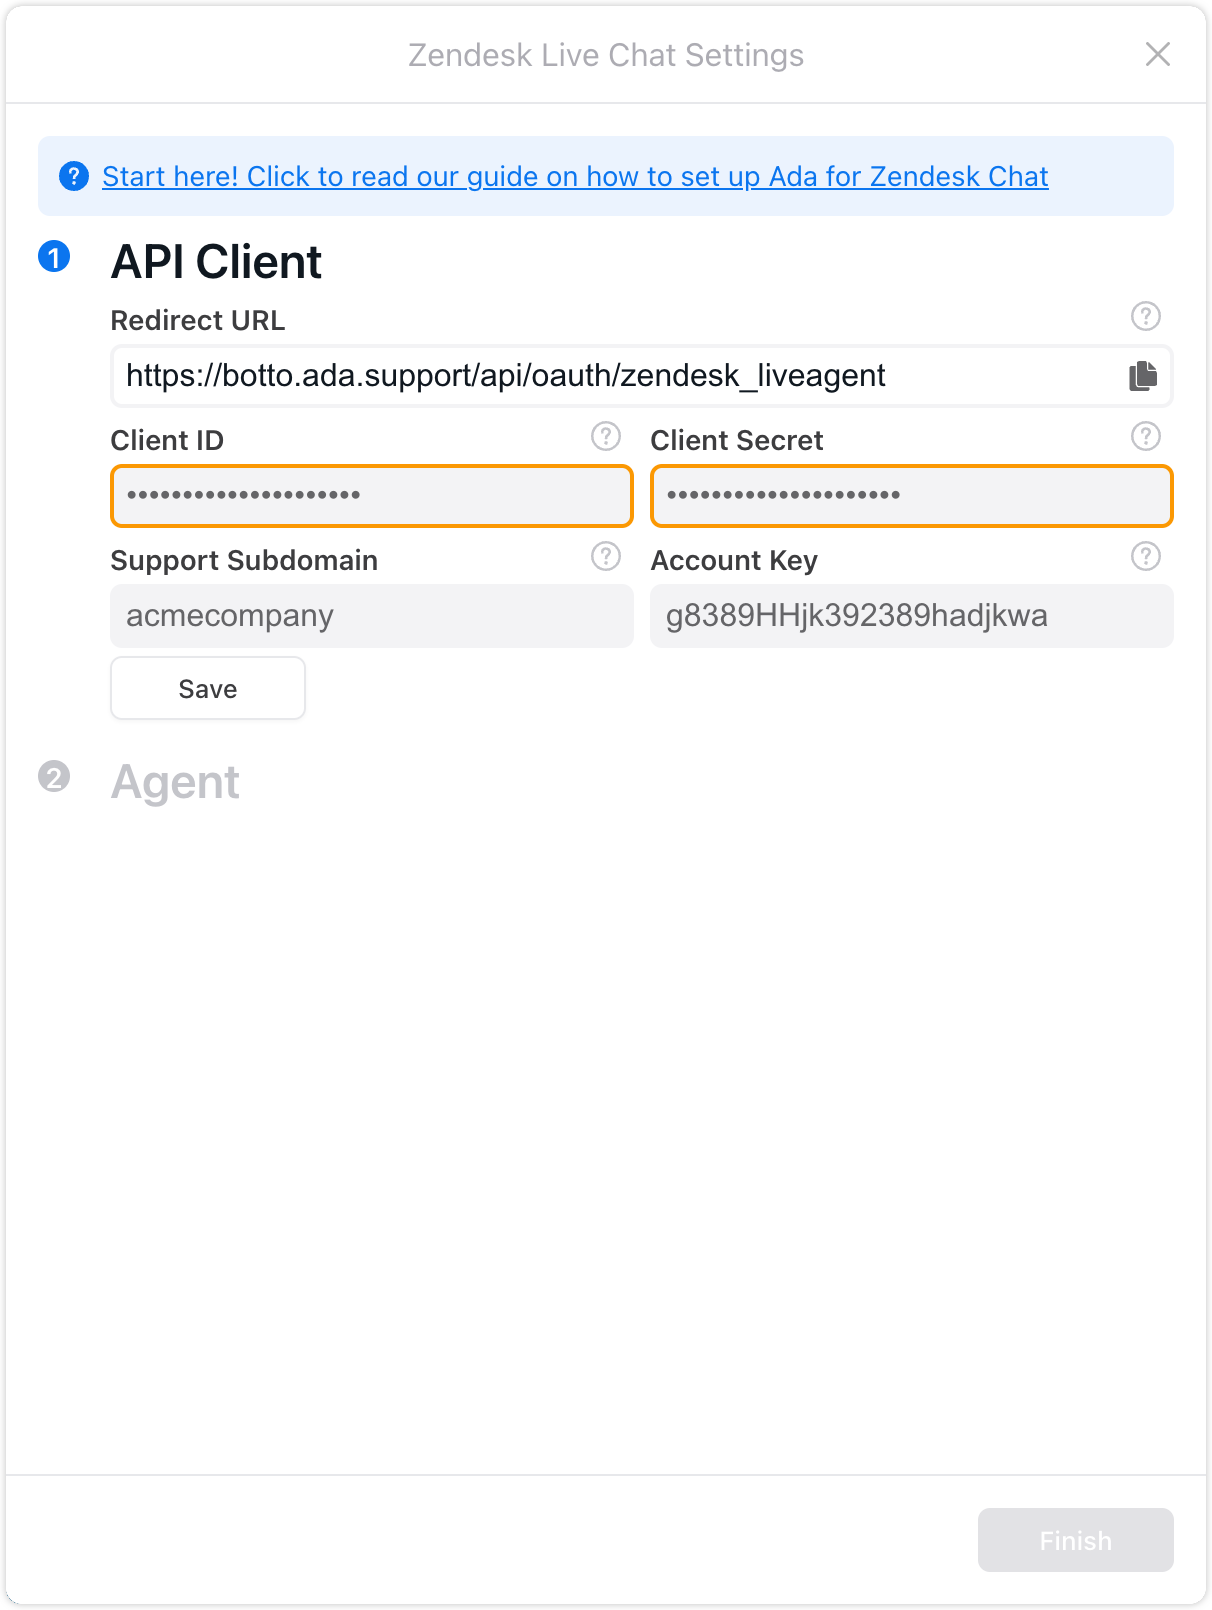
On the Ada dashboard, go to Config > AI AGENT > Handoffs. Then, on the Integrations tab, beside Zendesk Chat, click Configure.
The Zendesk Live Chat Settings window opens.
-
Under API Client, copy the contents of the Redirect URL field to your clipboard.
Create API client
Create an API client in Zendesk Chat to enable Ada authentication.
In Zendesk Chat
To locate the API & SDKs page:
-
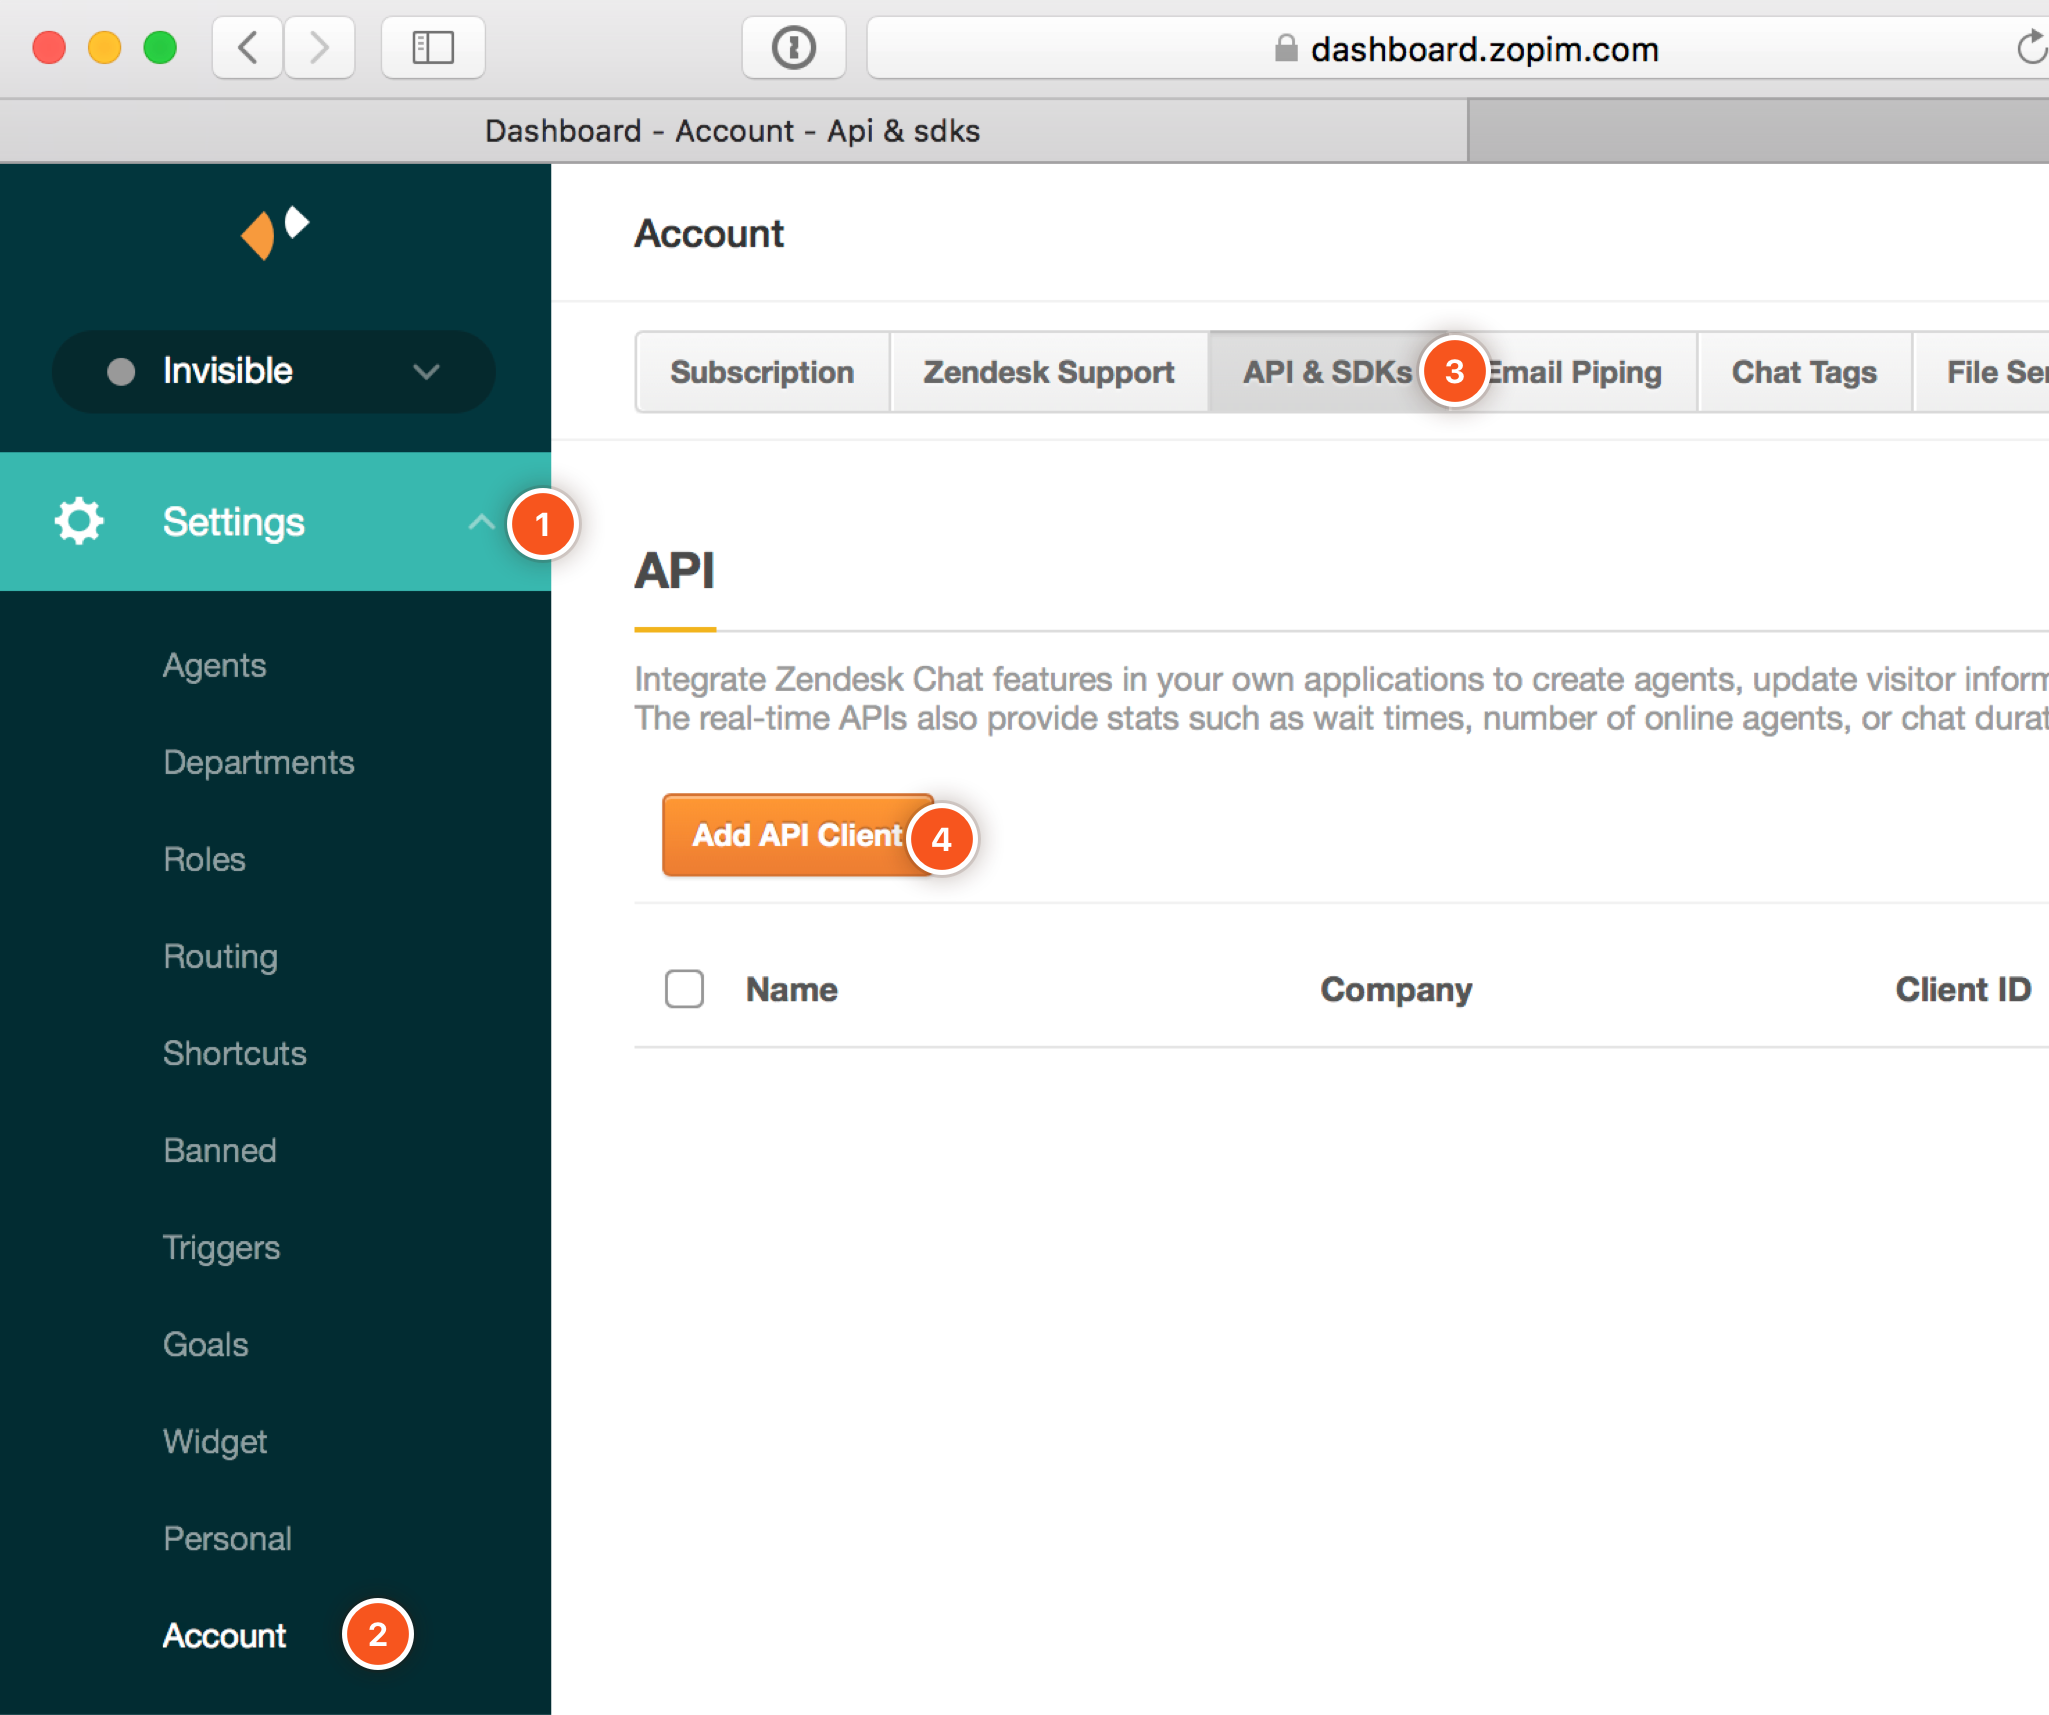
In the menu to the left, click Settings.
-
Under Settings, click Account.
-
In the gray toolbar at the top, click API & SDKs.
-
Click Add API Client.
To configure your new API client:
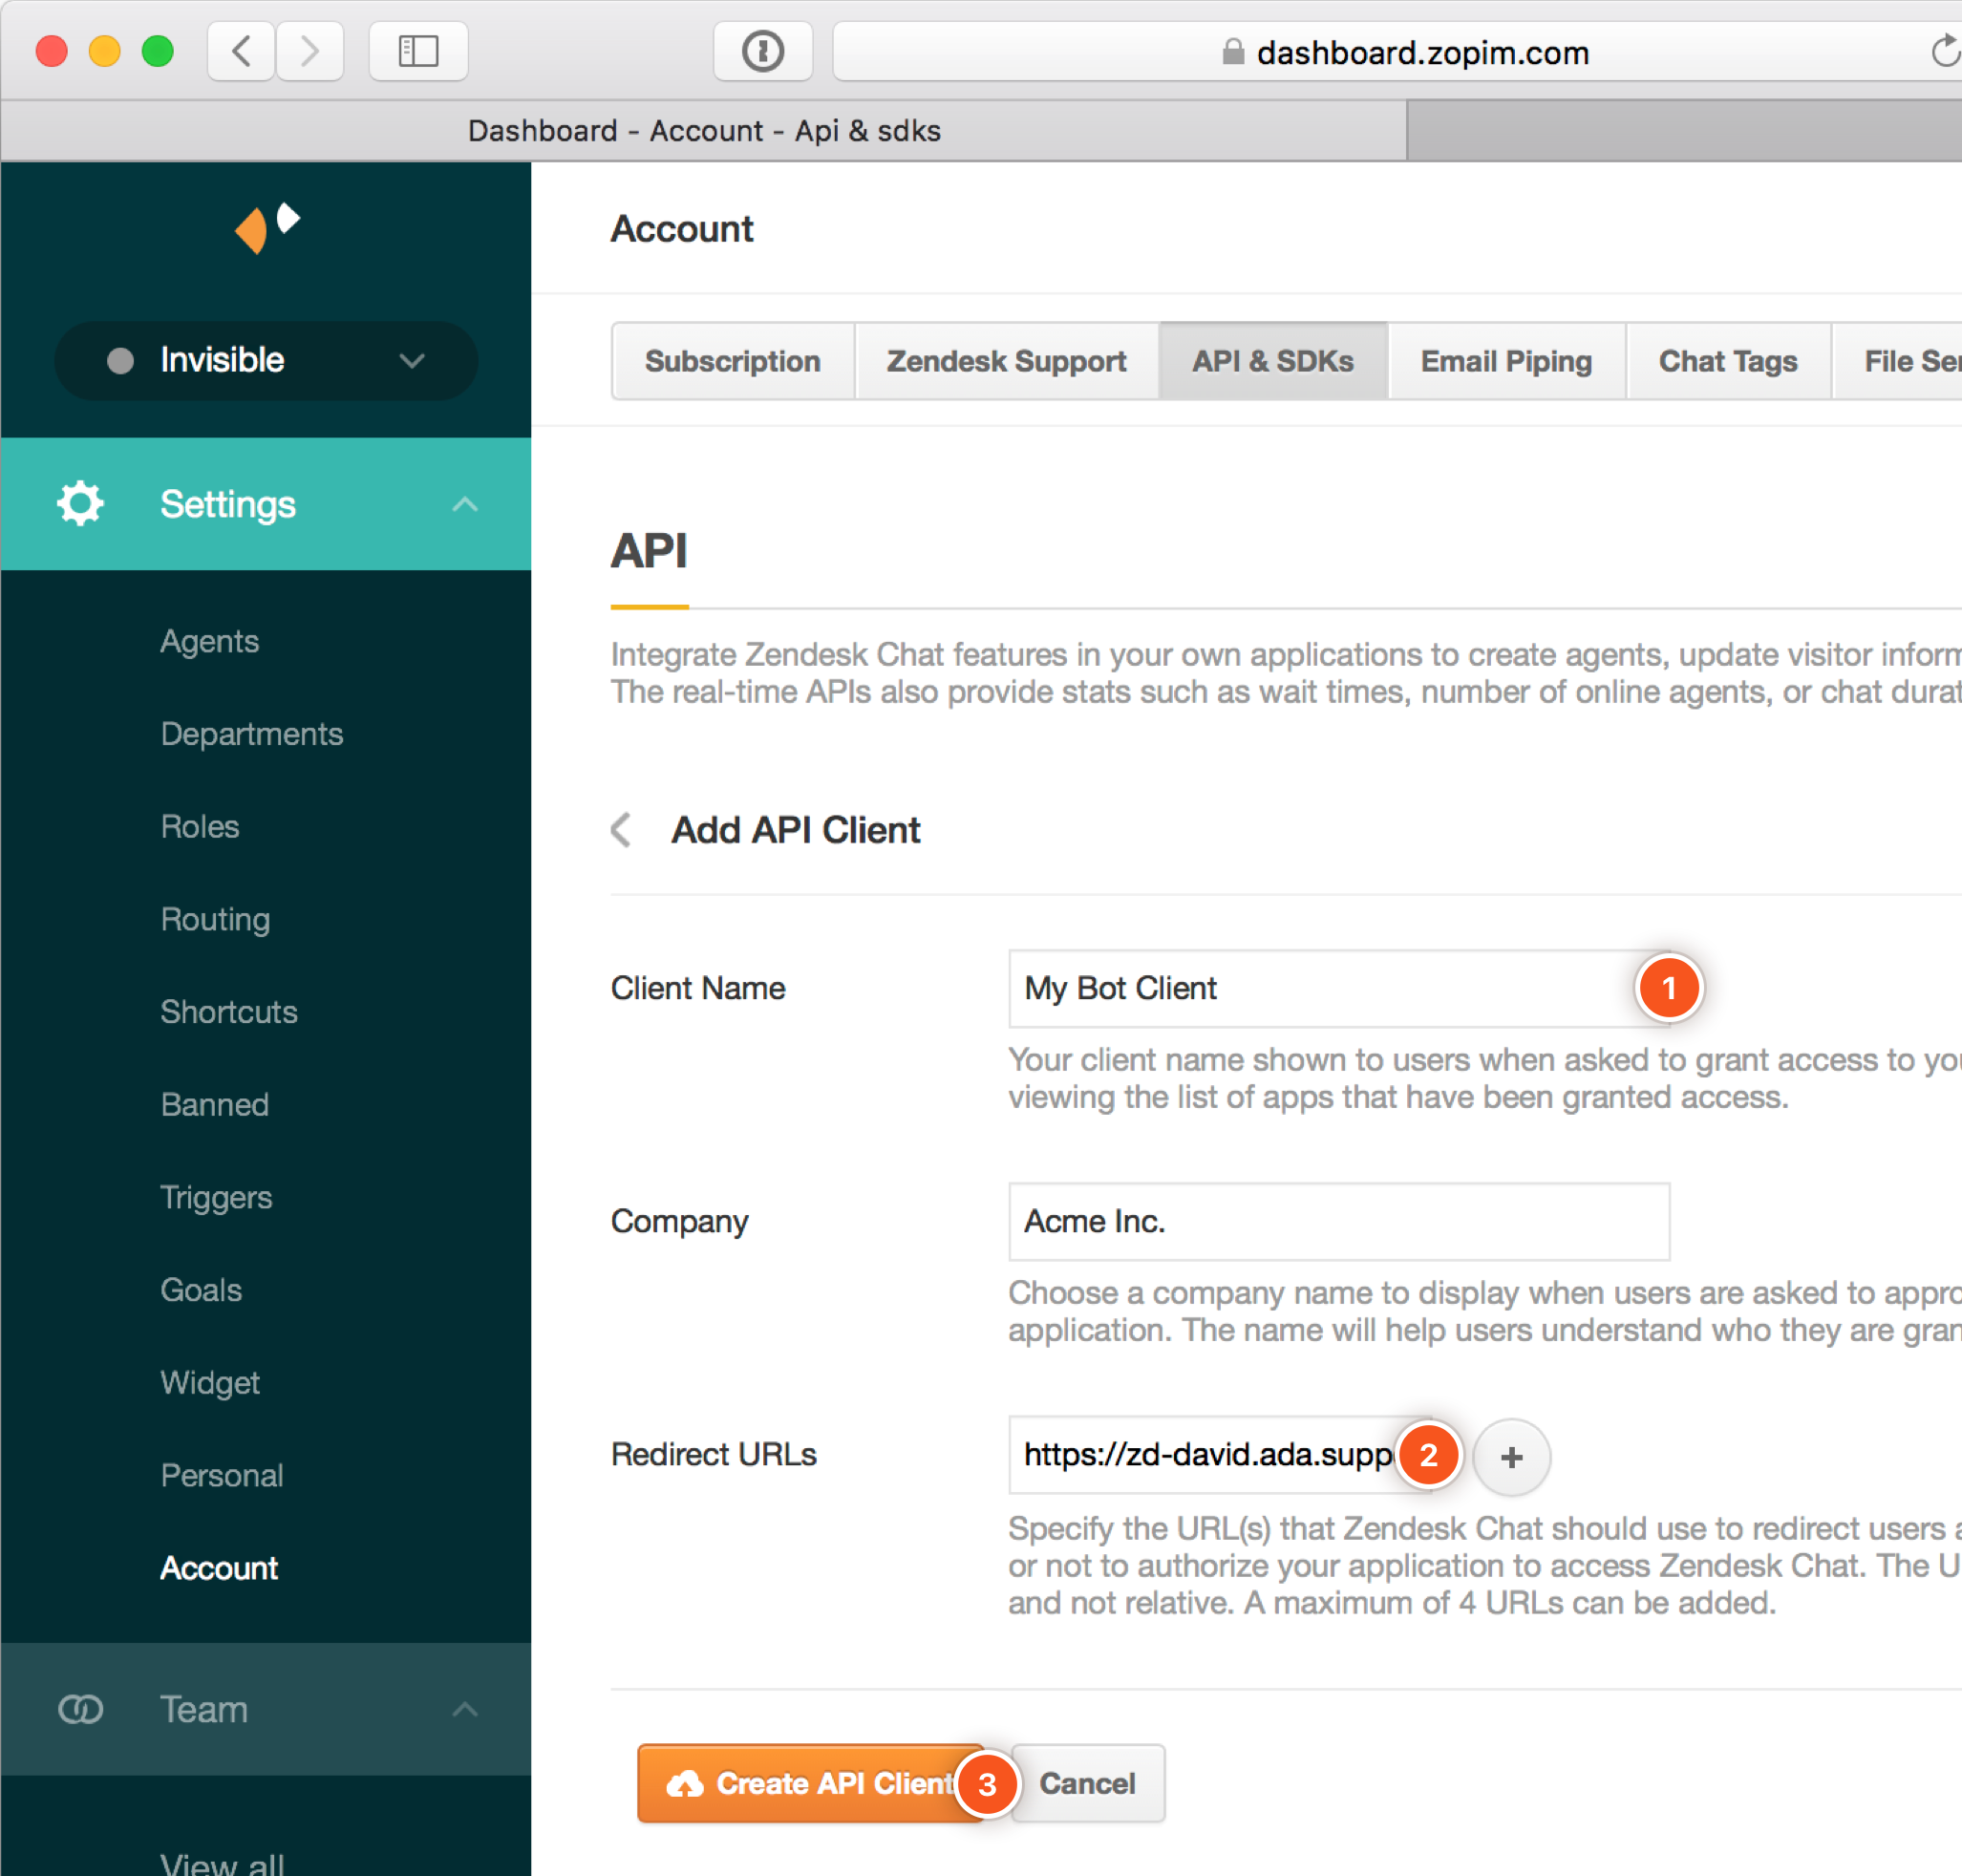
-
In the Client Name field, add a name for your API Client. Anything will do.
-
In the Redirect URLs field, paste your unique Redirect URL, which you copied previously.
-
Click Create API Client.
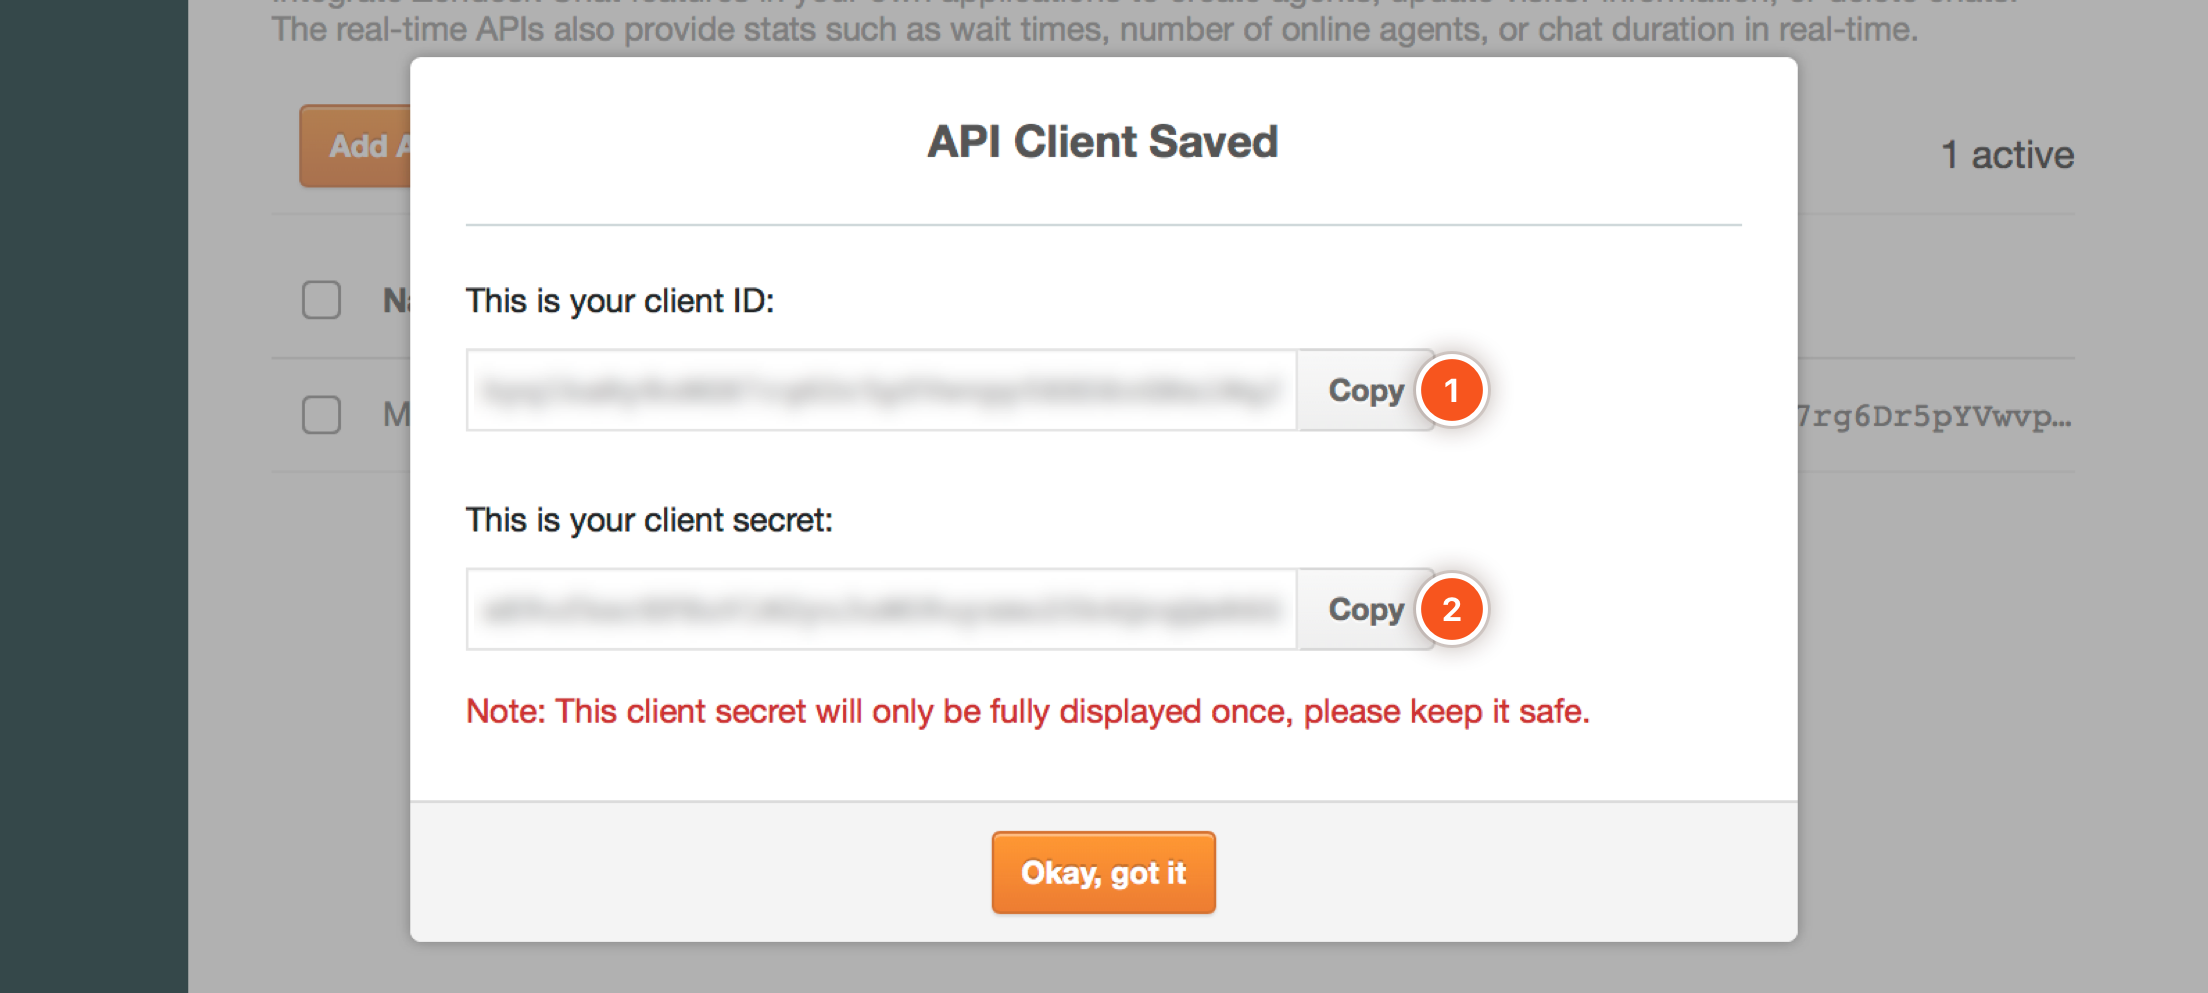
Add your API client to Ada
Copy the API client credentials from Zendesk Chat and enter them in Ada.
This prompt will only show once. If you accidentally close the API Client Saved window before copying the required fields, you will have to regenerate the Client Secret.
To add your API client to Ada:
-
Copy and paste your Client ID from Zendesk Chat into the Client ID field in Ada.
-
Copy and paste your Client Secret from Zendesk Chat into the Client Secret field in Ada.
-
If you use Zendesk Support integrated with Zendesk Chat, specify your Zendesk Subdomain in Ada. This is the unique identifier at the beginning of your Zendesk account URL—https://yoursubdomain.zendesk.com.
The subdomain is not the entire URL. It is only the portion marked yoursubdomain in the example above.
-
Click Save to set your API Client in Ada.
Zendesk:
Ada:
Retrieve your account key
Get your Zendesk account key to complete the configuration.
By checking your connection
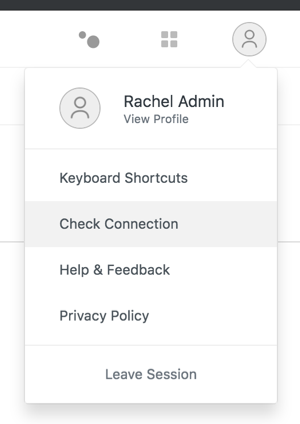
To retrieve your account key via connection check:
-
In the top right corner of your Zendesk Chat screen, click your user avatar, then click Check Connection.
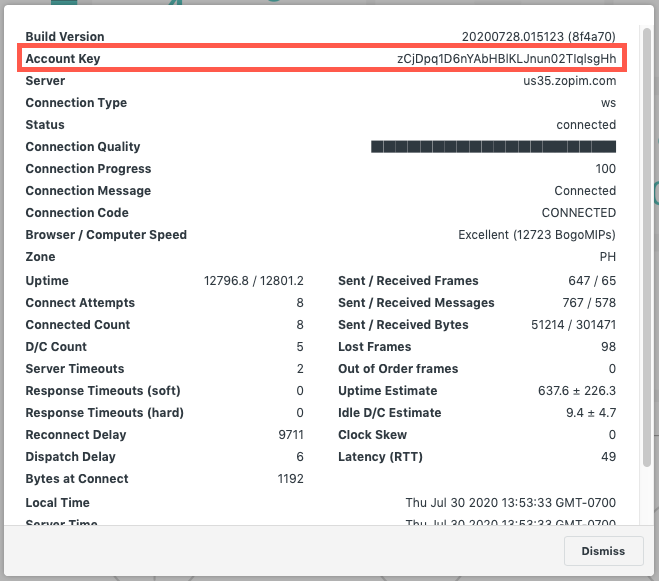
-
Copy the Account Key from the dialog that opens.
By simulating a conversation
If your account key isn’t available in the connection check dialog, you can retrieve it by simulating a conversation.
To retrieve your account key via simulation:
-
Click Visitors > Simulate Visitor.
-
Alternatively, on the widget tile, click Simulate conversation.
A window opens, with a URL that contains the account key in a parameter. Copy the account key from the URL.
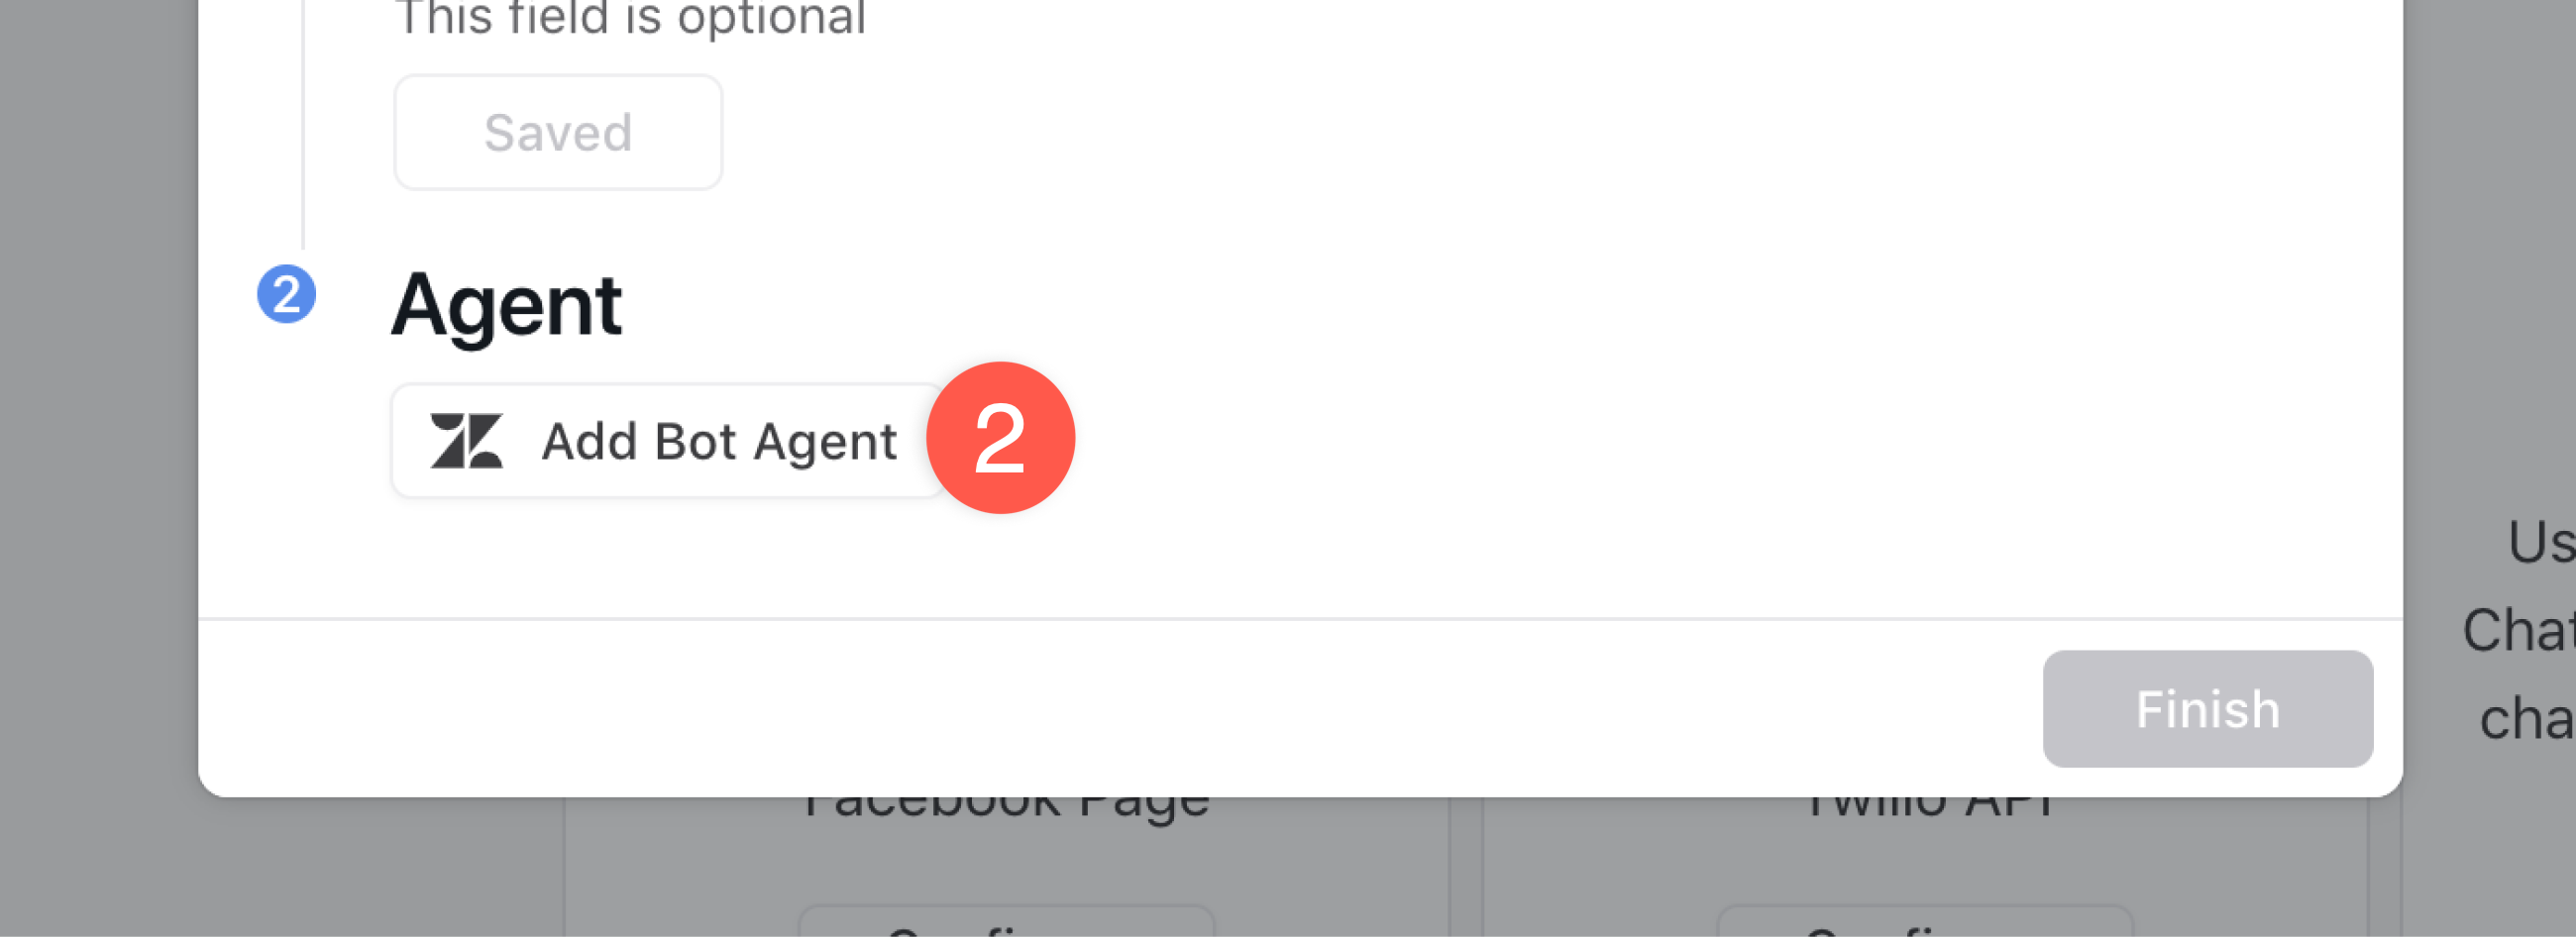
Add an agent
Connect your Zendesk bot user account to Ada to complete the integration.
In Ada
To add an agent:
-
Log into Zendesk Chat as the bot user account. We highly recommend you create a brand new bot user account, with an email address that isn’t tied to one specific person in your organization. This will ensure no changes will be made to the Bot Agent that could otherwise disrupt the integration.
-
Under Agent, click Add Bot Agent. A Zendesk Chat authentication tab opens.
-
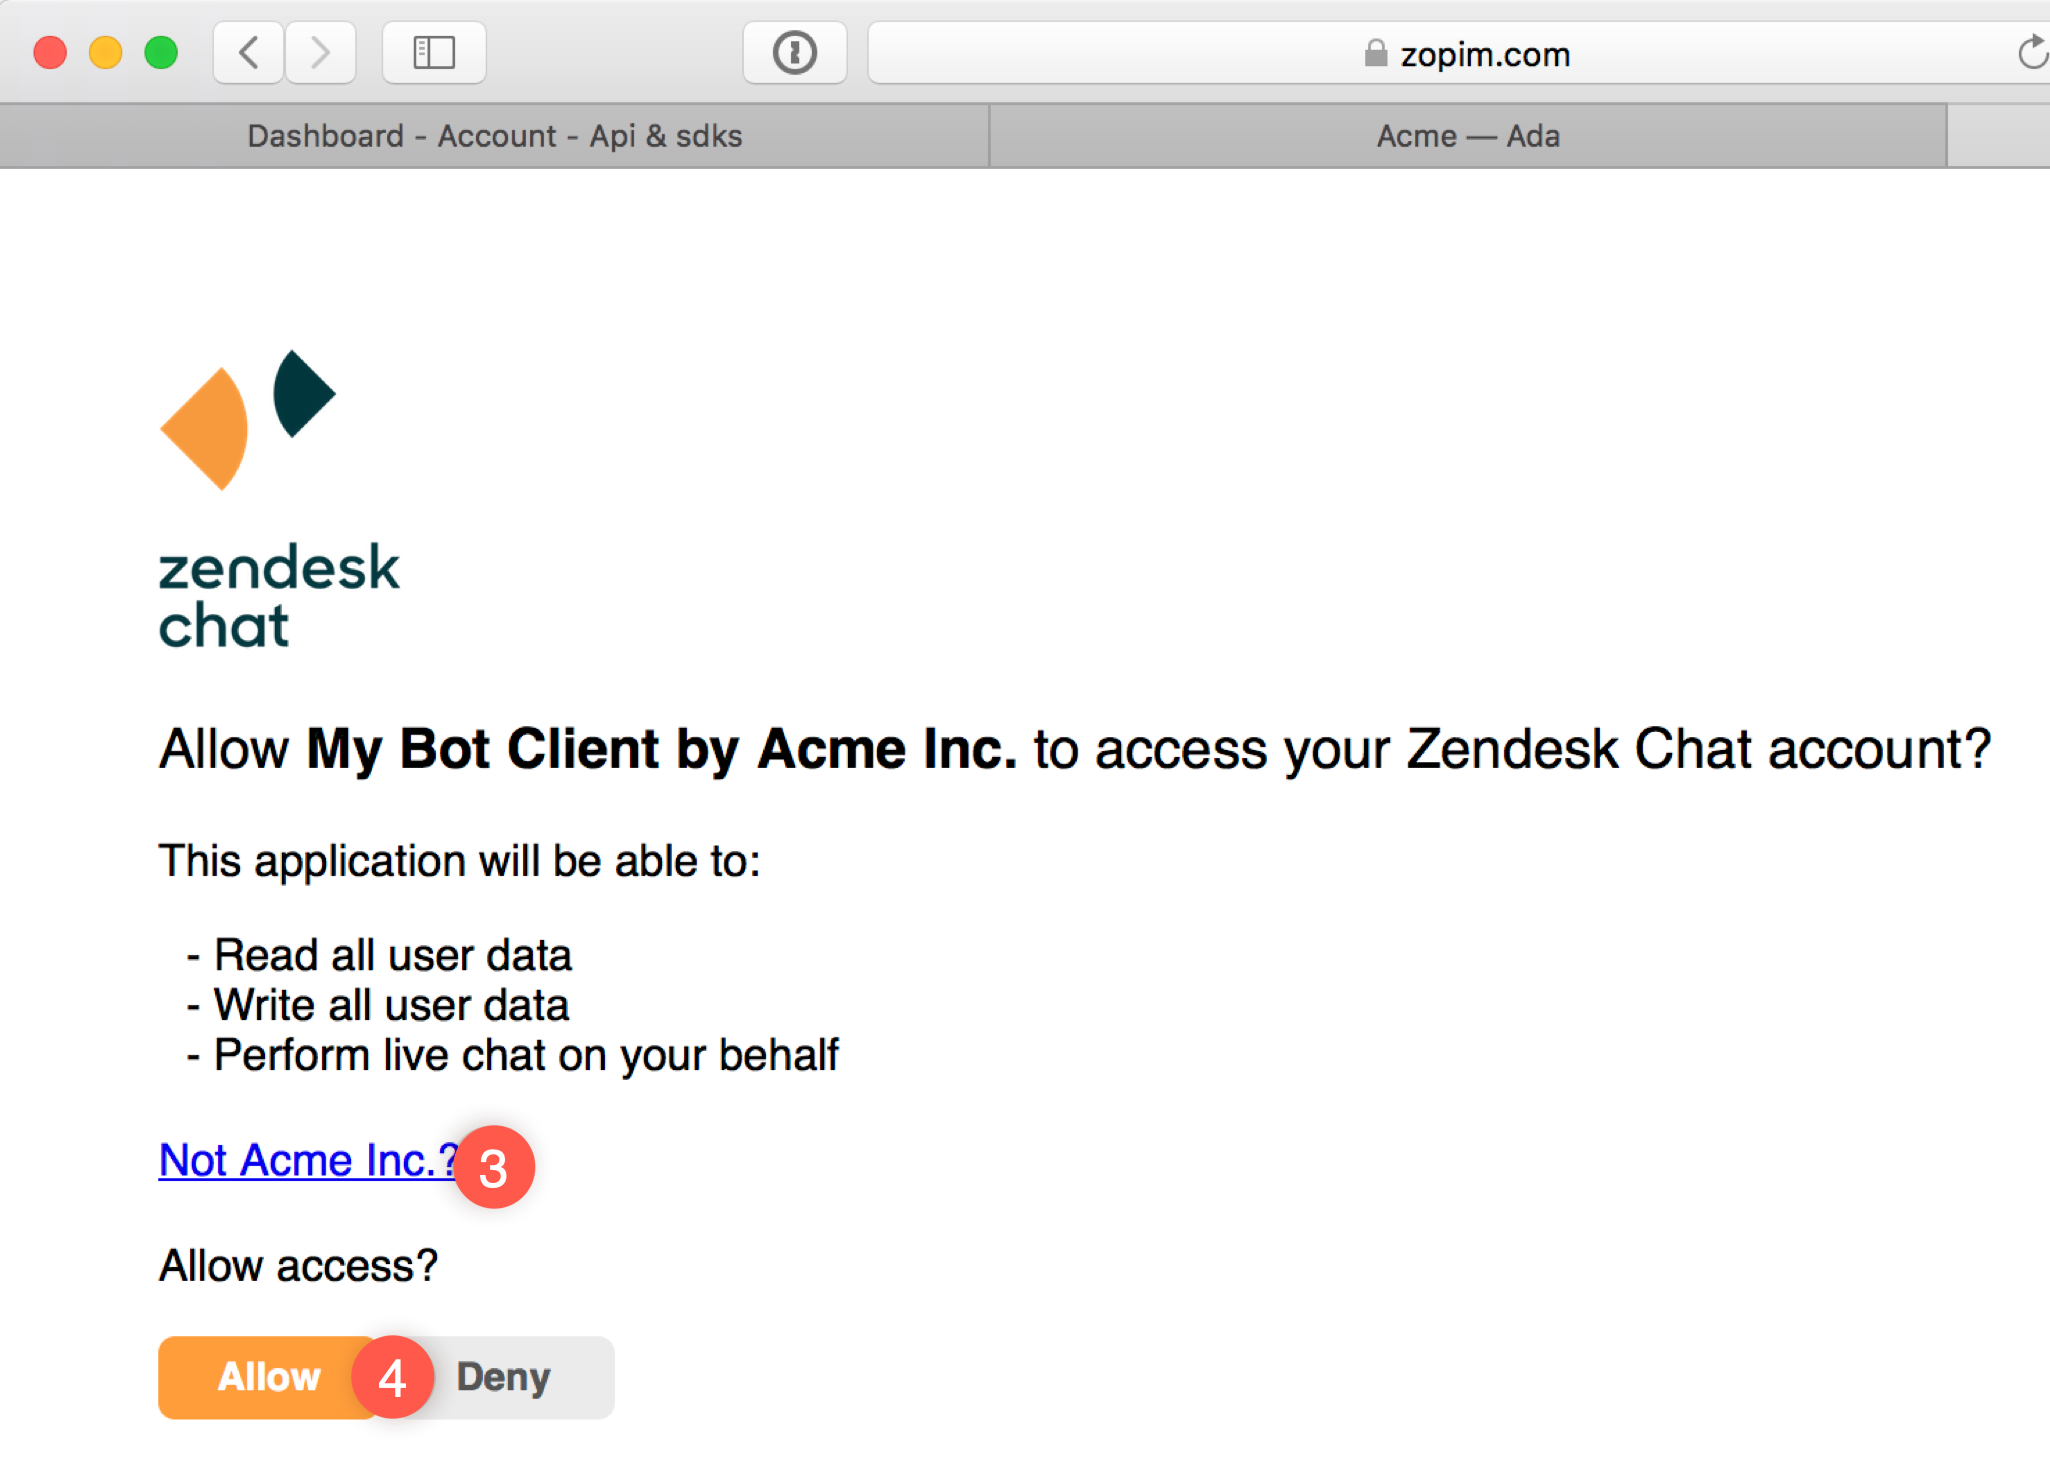
If you’re already logged in to your own personal account on Zendesk Chat, click the blue link to switch accounts. You must log in with an Administrator or Owner account.
-
Click Allow to add your Agent to Ada automatically.
Zendesk authentication (optional)
Configure visitor authentication to help agents verify customer identities. Authenticated customers display a green checkmark overlay on their Zendesk avatar.
To configure Zendesk authentication:
-
Reach out to your Ada team to let them know you would like this feature enabled.
-
We will provide your development team with the documentation necessary for the configuration.
That’s it! You’ve successfully configured Ada Glass for Zendesk. Next up, see Hand off customers to live agents using the Zendesk Live Agent block to create a Zendesk Chat handoff in your structured content.