

Configure the NICE CXone handoff
After you complete the initial configuration and share your credentials, your Ada team installs the CXone Utilities app on your AI Agent. When that is complete, the app appears in your AI Agent dashboard and you can configure the Handoff.
Your Ada team will install the CXone Utilities app and complete the backend integration setup. Contact your Ada representative to confirm when this step is finished before proceeding. If you are connecting more than one AI Agent to the same CXone instance, this is repeated for each AI Agent.
Configure the Ada webhook
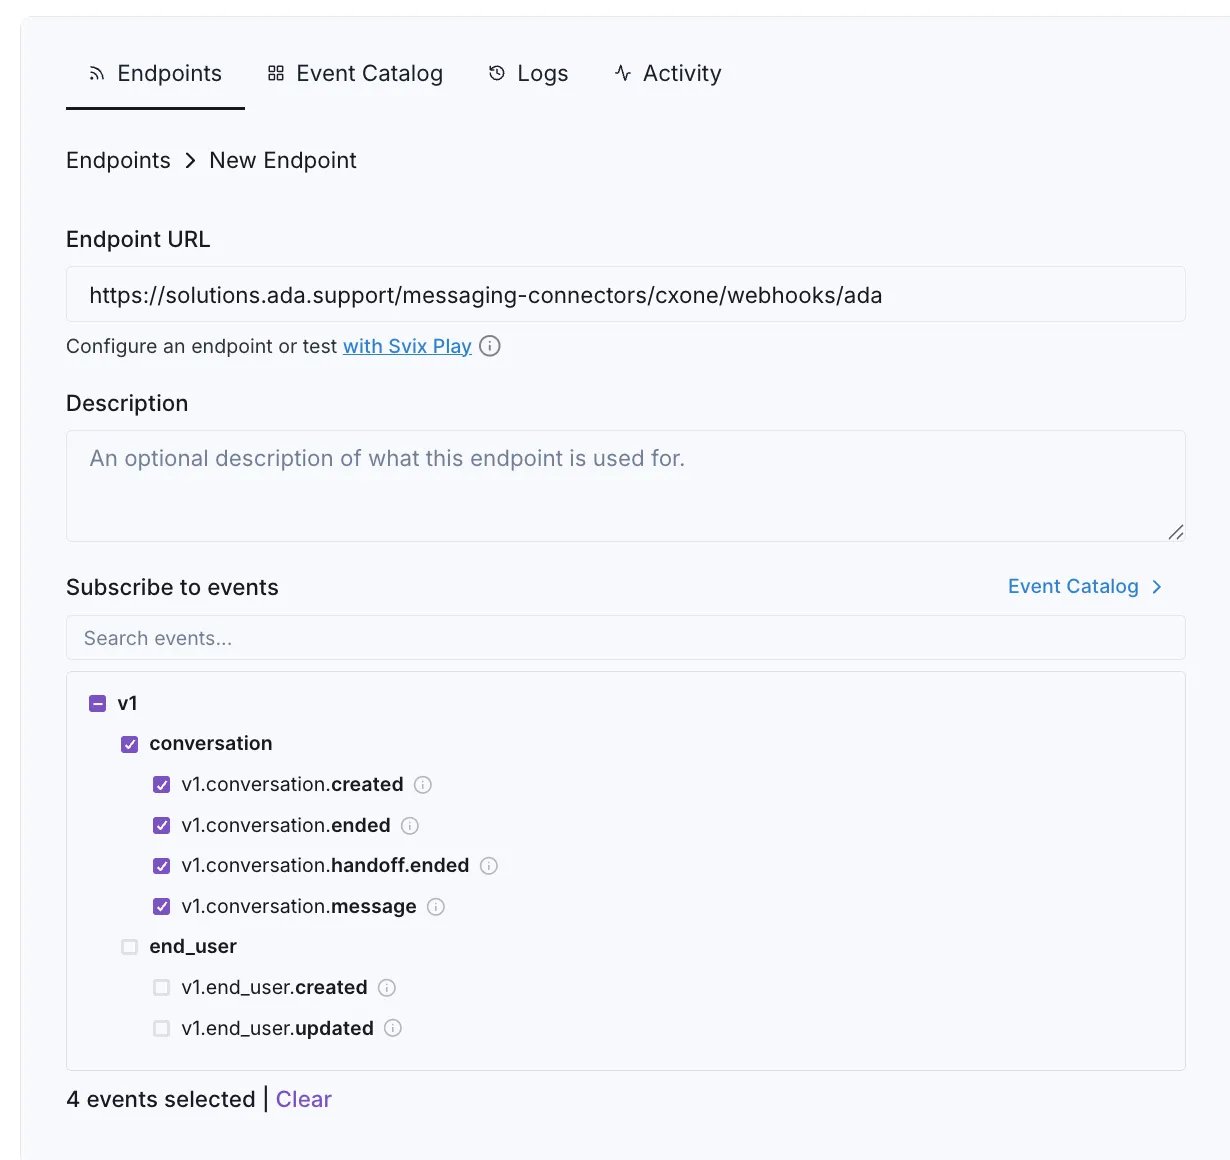
CXone needs to receive conversation events from Ada, which are delivered to a webhook endpoint registered in your Ada dashboard.
To configure the webhook:
- In your Ada dashboard, navigate to Platform → Webhooks.
- Create a new endpoint and set Endpoint URL to the value for your AI Agent’s cluster:
- US:
https://solutions.ada.support/messaging-connectors/cxone/webhooks/ada - EU:
https://solutions.eu.ada.support/messaging-connectors/cxone/webhooks/ada - Canada:
https://solutions.ca.ada.support/messaging-connectors/cxone/webhooks/ada
- US:
- Under Subscribe to events, select the following event check boxes:
v1.conversation.createdv1.conversation.endedv1.conversation.handoff.endedv1.conversation.message
- Save the endpoint.
Add the CXone Utilities block
Each escalation creates a contact in CXone on the channel you specify, which is then routed to a skill by your Studio script.
To add the handoff block:
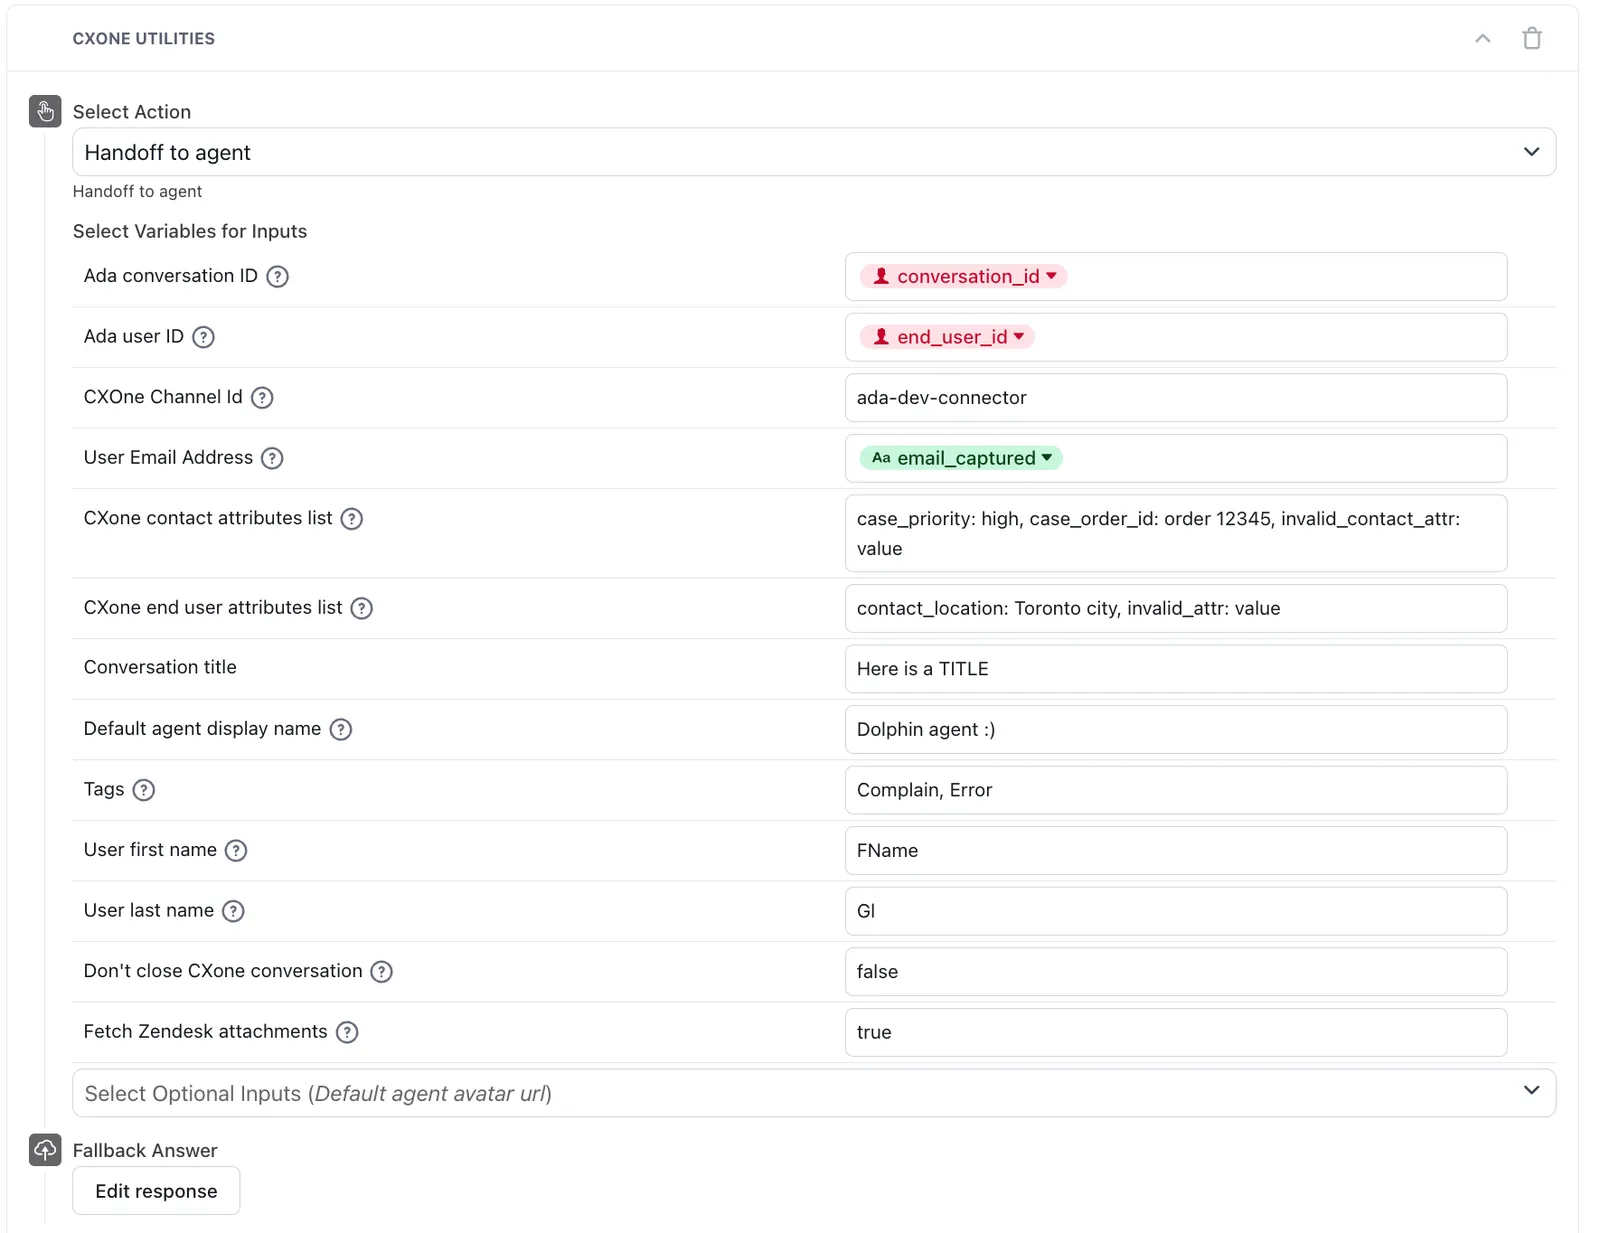
- In your handoff answer, add the CXone Utilities block.
- Set Select Action to Handoff to agent.
- Set the required inputs — Ada conversation ID, Ada user ID, CXOne Channel Id, and User Email Address.
- Optionally set any of the additional fields documented below. Once the action is configured, your AI Agent can hand off to a human agent in CXone.
Handoff input fields
The Handoff to agent action accepts the following inputs.
Pass custom attributes
Custom attributes carry conversation context into CXone, where agents see them on the contact and on the customer card. They can also be used as routing criteria in your Studio script.
Both attribute fields take a comma-separated list of key: value pairs, for example:
Each key must match the Ident of a custom field configured in CXone. Use a Case Custom Fields ident in the CXone contact attributes list field, and a Customer Card Custom Fields ident in the CXone end user attributes list field. See Configure custom fields for how to create these fields and find each Ident.
Route across multiple channels
A single AI Agent can escalate to more than one channel within the same CXone instance, which is useful when different conversation types should reach different teams.
To route a conversation to a specific channel, set the CXOne Channel Id input on the handoff block to that channel’s ID. Each channel must already exist in your CXone instance and have a Studio routing script assigned to it, as described in Initial NICE CXone configuration.
Related features
- Additional NICE CXone actions — check agent availability before escalating.