My team
Overview
Manage who can access your Ada dashboard and what they can do. You can invite team members, assign permission levels, and remove access when needed.
If your organization has multiple Ada instances, you must add users separately to each one. Access to one doesn’t allow users to log into another or access its data.
Use cases
Team management helps you maintain secure, appropriate access to your Ada dashboard.
- Onboard new team members: Invite colleagues who need to configure or monitor your AI Agent.
- Enforce least-privilege access: Assign Read Only access to stakeholders who need visibility without editing capabilities.
- Separate content editing from administration: Give content managers Agent access while reserving Admin access for technical administrators.
- Offboard departing employees: Remove access promptly when team members leave or change roles.
Capabilities & configuration
Control access to your Ada dashboard by assigning roles to team members.
User permissions
Assign different permission levels based on the type of access team members need. The available roles are Owner, Admin, Agent, and Read Only:
-
Owner: Complete administrative access.
-
Admin: Complete administrative access except for editing Owner team members.
-
Agent: Permissions to edit content in Ada only.
-
Read Only: Access to view, but not edit, content in Ada.
For a detailed breakdown of permissions by role, see User permissions reference.
Quick start
Add a team member to your Ada dashboard in a few steps.
For detailed instructions on managing team members, see Implementation & usage.
Implementation & usage
Add, remove, or reassign team members from the Team page in the Ada dashboard.
Add a user
Invite team members to give them access to the Ada dashboard.
To add a user:
-
On the Ada dashboard, click your initial, then choose Team.
The Team page opens.
-
Under Invite member, enter your team member’s name and email address.
You must enter a business email address. Domains like
gmail.comoroutlook.comare not accepted. -
In the Role dropdown, select a permission level for the user.
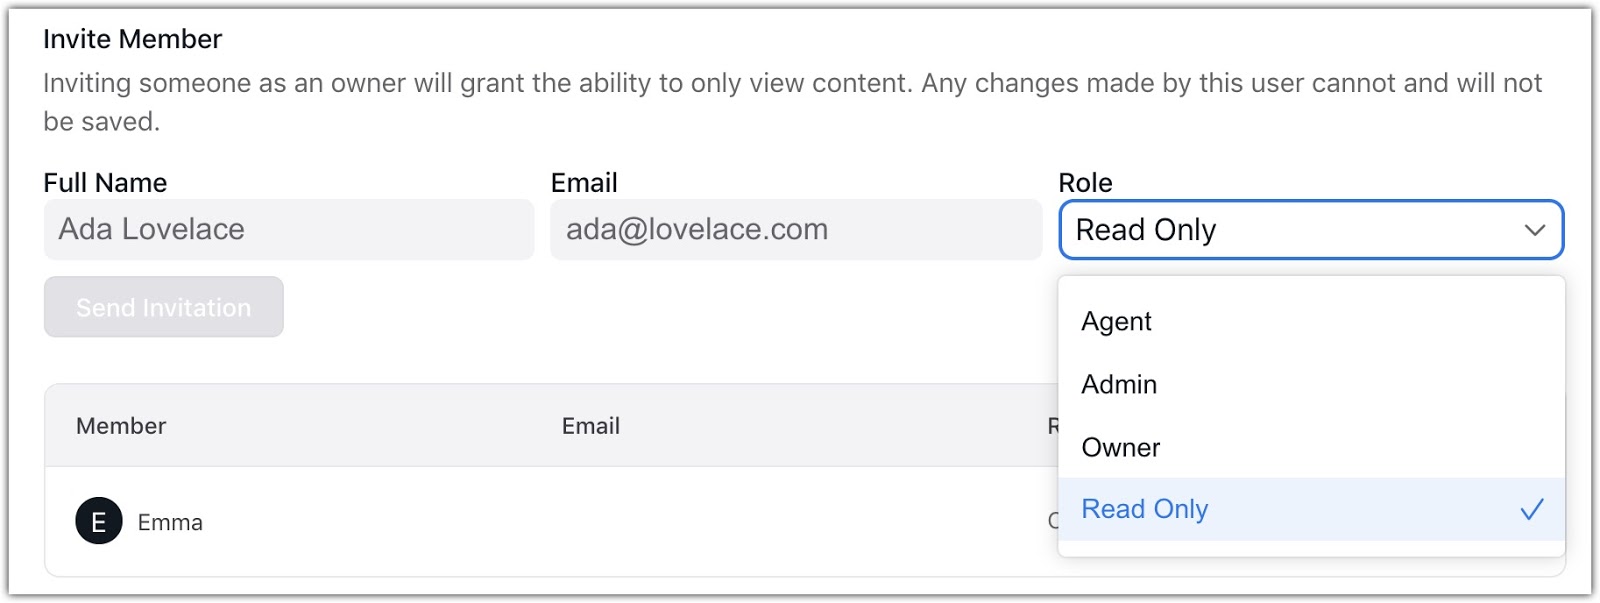
-
Click Send Invitation.
Your team member receives an automated invitation email. The email includes a signup link that expires after 24 hours. After 24 hours, they can set their password using the “Forgot Your Password?” link on the Ada login page.
The new user appears in your list of team members.
Delete a user
Remove a team member’s access to the Ada dashboard.
To delete a user:
-
On the Ada dashboard, click your initial, then choose Team.
The Team page opens.
-
In the list of users, click the Remove user icon
 .
. -
In the confirmation message, click OK.
The user’s name is removed from your list of team members.
Change a user’s role
Reassign a team member to a different permission level directly from the Team page. Each team member you have permission to edit shows a dropdown in the Role column.
To change a user’s role:
-
On the Ada dashboard, click your initial, then choose Team.
The Team page opens.
-
In the Role column, open the dropdown beside the team member’s name and select a new permission level.
The change saves immediately, and a confirmation message appears. If the update fails, the role reverts to its previous value.
The team member whose role changed receives an email confirming the update, including who made the change and their previous and new roles.
You cannot change your own role, and Admins cannot change the role of an Owner. When you cannot edit a member’s role, it appears as text instead of a dropdown. For the full breakdown, see the User permissions reference.
User permissions reference
Review the full permissions matrix for each role.
Related features
Explore additional access and account options.