Enhance your AI Agent with automation
Once your AI Agent is set up with basic Knowledge, you can expand its capabilities with Actions, Playbooks, and custom configurations to improve automation and engagement.
When you’ll see this setup process
- Your AI Agent has already been configured with basic Knowledge.
- You have a role with edit permissions (Agent or higher).
- You have not previously completed the automation setup flow.
Many AI Agents will already have some automation configured by Ada’s Customer Experience (CX) team during initial setup — including Greeting, Actions, or Playbooks. You’ll see this setup flow only if your AI Agent doesn’t yet have these automation elements in place, or if you’re adding new automation for the first time.
Step 1: Add Actions
Actions are tasks your AI Agent can perform, such as retrieving data from an external system or completing a customer-related workflow. They enable your Agent to go beyond answering questions and actually take action on behalf of your customers.
Before you can create Actions, you’ll need to set up Tokens. Tokens provide the secure authentication your Agent relies on to connect with external systems.
Once your tokens are in place, you can create Actions by defining their inputs, outputs, and logic to match your customer workflows.
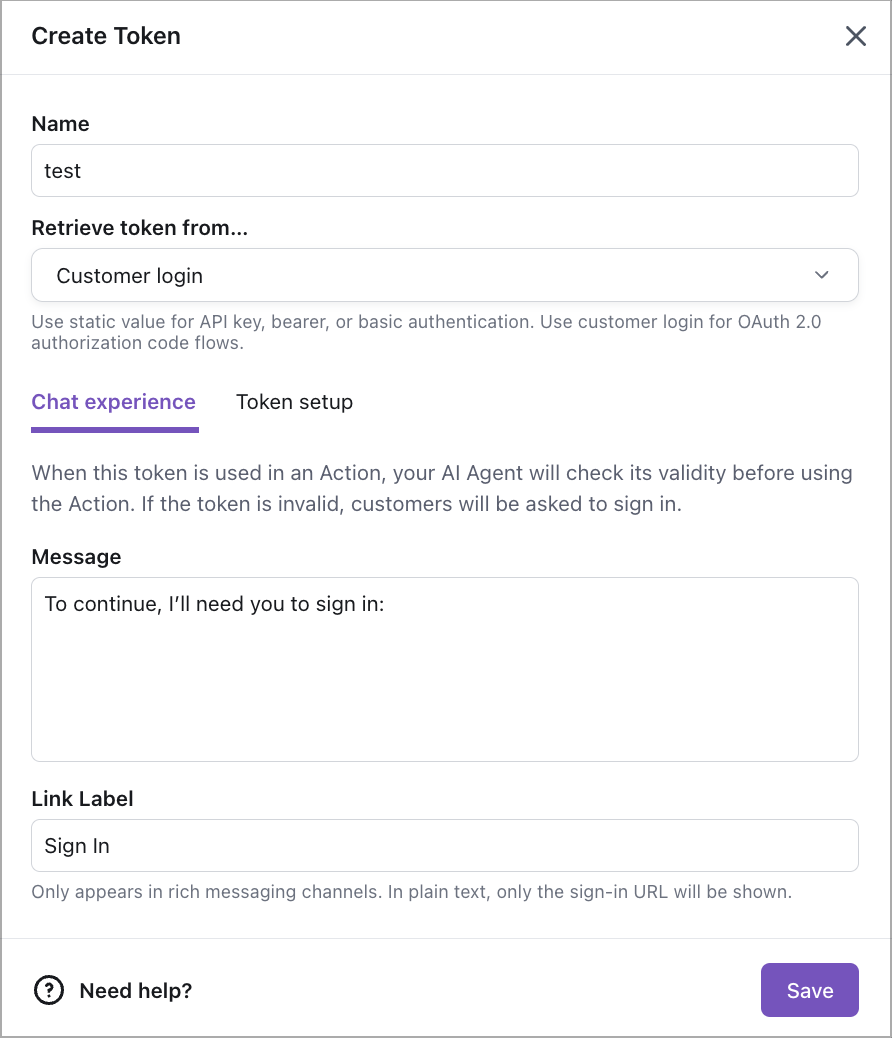
To get started, in your AI Agent’s Ada Dashboard, navigate to Config > AI AGENT > Actions. On the Actions page, click Manage Tokens, then on the Tokens page, click New Token. Enter the required details, such as token name and type.
If you need to retrieve the token from a customer login, you’ll also need to provide additional fields, including Auth URI, Client ID, and any others requested. When you finish adding all details, click Save to finish creating the token.
After creating a token, click the Back button to return to the Actions page. From there, click New Action, give it a name and a description.
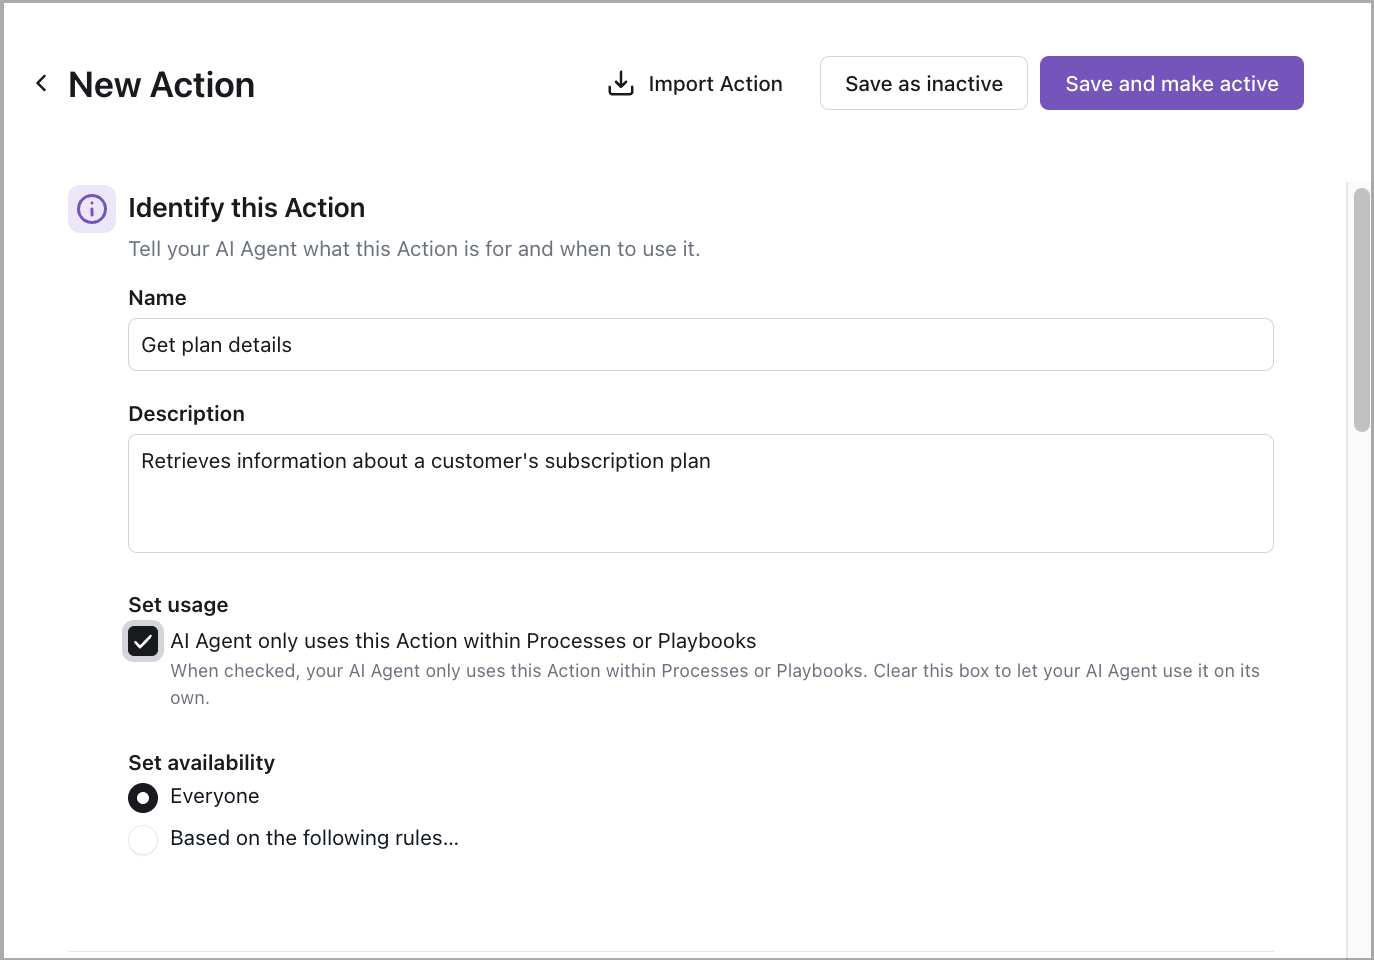
You can also import an Action in JSON format if needed.
Step 2: Add a Playbook
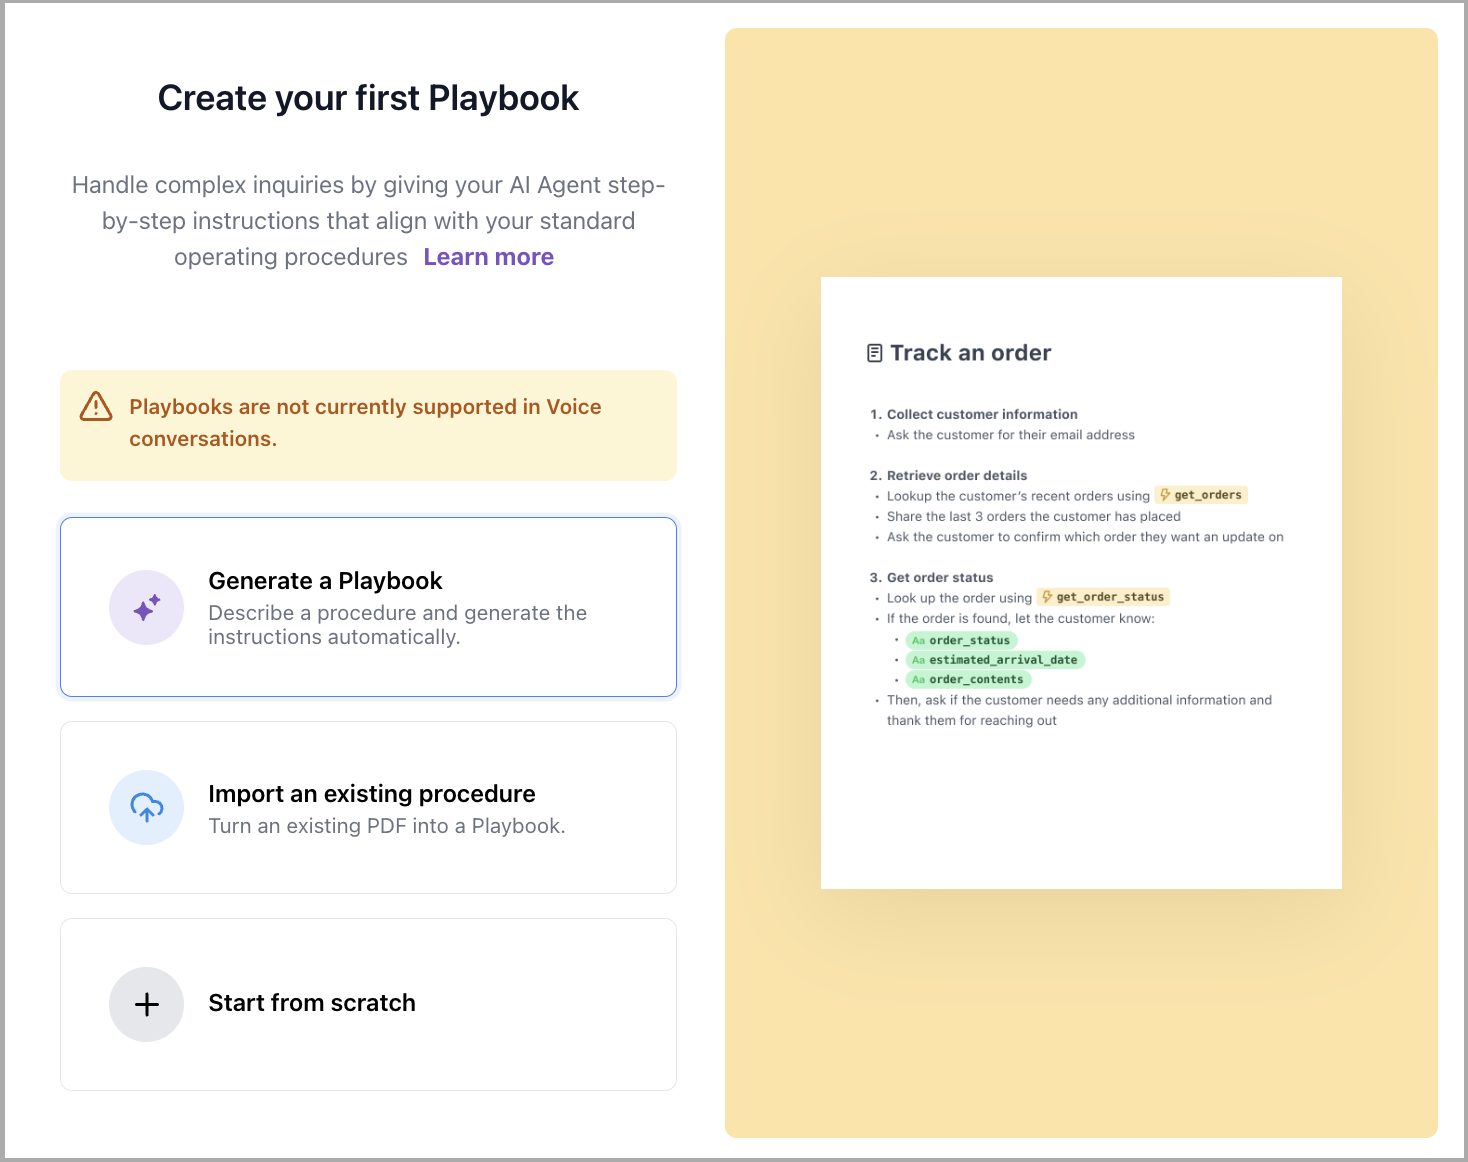
Playbooks allow your AI Agent to manage multi-step interactions and guide customers through more complex workflows. They combine conditions, actions, and responses to create tailored conversational paths.
Let Ada write your Playbook. On the Create your first Playbook page that appears, select Generate a Playbook.
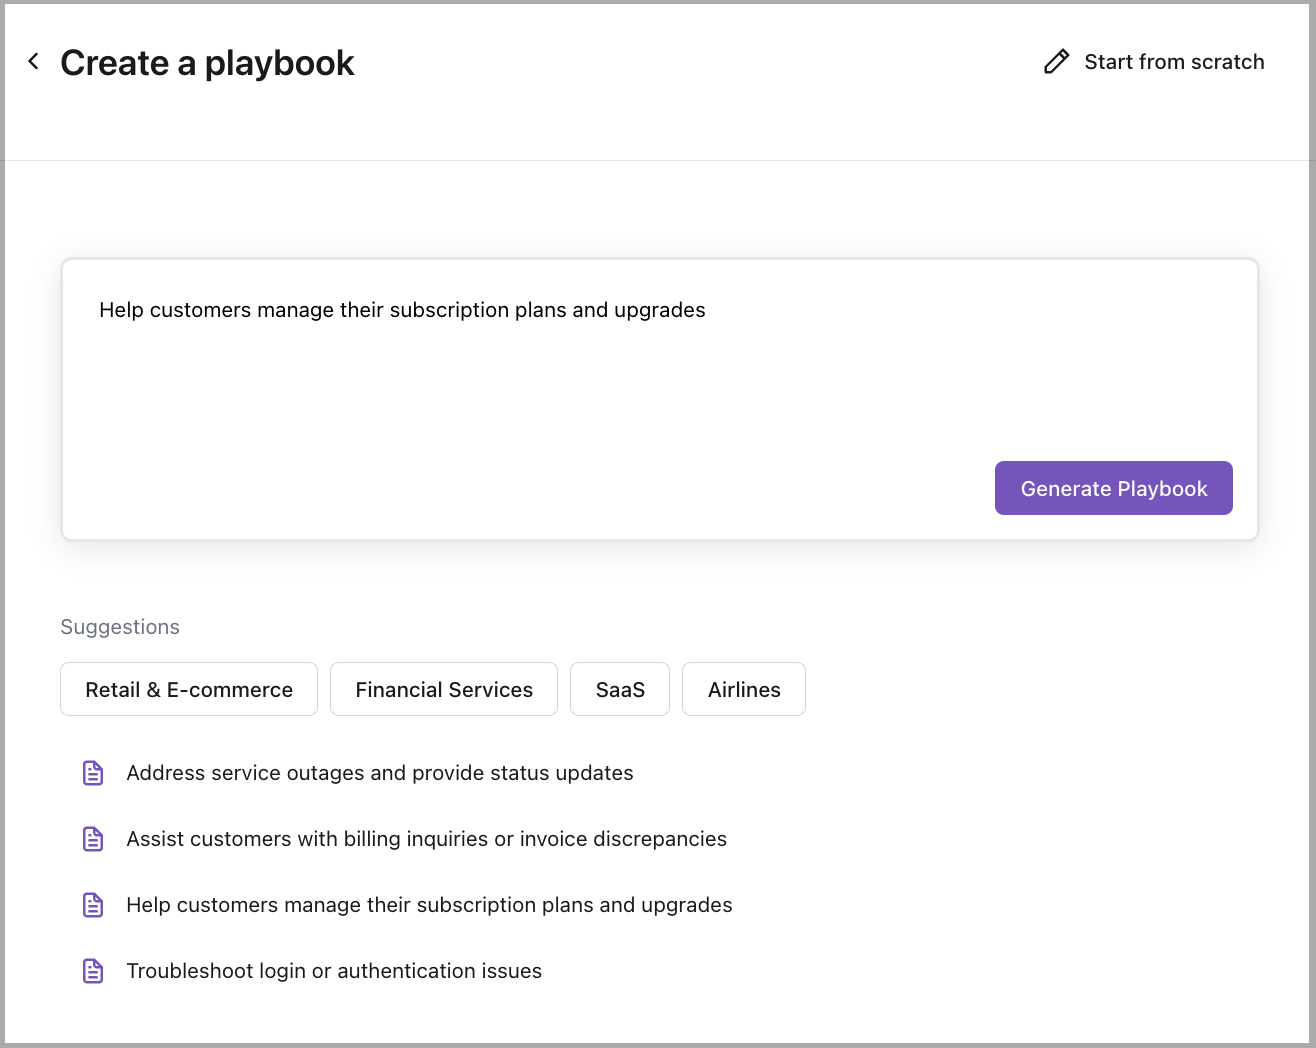
To quickly create your first Playbook, use AI generation. Simply choose a product area (for example, SaaS) and select a relevant use case (for example, Help customers manage their subscription plans and upgrades). You can also enter your own description if you have a specific workflow in mind.
Next, click Generate Playbook to produce a draft you can review and refine. This gives you a strong starting point—even if you’re not sure how to structure the workflow yourself.
For details, see this section.
Step 3: Customize the Greeting
First impressions matter! Define how your AI Agent starts conversations:

For details, see this section.
Step 4: Invite team members
Collaboration is key! Invite your team members to edit, test, and monitor your AI Agent:

For details, see this section.
Step 5: Test your AI Agent
Now it’s time to test your AI Agent with its enhanced capabilities. In the left-side navigation, click Test and start a conversation.
Try different types of inquiries to evaluate your AI Agent’s performance:
- Actions: Test API-powered interactions, such as retrieving order details or account information.
- Playbooks: Walk through multi-step workflows to confirm your AI Agent follows structured automation correctly.
- Greeting: Verify that the customized greeting appears as expected when the conversation starts.
Additionally, if you invite team members, collaborate by having them test different scenarios and provide feedback. Based on the test results, make any necessary adjustments to improve responses and automation before launching your AI Agent.
What’s next?
That’s it! You’ve successfully created your first AI Agent. From here, you can continue refining its responses, improving workflows, and expanding integrations.
Some customers may also need access to additional features. If this applies to you, reach out to your Ada representative for more information. These additional features can include:
- Channel-specific access: For billing reasons, Voice and Social channels may need to be enabled separately.
- Handoffs: Depending on your plan and tools in use, handoffs may include Zendesk Messaging, Zendesk Chat, Salesforce Chat, Salesforce Messaging, or a custom solution built by Ada’s Solutions team.
- Additional integrations and customizations: Some scenarios may require a more personalized setup or connections to specific third-party integrations.
Your Ada representative can walk you through these options and help you get set up with the features that best support your business.