Interactive Testing
Interactive Testing lets you engage with your AI Agent in real time, so you can experience exactly how it responds to your end users’ inquiries.
Interactive Testing differs from Simulations, which run saved test cases at scale with automated pass/fail evaluation against expected outcomes.
Use Interactive Testing for quick checks, multi-turn exploration, and qualitative validation.
Overview
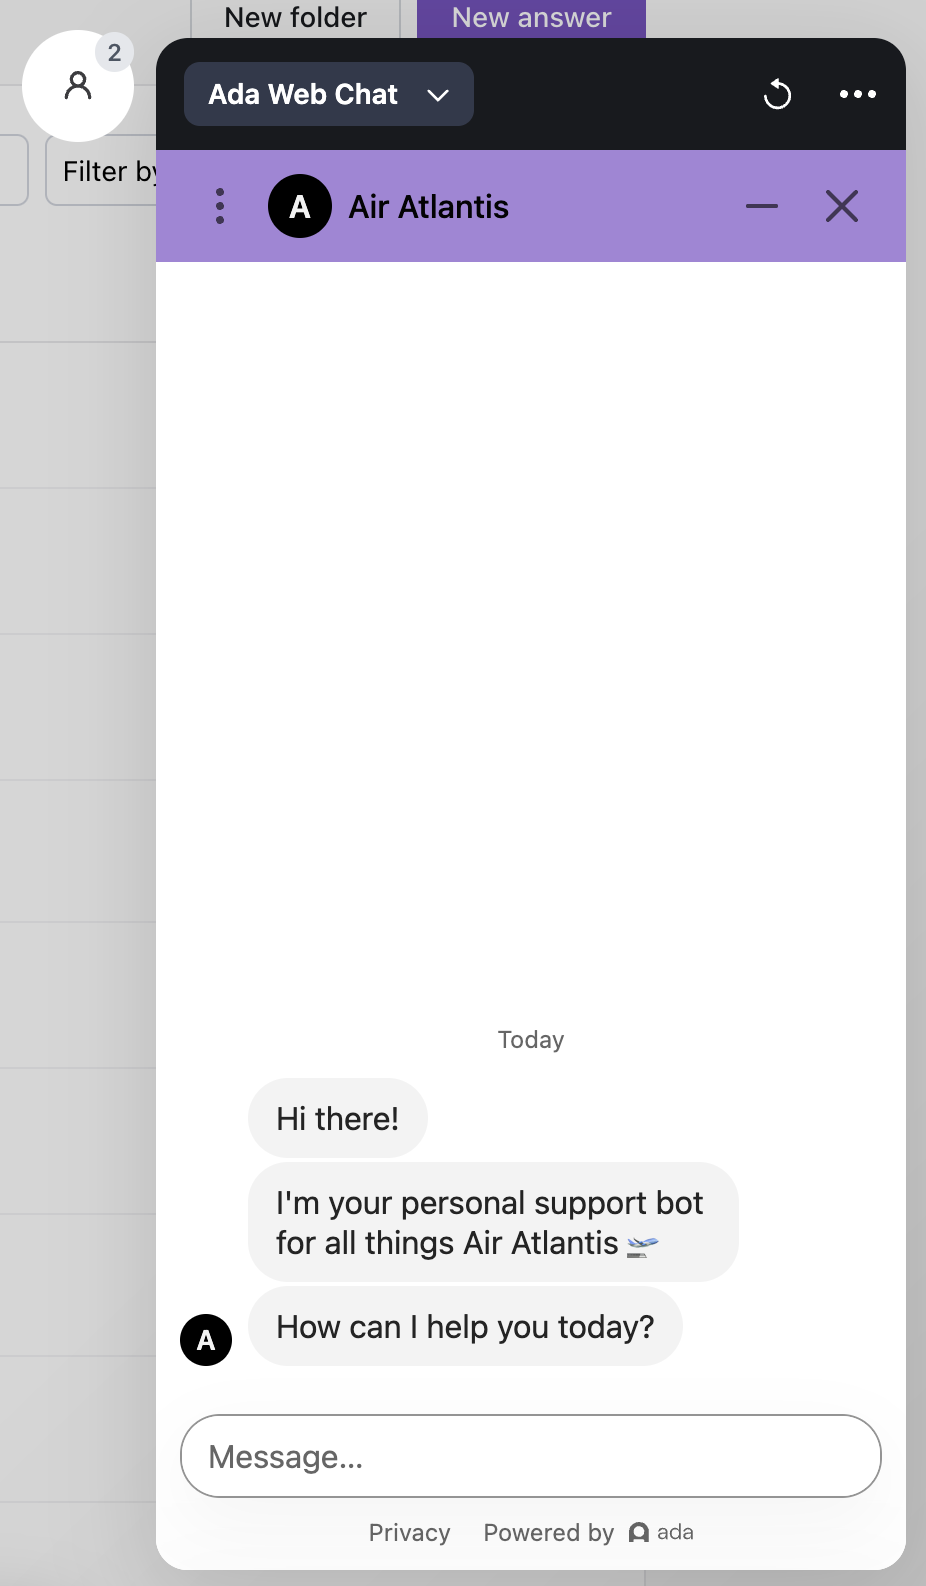
Before deploying changes to end users, you can use Interactive Testing to validate your AI Agent’s behavior. The test chat simulates a real conversation, allowing you to verify responses, test different user scenarios, and confirm that your configuration works as expected.
With Interactive Testing, you can:
- Chat with your AI Agent as an end user would
- Simulate different user types by setting variables
- Preview changes before exposing them to end users
- Share test URLs with stakeholders for feedback
Use cases
Interactive Testing supports the following workflows:
- Configuration validation: After setting up Knowledge, Actions, or Processes, test the AI Agent to confirm it responds correctly.
- User-specific testing: Simulate different end-user segments by setting variables to verify personalized responses.
- Pre-launch review: Share the test URL with stakeholders to gather feedback before going live.
- Change preview: Restrict changes to test sessions using the
test_uservariable to validate updates before publishing.
Capabilities & configuration
Interactive Testing offers several capabilities for testing conversations and can be configured to match different scenarios.
Test chat options
The test chat provides options for flexible testing across different contexts.
To open the test chat in a new window or another browser, click the More options icon ![]() .
.
- Open in a new window: Opens the test chat in a separate browser window.
- Copy URL: Copies the test URL to your clipboard. You can use this URL to test your AI Agent in any browser window, even if you’re not logged into Ada.
Before you launch your AI Agent, share the test URL and get feedback from stakeholders across your organization!
Test variables
If you’ve tailored your AI Agent’s content to different users based on Variables, you can set those variables in the test chat to simulate different end-user segments.
You can’t simulate user types using sensitive variables.
Chat persistence
The test chat follows your configured persistence settings. When you reset the chat, it behaves according to these settings.
Quick start
Get started with Interactive Testing in just a few steps. For detailed instructions, see Implementation & usage.
Implementation & usage
Start Interactive Testing, preview changes, simulate user types, and manage test sessions.
Get started with Interactive Testing
Once you’ve connected your knowledge base to your AI Agent, you can begin Interactive Testing.
To start a test session:
- From the lower left-side panel of your Ada dashboard, click Test. The Ada Web Chat launches.
- Type a message in the chat and press Enter to see how your AI Agent responds.
- Continue to test your AI Agent with various messages and inquiries.
Test changes before they go live
You can preview a change before exposing it to end users by restricting the change’s availability to test sessions.
To test a change before publishing:
- Create or open the change you want to test.
- Click Set availability → Based on the following rules…
- For the Variable field, search for and select
test_user. - Switch the comparator from Equals (=) to Is set.
- Save the change. It now applies only to sessions flagged with
test_user. - In the dashboard’s lower-left corner, click the purple Test AI Agent button to open a chat.
- Chat with the AI Agent to verify the new behavior.
- When you’re satisfied, reopen the change, switch availability to Everyone, and click Save to publish it for end users.
Impersonate different user types
You can set variables in the test chat to simulate different end-user segments and verify that responses are personalized correctly.
To impersonate a user type:
-
In the test chat, click the User icon beside the top of the test chat.
-
In the Set test variables window, set the variables corresponding to the user type you’d like to test, and start chatting with your AI Agent.
If you start typing a variable value, you can see a list of values from previous conversation data. For example, if you’re using the
regionvariable, any values stored inregionfrom previous conversations will appear as options. You can click one of these options to select it, or continue typing to enter a different value.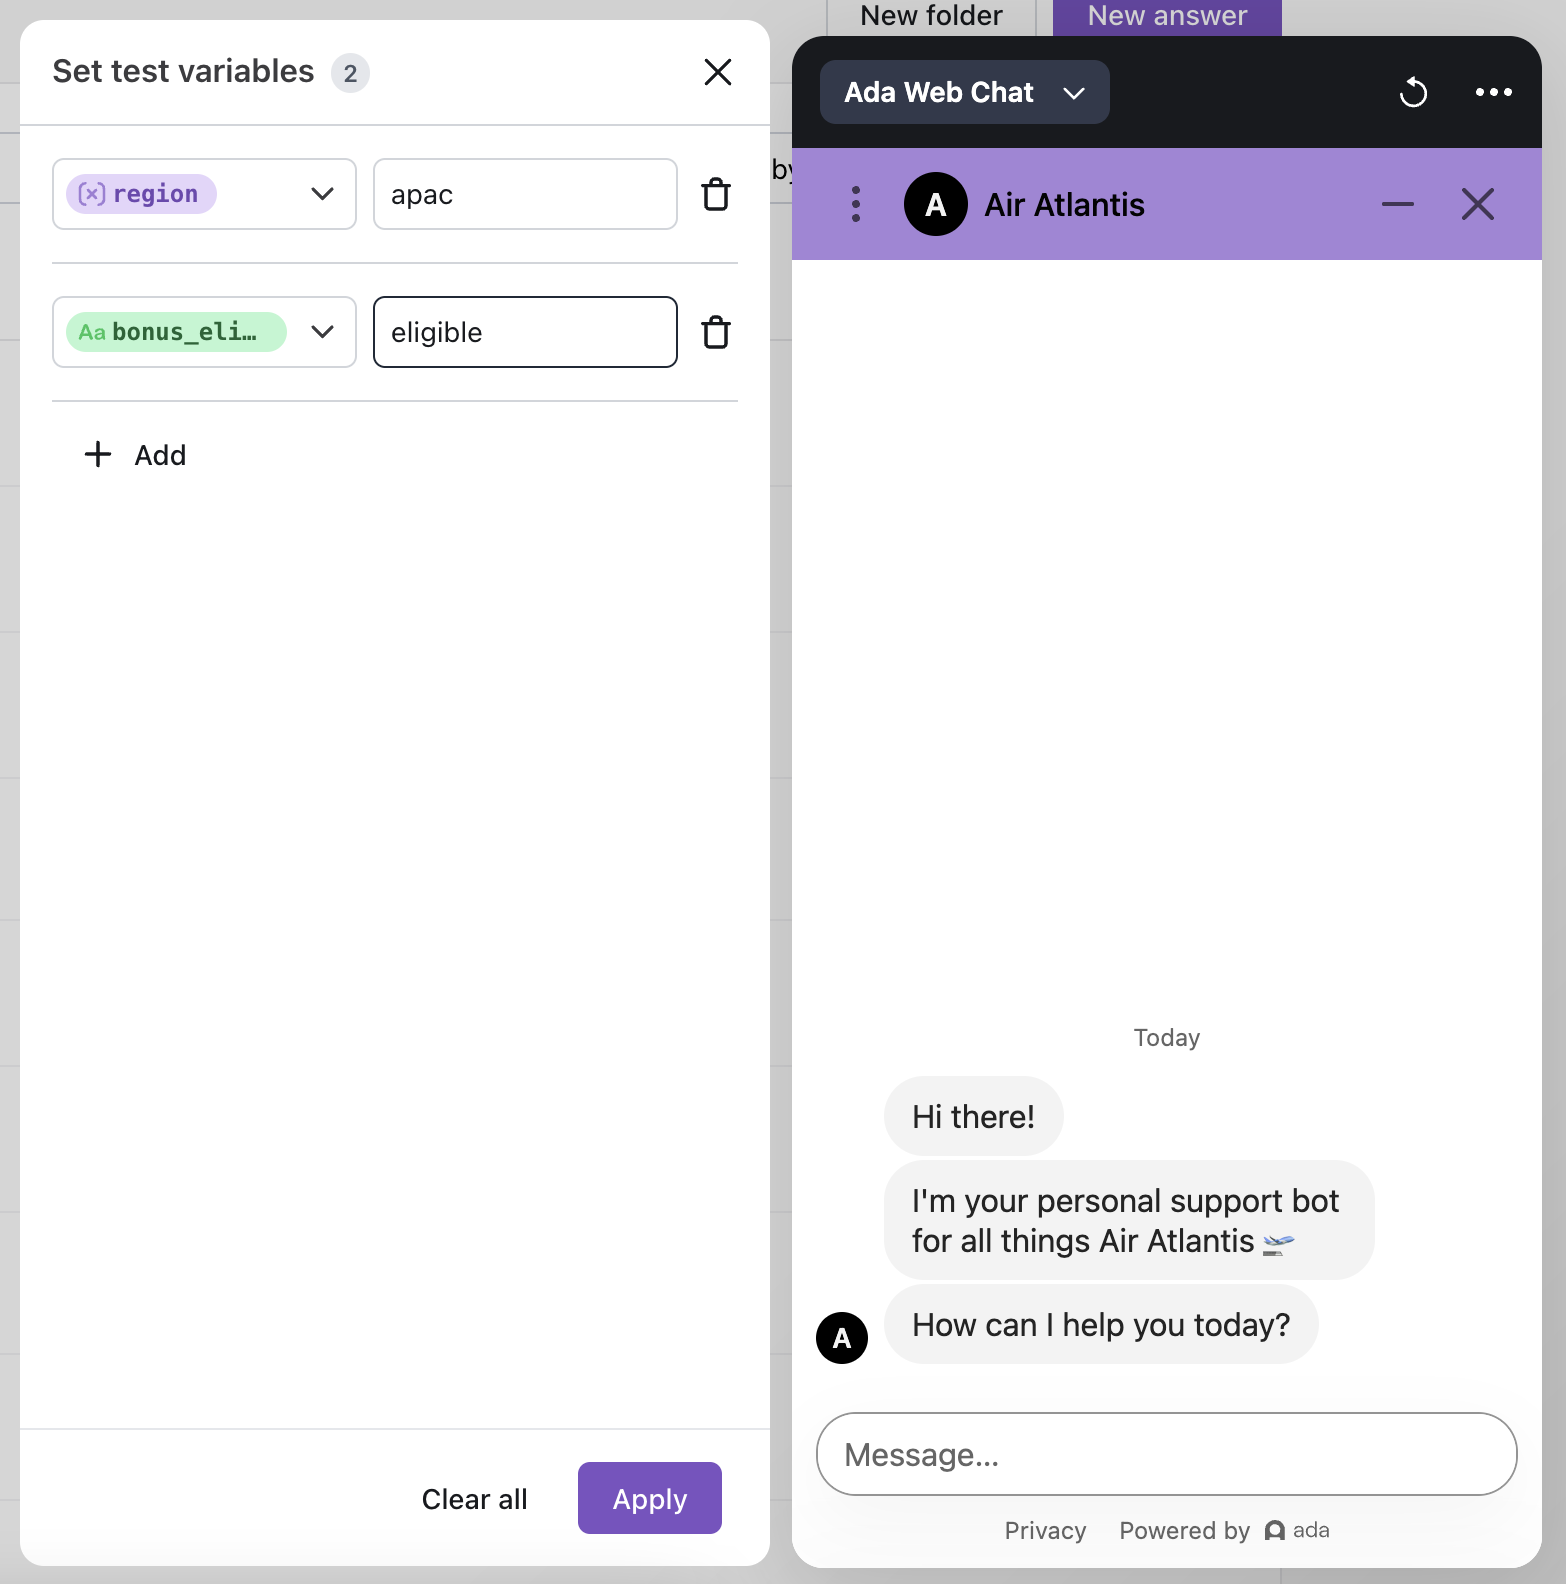
Reset or end your test chat
You can reset the test chat to start a new session or exit when finished.
To reset the test chat:
- Click the Refresh icon. The chat resets according to your configured persistence settings.
To end the test chat:
- Click anywhere outside the test chat to exit and return to your dashboard.
Related features
- Simulations: Create and run automated test cases with defined expected outcomes to validate changes at scale before they affect end users.