Launch options
Overview
Launch options let you control when and where your AI Agent appears. You can show your Chat widget to only a percentage of end users, which is useful for testing or transitioning between AI Agents. You can also restrict your AI Agent to specific domains to prevent unauthorized embedding.
Use cases
Launch options help you control AI Agent visibility and rollout.
- Testing before launch: Validate your AI Agent’s performance with a small group before full deployment.
- Parallel AI Agent rollout: Show different AI Agents to different portions of your end users during a transition period.
- Staged migration: Move end users from one AI Agent to another without disrupting service.
Capabilities & configuration
Launch options provide settings for rollout percentages and website restrictions.
- Rollout percentages: Control what percentage of end users see your AI Agent, a second AI Agent, or no AI Agent.
- Website restrictions: Authorize specific domains where your AI Agent can appear.
Quick start
Configure launch options in a few steps.
For detailed instructions, see Implementation & usage.
Implementation & usage
Configure rollout settings and website restrictions.
Rollout settings
Rollout settings let you control what percentage of end users see your AI Agent.
Before you begin
Before setting your AI Agent’s rollout percentages, here are some things you should understand:
-
These settings only affect how often end users see AI Agents that load automatically when the page loads. They don’t affect on-demand embed methods, social media channels, third-party SDKs, or methods that bypass the default chat button to launch your AI Agent.
For example, if you’ve used the Ada Embed Directory to make your AI Agent load every time an end user clicks a custom button, it will load every time any end user clicks that button, regardless of what the rollout percentage for that AI Agent is. In this case, if you want to reduce the number of end users who see that button, you’ll have to use code on your website to make that button visible to only a percentage of your end users.
-
You can split your end users by percentage into not seeing any AI Agent, seeing the current AI Agent, seeing a second AI Agent, or any combination of the three. If your percentages are split, Ada rolls a virtual dice with your probability percentages to assign each end user a category when they first load the page. End users then stay in that category until either they clear their cookies, or you change the percentage for any AI Agent to 100%. If you change your percentages in the middle of the rollout (e.g,. increasing an AI Agent’s visibility from 20% to 50% to end users), those new percentages only affect end users that Ada hasn’t already assigned a group.
-
Launch controls don’t redirect test chats. Testing from the Ada dashboard always opens the AI Agent you’re editing, even when its rollout is set to 0% and traffic is directed to a second Agent. On the legacy web embed, a session started with
testModeis never redirected to the second Agent either — if you use the npm package version of Embed2, this requires v1.14.19 or newer. The rollout percentage still governs whether the widget appears, though — below 100% it shows only to the rollout group the browser lands in, and never at 0% — so setrolloutOverrideto1to always show it. -
If the two AI Agents have different customer persistence settings, those settings will apply for each AI Agent.
-
If you’re rolling out multiple AI Agents and use the Zendesk Messaging handoff, you can only use that handoff for one AI Agent at a time. For the second AI Agent, use a non-Zendesk handoff until your transition is complete.
-
The two AI Agents use the same Embed2 script.
-
Both AI Agents use the embed from the AI Agent you put your rollout settings in. This means that any metavariables that would load for your first AI Agent automatically load for your second one as well, and that you can’t set any metavariables to only load for the second AI Agent.
-
If you’re using the npm package version of Embed2, make sure you’re using v1.7.0 or newer.
-
Preview a different AI Agent
If you want to progressively roll out a second AI Agent, you can start by previewing the second AI Agent on your website.
Make sure your AI Agents meet the following criteria:
-
Your current AI Agent is already launched and live on a webpage.
-
In both AI Agents’ allowed websites, at least one domain is common between the two AI Agents so they can load.
-
As a best practice, don’t configure duplicate launch settings in your second AI Agent. If you do, Ada will ignore those settings and follow the settings in your current AI Agent instead.
To preview a different AI Agent:
-
On the Ada dashboard, go to Config > CHANNELS > Chat, then go to the Launch tab.
-
Under Launch controls, in the New Ada subdomain field, enter the subdomain for the AI Agent you want to preview.
If it’s a valid subdomain, a preview section appears.
-
In the preview section, you can enter a URL where your first AI Agent is already embedded, so you can preview what it will look like when your second AI Agent appears on that same page. Then, you can use the buttons to either copy the preview URL or open the page in a new tab.
-
Click Save.
As long as the new AI Agent is set to be shown to 0% of your end users, your AI Agent remembers its subdomain for the future when you’re ready to launch it.
Change rollout percentages
To change rollout percentages:
-
If you’re using these settings to roll out a second AI Agent, make sure your setup meets the criteria for previewing it above.
-
On the Ada dashboard, go to Config > CHANNELS > Chat, then go to the Launch tab.
-
Under Launch controls, enter the percentages for each case:
-
End users who never see a chat button load on your website
-
End users who see your current AI Agent
-
End users who see your second AI Agent
The sum of all of your percentages must be 100% to save your launch settings.
-
-
Click Save.
Website restrictions
Safeguard your AI Agent against attack by malicious parties by authorizing all the domains where you’d like your AI Agent to appear. Your AI Agent will only show for end users if you authorize your website’s domain URL by adding it to your list of allowed websites in Ada.

Add a domain
To add a domain:
-
On the Ada dashboard, go to Config > CHANNELS > Chat, then go to the Launch tab.
-
Beside Allowed websites, click Add domain.
The Add An Authorized Domain window appears.
-
In the Add An Authorized Domain window, in the Domain URL field, enter the domain URL you want to authorize. Use the following formats:
-
Single domain:
https://www.yourdomain.com -
Wildcard URL matching for all subdomains:
https://*.yourdomain.com-
Use the top level domain URL only. Do not include any page paths. If you have many subdomains, but want to include only some of them, you have to add each one individually.
-
Use wildcards for domains with subdomains. The top level domain itself needs to be added separately (e.g.,
https://domain.comneeds to be added separately fromhttps://*.domain.com).
-
-
All domain variants need to added separately.
-
http://www.yourdomain.com -
http://yourdomain.com -
https://www.yourdomain.com -
https://yourdomain.com
-
-
-
Click Add to add the domain URL to the domain list.

Edit a domain
You can edit any domains already in your list.
To edit a domain:
-
On the Ada dashboard, go to Config > CHANNELS > Chat, then go to the Launch tab.
-
Under Domain, click the pencil icon next to the domain entry you want to edit.
-
In the Edit An Authorized Domain window, make your changes to the domain URL in the Domain URL field.
-
Click Save.
The updated domain appears in the domain list.
Remove a domain
To remove a domain:
-
On the Ada dashboard, go to Config > CHANNELS > Chat, then go to the Launch tab.
-
Under Domain, click the trash can icon next to the domain entry you want to delete.
-
In the Confirm Domain Removal window that appears, click Yes, Remove Domain.
This removes the domain from the list. Your AI Agent will no longer launch on that domain.
Troubleshooting
If your AI Agent is embedded on a URL but is not displaying as expected, it is likely that it is being blocked from loading on that site.
To investigate:
-
In Chrome, Firefox, or Safari, right-click any part of the page and select Inspect Element.
-
Access the console from within the inspector tool.
-
On the webpage, click the chat icon to launch the AI Agent.
-
Look for errors in the console. It is likely error messages will indicate that it “violates the Content Security Policy directives.” In other words, that the URL is not included in the AI Agent’s list of allowed websites.
-
Cross-reference your AI Agent’s list of allowed websites with the URL you are testing, to make sure the domain URL was formatted properly when you added it to your AI Agent.
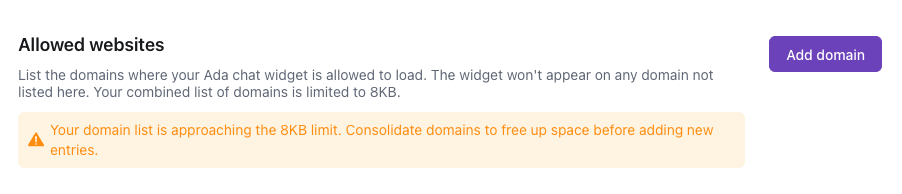
The allowed websites list has a maximum size of 8KB. The following message appears when this limit is reached:
If the current URL exceeds the allowed website limit, the following warning appears instead:
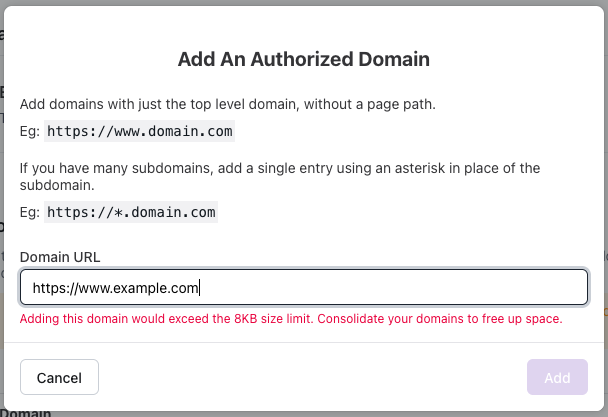
Allowed website lists that exceed the size limit may prevent the chat bubble from loading. To keep the allowed websites list to an appropriate size, it is highly recommended to use wildcard URL matching where possible.
Related features
- Chat onboarding: Get started with Chat.
- Appearance settings: Customize your Chat widget’s look and feel.
- Data controls: Configure persistence and link protocols.
- Installation: Add the Chat widget to your website or app.