

Tool permissions
Control which MCP tools connected assistants can use from Config > PLATFORM > MCP server. These settings apply across MCP clients.
Who can manage access
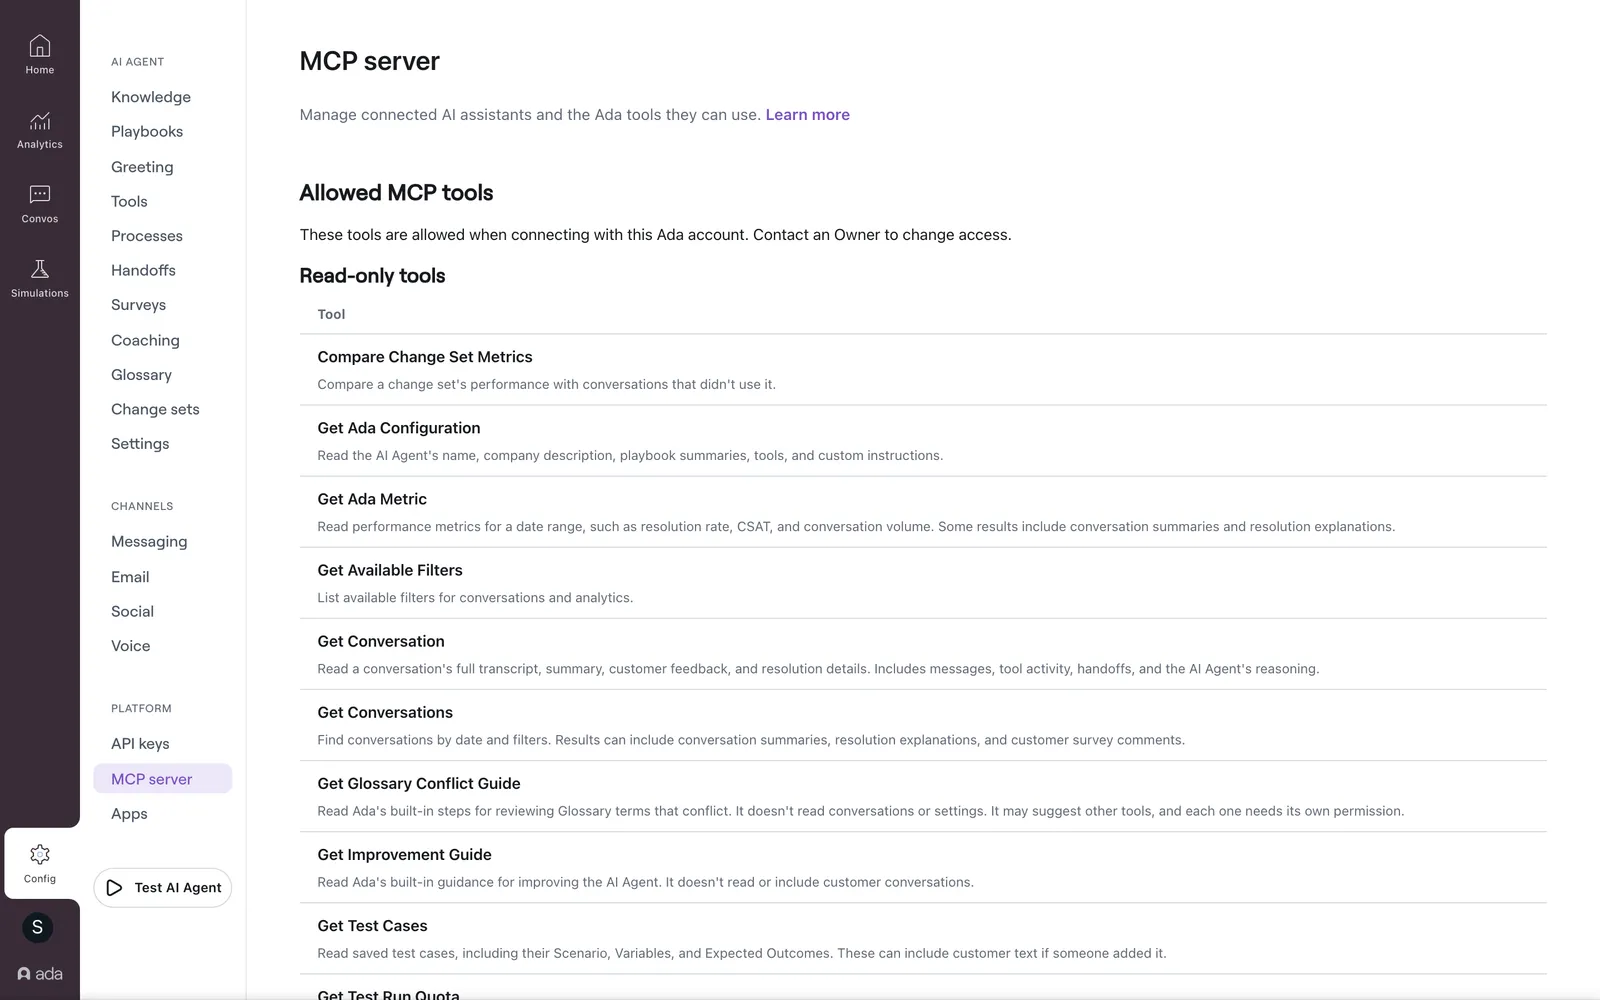
Only Owners can change tool permissions. Owners always follow global settings and cannot be restricted individually.
Members with the Admin role can use read and write tools. Members with the Agent or Read Only role can use read-only tools. An Owner can limit every non-Owner further.
Other members can view their tools under Allowed MCP tools. Contact an Owner to change access.
When individual settings are enabled, only Owners can change another member’s email address. This prevents moving a member’s tool access to someone else.
How permissions work
By default, All tools and Global settings only are selected. Existing connections keep their access until an Owner saves restrictions.
Global settings apply to everyone, including Owners and API keys. Individual settings cannot allow tools blocked globally. Member settings also cannot exceed their dashboard role.
Change global settings
- Go to Config > PLATFORM > MCP server.
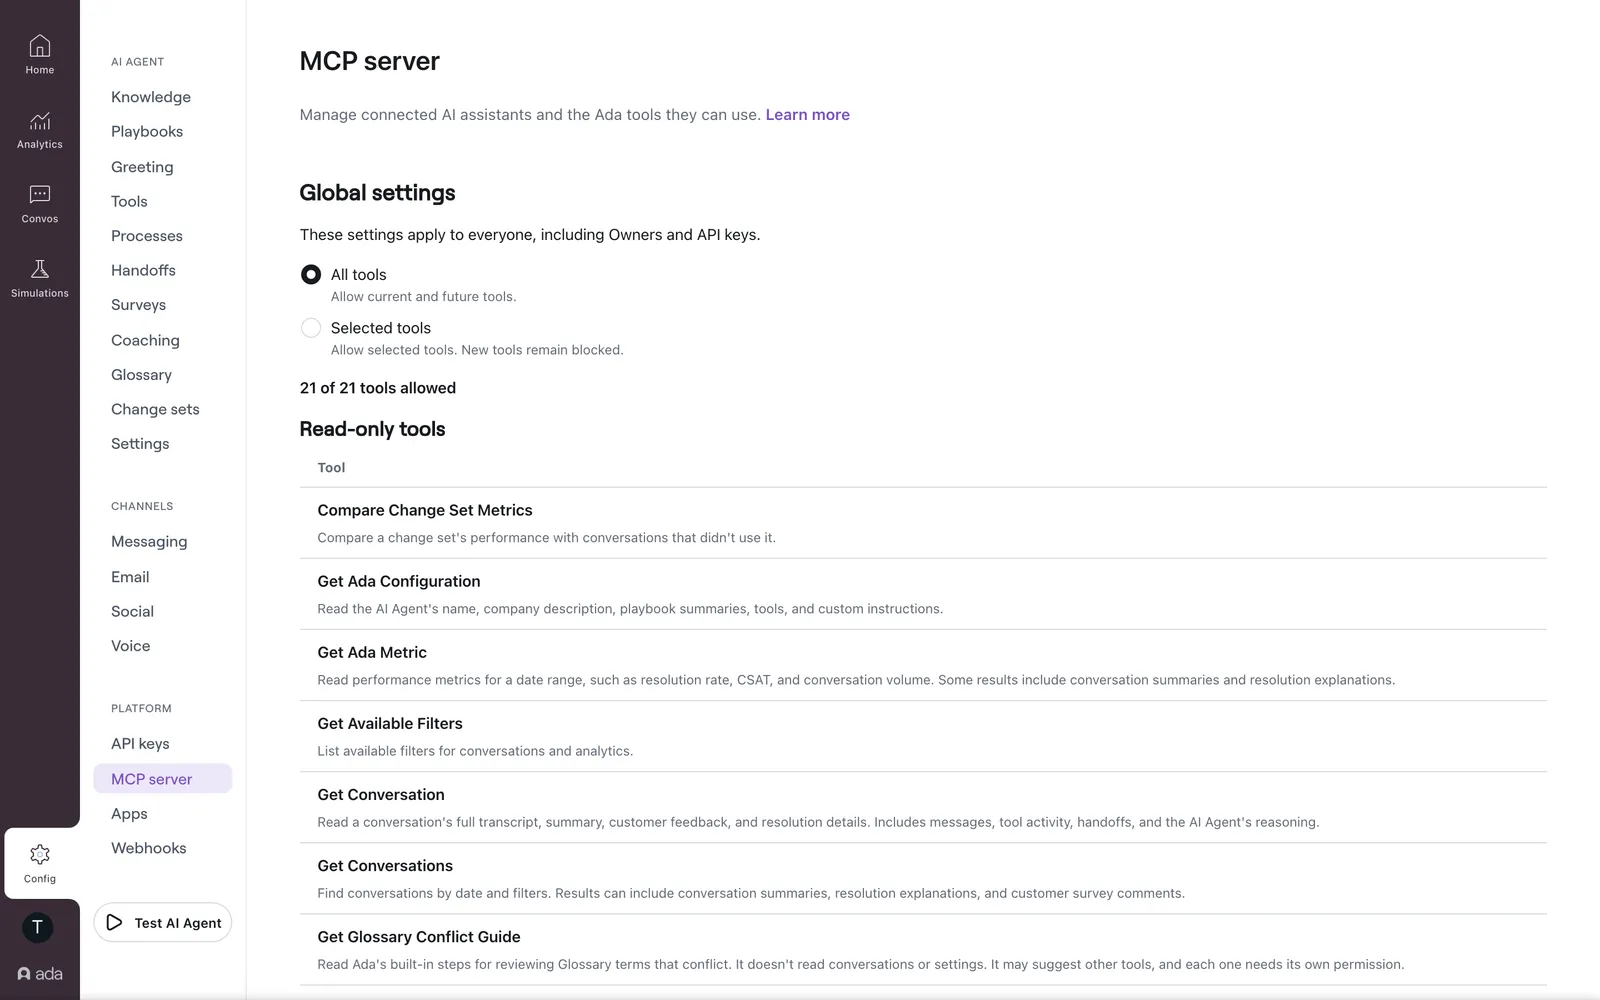
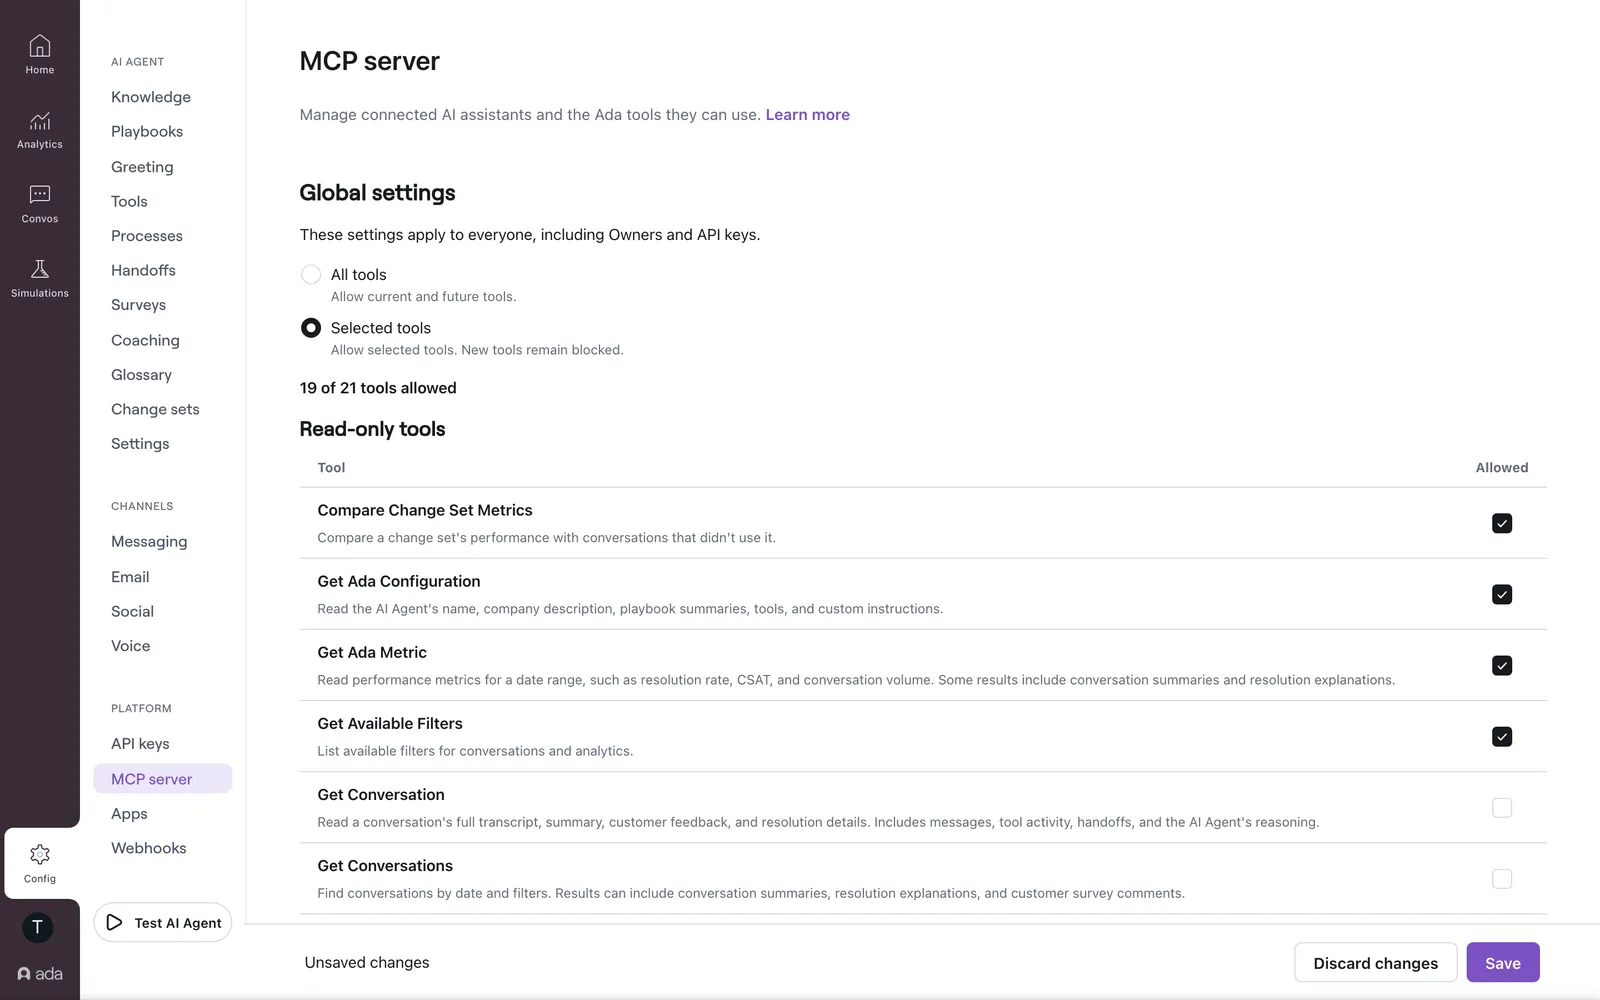
- Under Global settings, choose Selected tools.
- Review the descriptions under Read-only tools and Write tools.
- In the Allowed column, select the check boxes of the tools to allow. Clear the check boxes of the tools to block.
- Click Save in the bottom save bar.
- Review the impact, then click Save in the confirmation.
To allow current and future tools globally, choose All tools and save. The tool list is read-only in this mode.
Global restrictions apply to Owners and existing integrations too. If you clear every check box, the page shows “Saving will block all MCP tools for everyone, including Owners and API-key integrations.” Blocking every tool stops all MCP tool calls. Dashboard access remains available to change the settings.
Enable individual settings
- Under Individual settings, choose Global and individual settings.
- Open Team members or API keys.
- Click Edit settings beside a member or key.
- Clear the check boxes of the tools that should not be allowed.
- Review the Tools allowed counts.
- Click Save. Confirm if prompted.
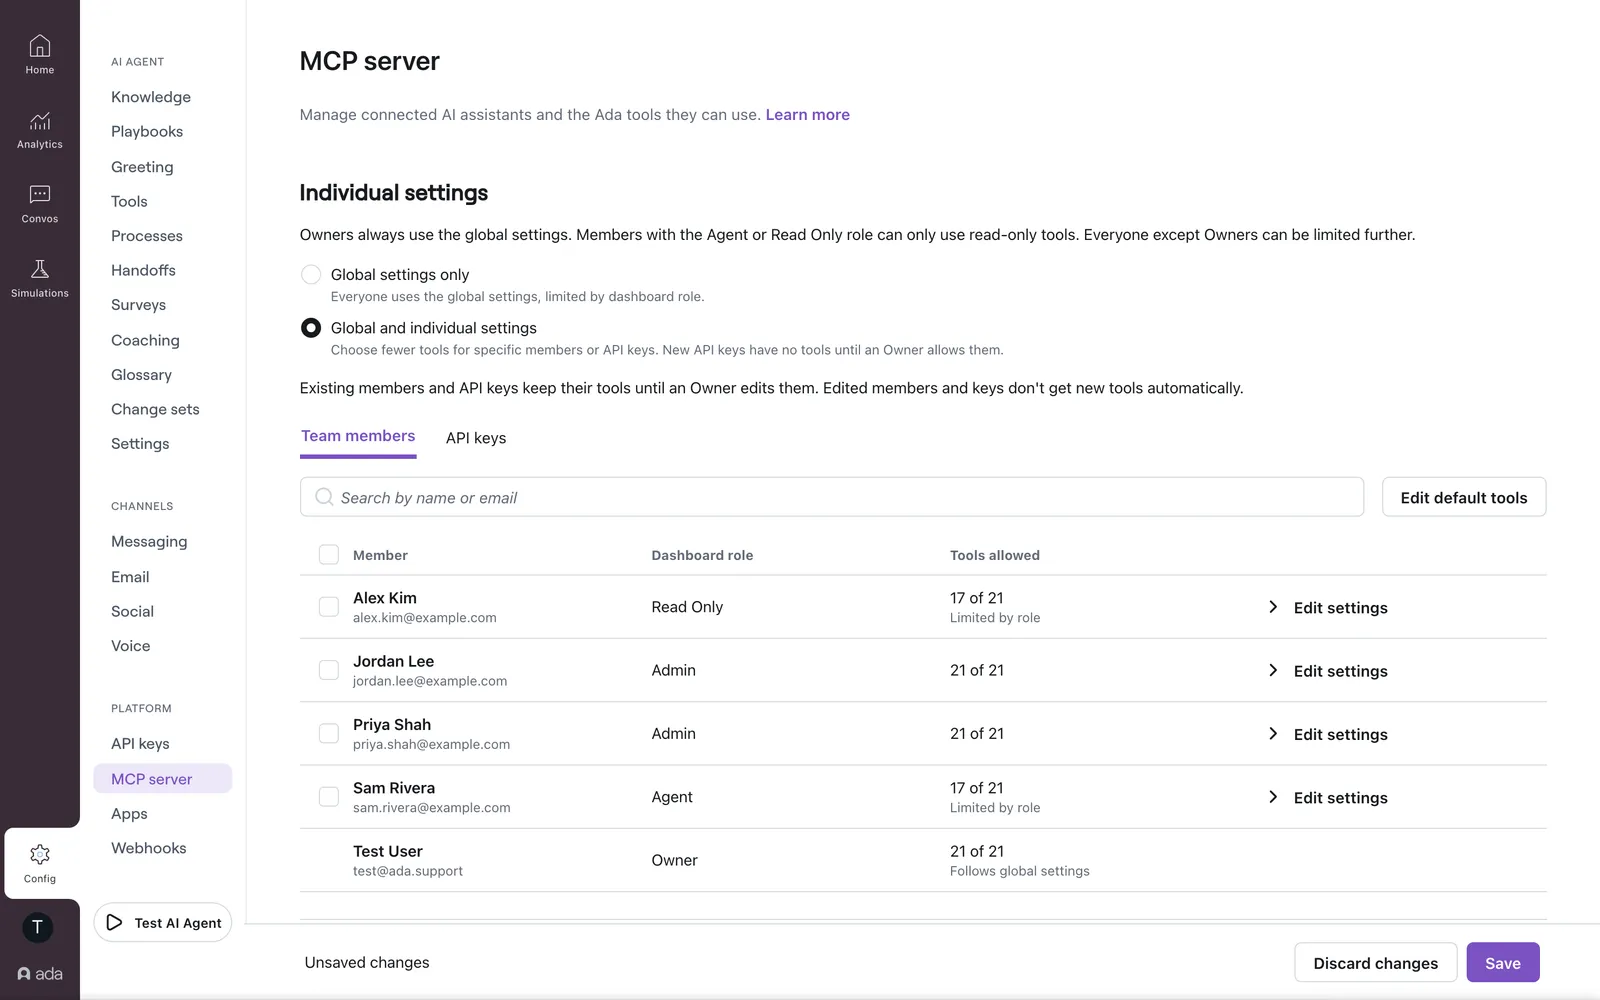
The page saves global, member, and key changes together. Discard changes removes all unsaved edits.
Enabling individual settings for the first time preserves access for existing members and dashboard API keys. New members start with no tools unless an Owner configures a starting selection. Previously saved restrictions apply again when individual settings are re-enabled.
Choose tools for new members
- Open Team members in Individual settings.
- Click Edit default tools beside the search field.
- Choose No tools or Selected tools.
- Select the check boxes of any starting tools, then click Apply changes.
- Click Save on the page. Confirm if prompted.
These defaults apply to members added after saving. Changing them does not affect existing members, even if they have not connected yet. Global settings and dashboard roles still limit access.
Change access in bulk
- Open Team members or API keys.
- Search if needed, then select the check boxes of the members or keys to change. Changing the search clears the selection.
- To include every match on all pages, click Select all. The button shows the number of matches, for example Select all 4.
- Click Edit selected.
- Choose Block tools or Allow tools. In the Selected column, select the check boxes of the tools to change.
- Review the impact, then click Apply changes.
- Click Save on the page. Confirm if prompted.
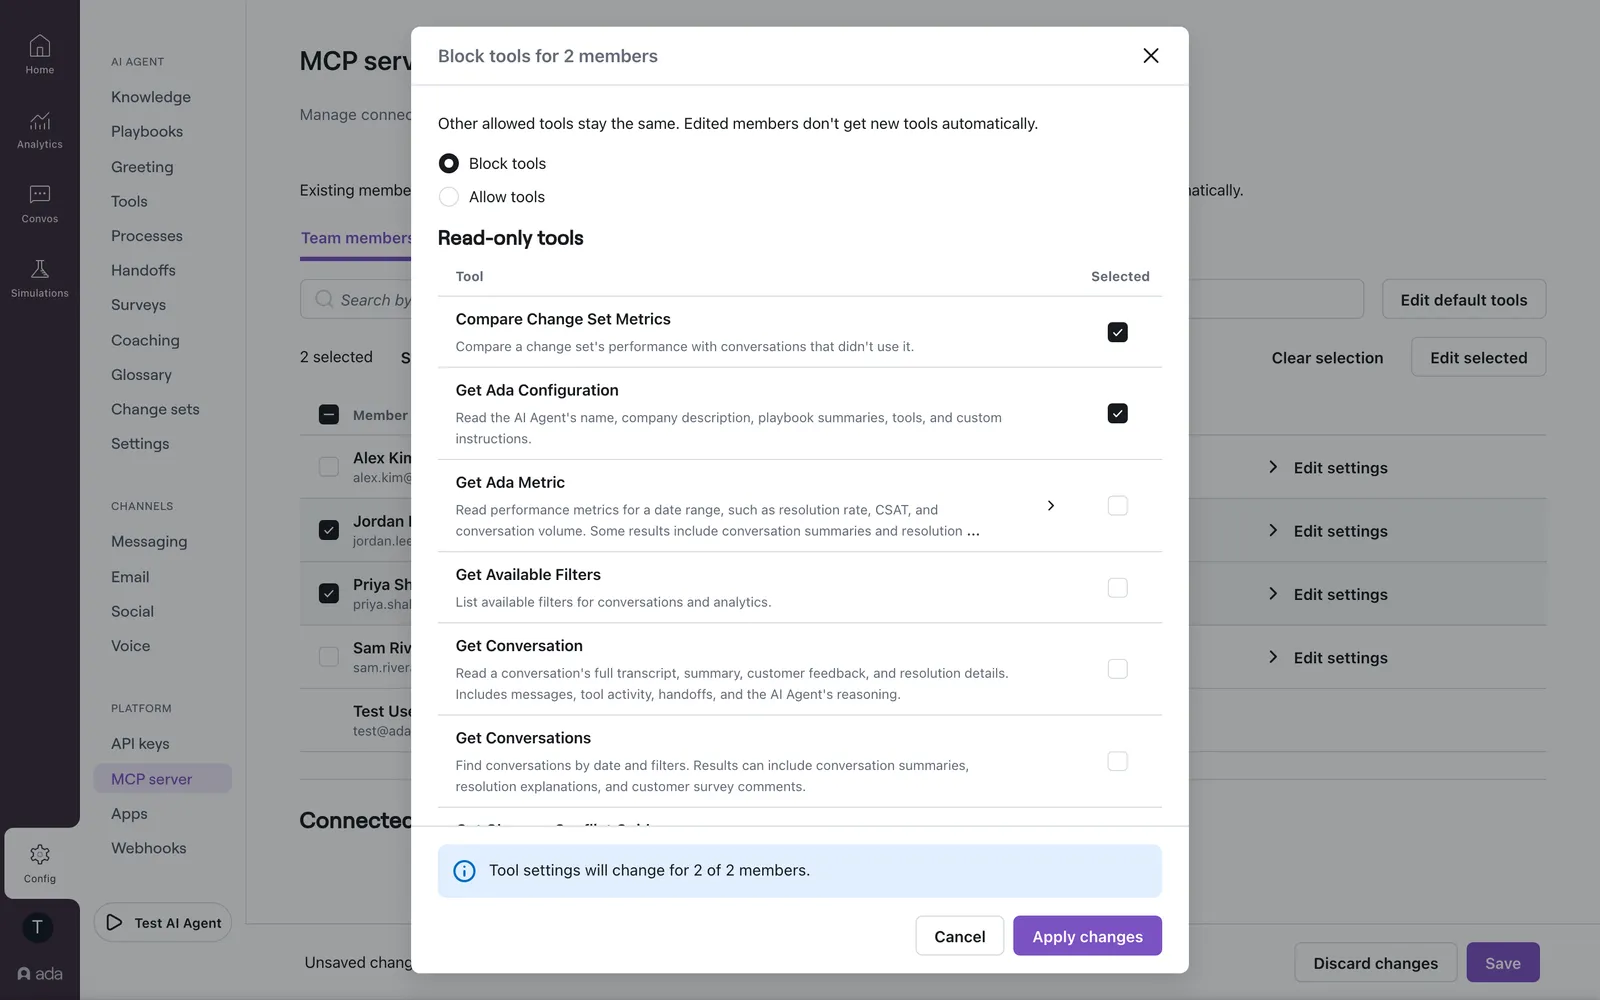
Other allowed tools stay the same. Edited members and keys do not get new tools automatically. Allowing a write tool does not give it to members with the Agent or Read Only role.
Change or remove member access
- Find the member in Team members.
- Click Edit settings.
- Select or clear the check boxes in the Allowed column.
- Click Save. Confirm any reduction in access.
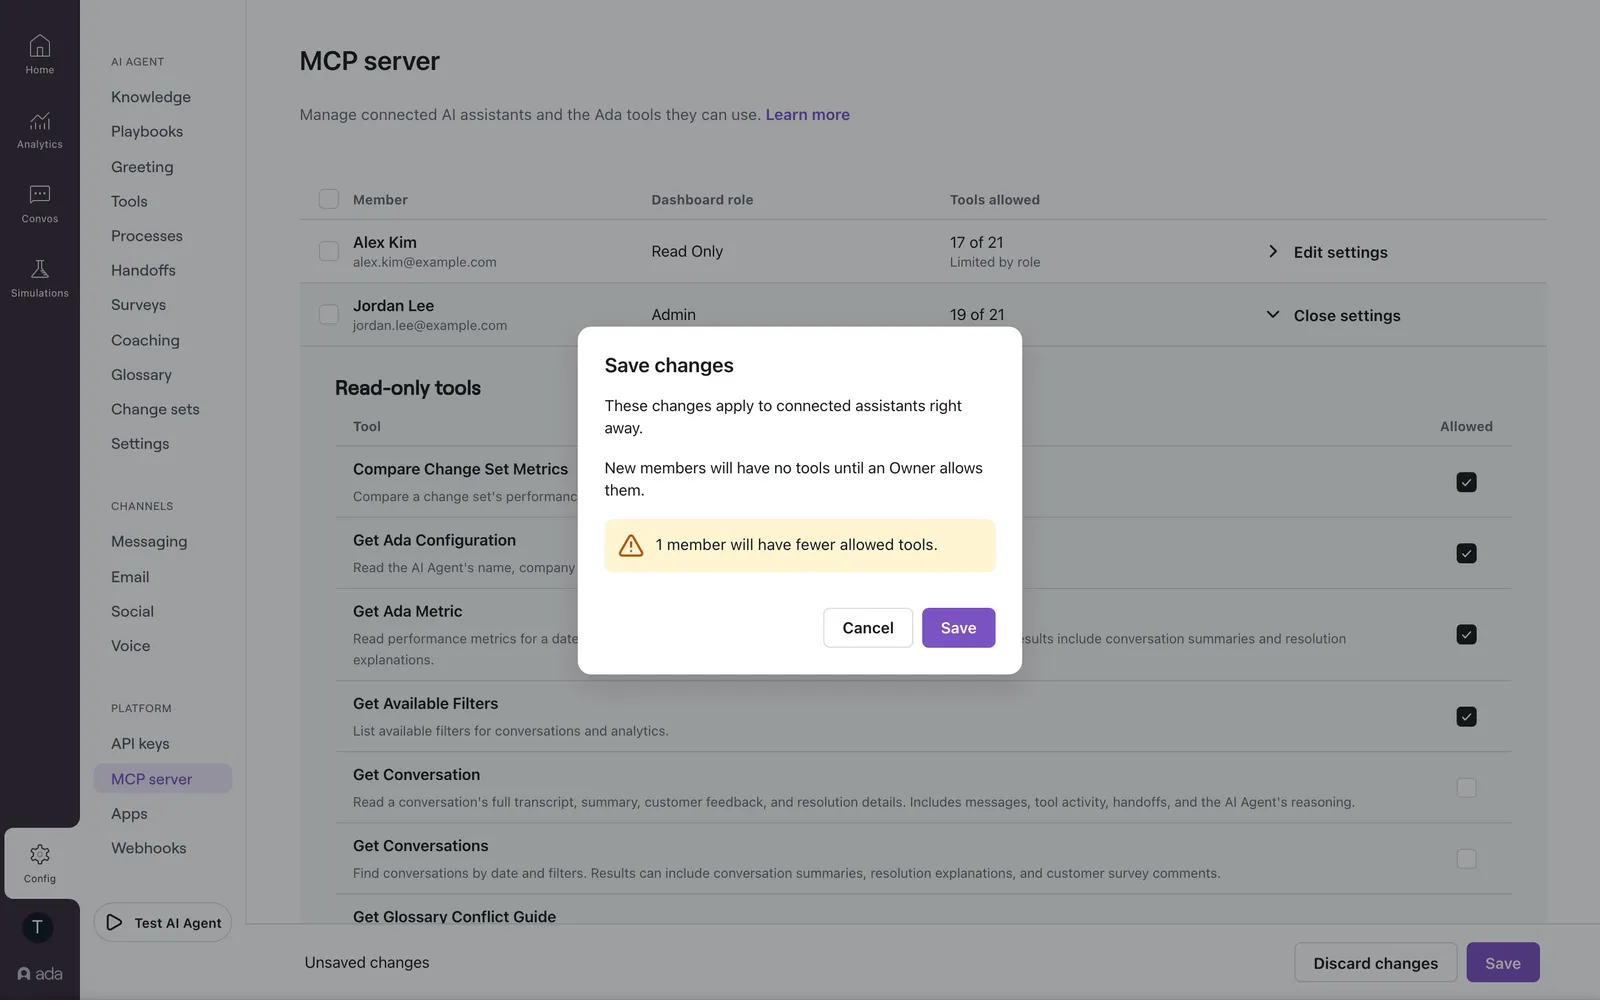
Only tools allowed by global settings and the member’s role appear in the editor. To remove all MCP tool access, clear every check box and save.
Saved changes apply across the member’s OAuth connections.
Manage API key access
- Open API keys in Individual settings.
- Find the key by its name and masked identifier.
- Click Edit settings and select the check boxes of its allowed tools.
- Click Save. Confirm any reduction in access.
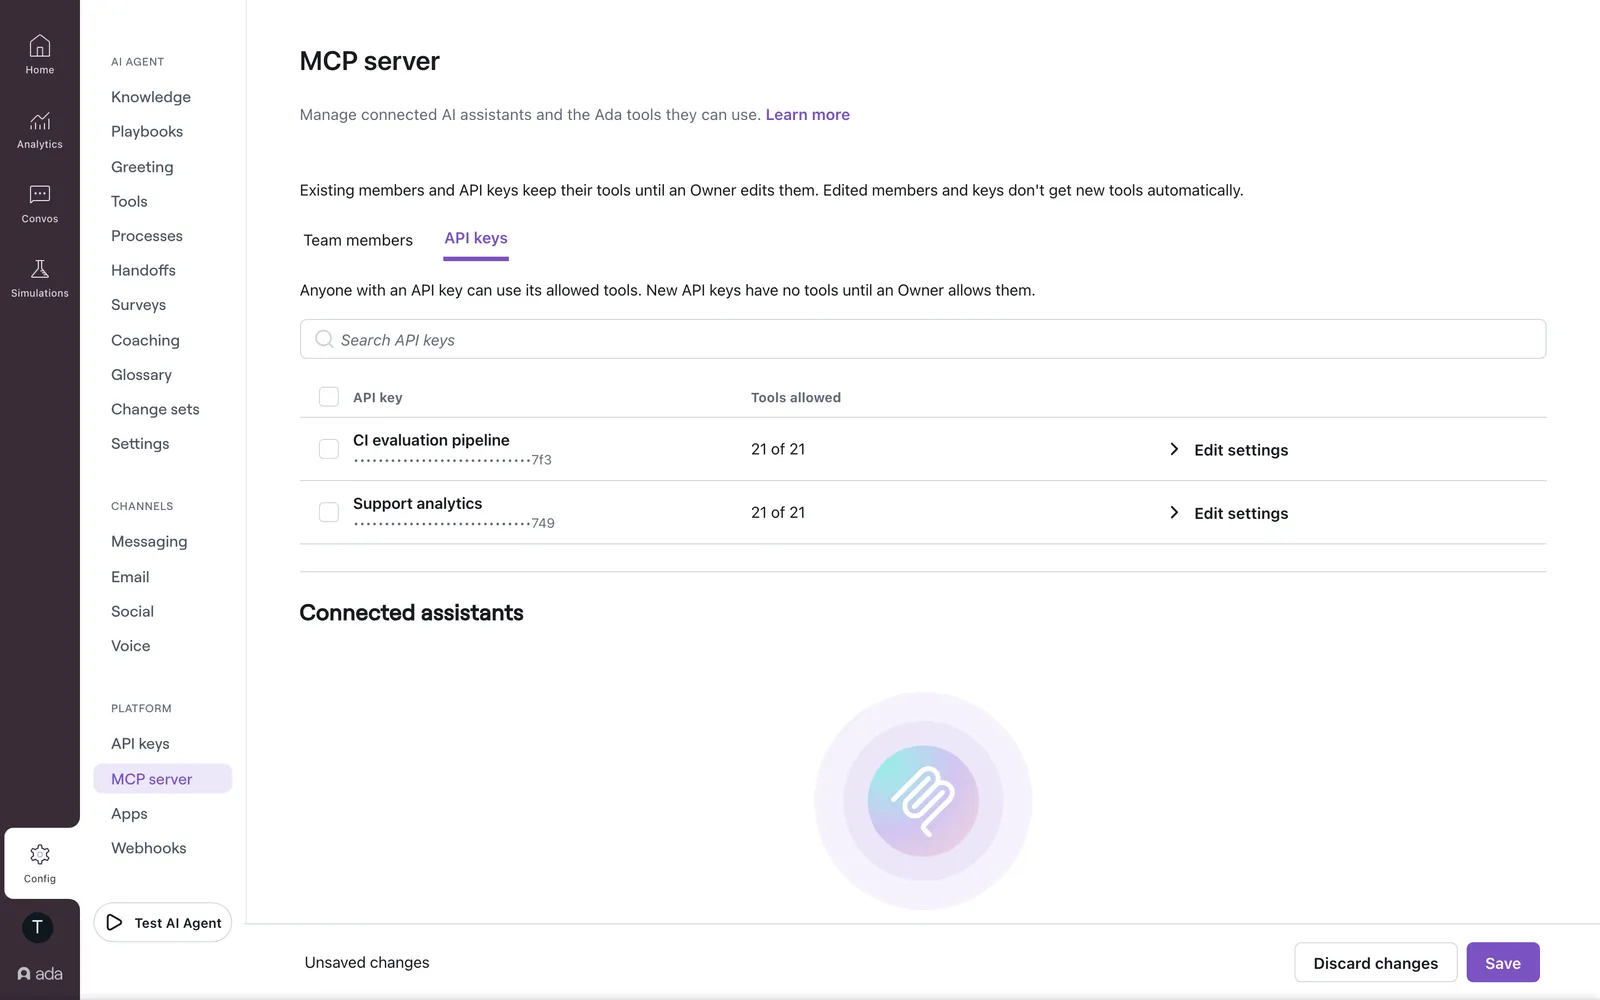
Anyone with the key can use its allowed tools. The key does not inherit the creator’s dashboard role or personal MCP restrictions. Share keys only with people and systems that should have that access.
Create and delete keys in Config > PLATFORM > API keys. Only active dashboard keys that support MCP appear in the permissions table. With individual settings enabled, new and replacement keys have no MCP tools until an Owner allows them. Other Ada APIs are unaffected.
Renaming a key keeps its permissions. To replace a key without interrupting an integration, create the replacement first. Allow its tools, update the integration, then revoke the old key.
To remove a key’s MCP tool access, clear every check box and save. If the save reduces a key’s tools, the confirmation also says “Integrations that use blocked tools may stop working.”
Use global settings only
- Choose Global settings only.
- Click Save.
- Confirm that individual restrictions will no longer apply.
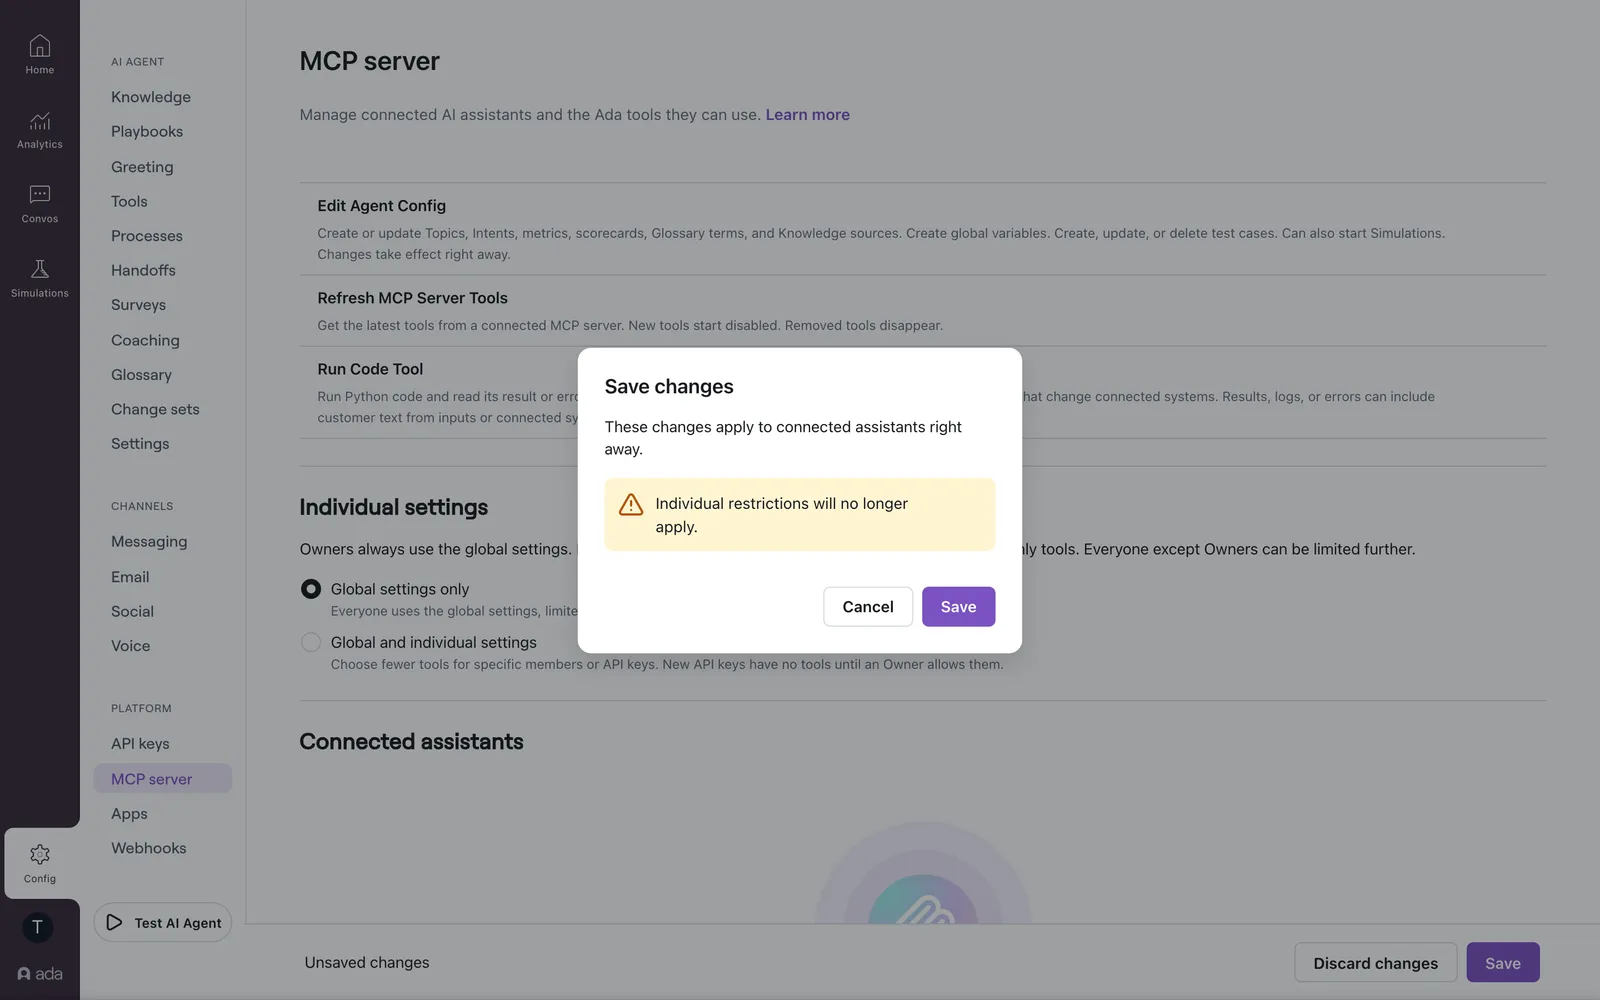
Members return to global settings, limited by their dashboard roles. API keys return to global settings. Saved individual restrictions remain stored and apply again if individual settings are enabled.
When changes take effect
Changes apply to the next tool request, including existing connections.
Tool permissions do not filter free text or detect prompt injection. Blocking conversation tools does not remove every source of end-user text. See Data privacy for text that other tools can return.
To disconnect an assistant, see Managing connections. For missing tools or errors, see Troubleshooting.