Configure and use Zendesk Support handoffs
Ada’s Zendesk Support handoff workflow creates a messaging-like experience within Ada Chat. Customers stay within the bot’s web chat, while Zendesk agents manage interactions directly from the Zendesk ticket view— no Zendesk Messaging needed.
Set up Zendesk Support handoffs
Configuring Zendesk Support handoffs allows conversations to seamlessly transition from Ada’s bot to Zendesk agents, ensuring a smooth customer experience.
Keep your Zendesk Admin Center open while configuring Zendesk Support, as you’ll need it for several key steps. This includes:
- Configuring API credentials
- Installing the Zendesk app
- Setting up webhooks
- Creating ticket triggers
Follow the steps below to ensure proper ticket creation and communication between Ada and Zendesk.
Step 1: Enable and configure Zendesk Support in Ada
To integrate Zendesk Support with your bot, start by enabling the handoff integration in Ada. This involves setting up API credentials, configuring authentication, and linking your Zendesk instance. Once enabled, your bot will be able to escalate inquiries to Zendesk Support.
Enable Zendesk Support in Ada
-
On the Ada dashboard, go to Settings > Integrations > Handoff Integrations.
-
On the Zendesk Support card, click Configure.
The Configure Zendesk Support view opens.
Create OAuth Credentials in Zendesk
-
In the Zendesk Admin Center for your instance, go to Apps and integrations > Zendesk API.
-
On the Zendesk API page, create an OAuth client.
a. On the OAuth Clients tab, click Add OAuth client.
b. In the Create a new OAuth client view, configure the following fields:- Client name: Specify the OAuth client name that will be visible to your users. For example,
My OAuth Client. - The view name refreshes, showing the newly specified Client name.
- Description: Provide a description of the OAuth client. This field is optional.
- Unique identifier: Type the following value:
ada_zendesk_support.You must use this exact text.
- Client kind: Set it to Confidential.
c. In the OAuth client view, click Save, then click OK.
- Client name: Specify the OAuth client name that will be visible to your users. For example,
Generate an API token
- On the Zendesk API page, on the Settings tab, click Add API token.
- In the Create a new token view, complete the following steps:
a. In the API token description field, enter a brief description of the API token. For example,My API token.
b. The view name refreshes, showing the newly specified API token description.
c. Copy the contents of the API token field. You will need to provide this value to Ada in a later step.
Enter Zendesk Credentials in Ada
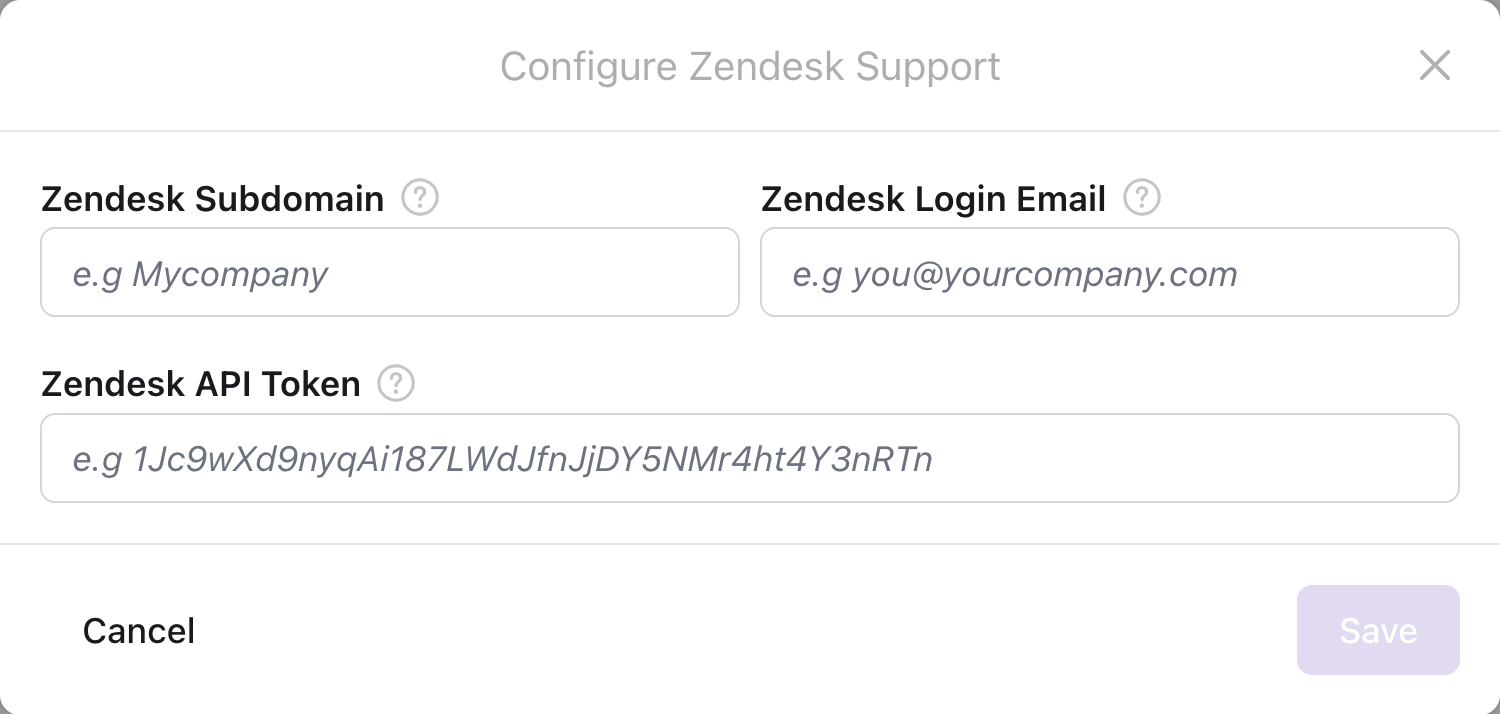
- In Ada, in the Configure Zendesk Support view, configure the following fields:
- Zendesk Subdomain: Type the subdomain of your Zendesk instance.
- Zendesk Login Email: Provide the email used with the API token.
- Zendesk API Token: Paste the contents copied from the Zendesk API token field.
- Click Save.
The Configure Zendesk Support view closes.
On the Integrations tab, the toggle next to Zendesk Support appears enabled.
Step 2: Install the Zendesk app
-
Download the Zendesk app.
a. In Ada, still on the Integrations tab, in the Zendesk Support configuration, click Configure.
b. In the Configure Zendesk Support view, click Download Zendesk App.
This section was not available when you were adding the Zendesk subdomain, email, and API token.
c. Save the Zendesk app to a desired location.
-
In Zendesk, go to Apps and integrations > Zendesk Support apps.
-
On the My Apps page, on the Private Apps tab, in the top-right corner, click Upload private app.
-
On the Upload App page that opens, complete the following steps:
a. In the App Name field, type the name of the Zendesk app downloaded from Ada. For example,
Ada.b. Click Choose File and select the file containing the downloaded Zendesk app.
c. Click Upload.
d. In the Creating a new App view that appears, click Upload.
-
In the Zendesk app form that appears, provide the following details:
- ada_subdomain: Type your Ada’s bot handle.
- ada_cluster: Specify your Ada cluster. A cluster represents a specific environment used for different stages of agent deployment. In your bot, the cluster is identified by the segment of the URL that follows the bot handle. For example, in the URL
https://{ada_subdomain}.ada.support,ada.supportrepresents the cluster.
When done, click Install.
-
On the My Apps page, on the Currently Installed tab, confirm that your app appears in the Enabled apps section.
Step 3: Configure the Zendesk Support app
- In Zendesk, go to Apps and integrations > Apps > Channel apps.
- On the Channel integrations page that appears, click the Zendesk Support integration.
- On the ada_zendesk_support integration page that appears, on the Accounts tab, click Add account.
- In Ada, in the Configure Zendesk Support view, copy the contents of the Ada Configuration Token field.
- In Zendesk, in the Add account view, in the Client Token field, paste the Ada Configuration Token from Ada. Then, click Save.
Step 4: Configure webhooks and ticket triggers
To ensure smooth handoffs between your bot and Zendesk Support, set up webhooks and ticket triggers. Webhooks notify Ada when a ticket status changes, enabling automated updates, while triggers define the conditions under which handoffs are completed.
Create a webhook in Zendesk
- In Zendesk, go to Apps and integrations > Actions and webhooks > Webhooks.
- On the Webhooks page, in the top-right corner, click Create webhook.
- On the Create webhook page, under Select a way to connect, select Trigger or automation.
- Under Add details, in the Name field, specify the name for your webhook. For example,
End Handoff Webhook. - In the Endpoint URL field, type your full bot’s URL, followed by
/api/zendesk_support/end_handoff. For example:https://my-bot.ada.support/api/zendesk_support/end_handoff. - Ensure these fields are configured as follows:
- Request method:
POST - Request format:
JSON
- Request method:
- Set the Authentication field to Bearer token .
- In Ada, in the Configure Zendesk Support view, copy the contents of the Ada Configuration Token field.
- In Zendesk, under Add details, in the Token field, paste the Ada Configuration Token from Ada.
- Save your changes.
Link the webhook to a ticket trigger
-
In Zendesk, go to Objects and rules > Business rules > Triggers.
-
On the Triggers page, on the Ticket tab, click Create trigger.
-
On the Create ticket trigger page, configure the following fields:
- Trigger name: Specify the trigger name. For example,
Ticket Resolution Trigger. - Trigger category: Set this based on how you want to categorize your triggers. For example, Notifications.
- Trigger name: Specify the trigger name. For example,
-
Under Conditions, set up a rule using either the Ticket Status category or Status, whichever applies. For example:
- Category:
Ticket > Status - Operator:
Changed to - Value:
Solved
This causes the trigger to activate the newly created webhook each time a ticket is solved.
- Category:
-
Under Actions, create an action with the following parameters:
- Category:
Notify by > Active webhook - Value:
End Handoff Webhook
- Category:
-
Also under Actions, in the text field, type the following
POSTcode: -
Save your changes and create the trigger.
Next steps
Now that you’ve set up a Zendesk Support handoff in your bot, it’s time to refine the experience for both agents and customers. The following sections will guide you through configuring the Zendesk Support block, understanding the agent workflow, and ensuring a seamless transition for customers. Learn how to customize the handoff response, structure ticket details, and enhance the agent experience. Additionally, see how the bot maintains a smooth, uninterrupted conversation flow for customers as they transition between AI-driven and human-assisted support.
Configure the Zendesk Support block
Once you’ve configured Zendesk Support handoff in your bot, the next step is to add the Zendesk Support block to your handoff response.
With the Zendesk Support block, you can:
- Specify a standby message, to tell your customers when to expect a response
- Select a Zendesk Group
- Set the ticket subject
- Add conversation details to Zendesk fields
- Use ticket tags to categorize conversations and activate rules
- Provide a response if an error is encountered
To configure a Zendesk Support block:
- On the Ada dashboard, drag and drop the Zendesk Support block into your handoff Answer.
- In the Zendesk Support block, configure the fields that are required to complete your handoff:
- Standby Message: An automated response that informs users when to expect a reply.
- Group: A collection of agents organized by role or expertise to optimize ticket routing and management.
- Subject: The subject assigned to the ticket upon creation.
- Zendesk Fields: Ticket fields that streamline workflow and routing, including subject, description, tags, priority, groups, and custom fields.
- Tags: Keywords applied to tickets based on detected topics or intent, helping with categorization, routing, and automation. You can use both variables and plain text for tags.
- Error Fallback: An automated response triggered if an error occurs while attempting to trigger the handoff, acknowledging the issue and guiding users on next steps.
Agent experience
When a handoff to a human agent occurs through Ada’s bot, a Zendesk ticket is created, containing a full transcript of the conversation. The Zendesk agent continues the chat directly from the Zendesk ticket view. Once the issue is resolved and the ticket is marked as resolved, a notification is sent to the customer via the bot window, indicating that the conversation has ended.
End user experience
For the end user, the transition is seamless—the only noticeable change is who they are chatting with. Conversations with both AI and human agents take place within Ada’s bot web chat. If the user ends the chat, a notification alerts the agent, who can then close the ticket.
Note that Zendesk does not support typing indicators for this type of handoff.