Save content in variables using the Set Variable block
Overview
The Set Variable Block allows you to assign values to your variables, build creative flows, and pass relevant information about the chatter’s conversation to your agents. With the Set Variable Block, you can work with variables dynamically, such as saving a variable with a new value or creating new variables entirely and providing them with values.
Here are some sample use cases of the Set Variable Block:
-
{variable} = {basic}
In an Answer flow that requires the chatter speak with an agent, you can use the Set Variable Block to save a text or number variable with specific text content. This newly saved text content can subsequently be used by your interactive voice response (IVR) or live chat systems to route chatters to the appropriate queues and provide your agents with additional context of the chatter’s conversation.
You can set a text variable with a number value or a number type variable; however, please note that the value will be saved with a decimal point.
-
{variable} = {variable}
Save a global variable with the content of a metavariable in order for it to be passed to Zendesk using the Zendesk Ticketing Block.
-
{variable} = {true/false}
Save a global yes or no variable with a True or False value to guide your chatters to specific Answers. For example, imagine that you have an order tracking flow with multiple Capture blocks. If your chatters keep clicking the “No thanks” or “Never mind” quick reply buttons to exit the flow, it might mean they’re frustrated that they can’t track their orders. You can set a “from_order_tracking” global boolean variable to True at the start of the order tracking flow, and use a Conditional block in the Cancel Capture Answer to redirect chatter to a second (hidden) Order Tracking Answer flow.
-
{variable} = null
You might have chatters returning from past conversations, during which you might have collected data like order numbers that won’t be relevant for the current conversation. To start with a clean slate, you can set the order number variable to null in your Greeting Answer. Later in the conversation, because that variable doesn’t have an order, your bot will know it needs to ask for an order number so it’s serving relevant information to the chatter.
Use the Set Variable block
In the Answers View, drag and drop a Set Variable Block from the block drawer into an Answer. The Set Variable Block can be inserted directly into an Answer, or it can be nested within Scheduled Blocks or Conditional Blocks.
Under Variable, select a variable to save the value in, or click Make New Variable to create a new one.
You can’t select metavariables, which your bot sets automatically, or variables that contain list responses.
If this variable already has a value assigned to it at this point in the conversation, this block will overwrite the old value. If you created a new variable, follow these steps to finish creating it:
- If you created a new variable, enter a Name for it that describes the data it will contain.
- Under Availability, select either Only this Answer to limit the variable’s use to the current Answer, or All Answers to make the variable available throughout your bot.
- Under Type, select the type of information the variable should store, so your bot can help validate chatter responses to fit it.
- Click Save. Your bot saves your new variable.
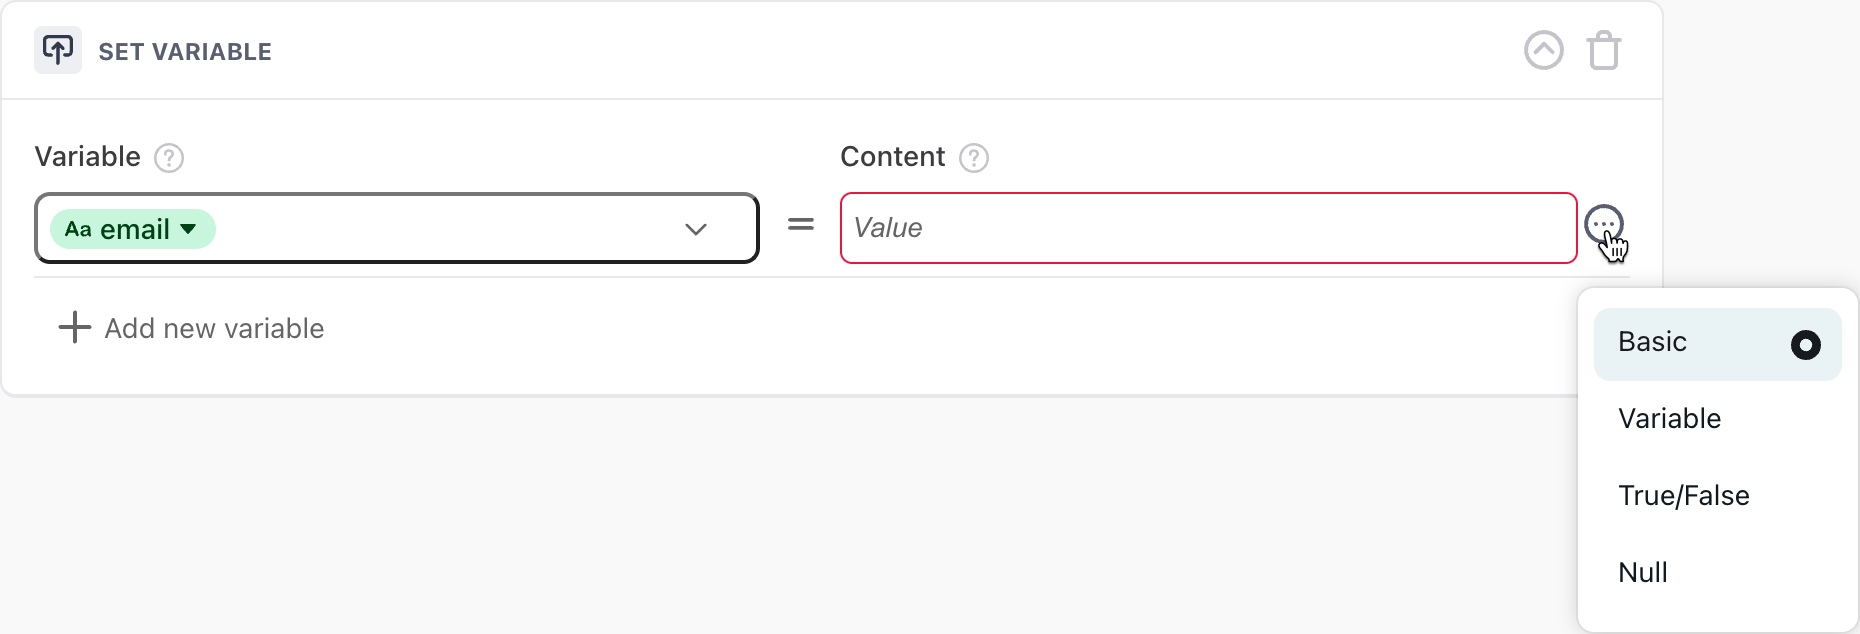
Under Content, beside the dropdown list, click the More Options icon
 and select a variable type:
Basic: Save a static text value that you add manually into the variable.
Variable: Save the content of another existing variable into this variable. For example, you can save the value of an existing metavariable into this variable.
For security reasons, you can’t save a variable with the value of an authentication variable.
- True/False: Save either a positive or negative response in the variable.
- Null: Clear any previously set values from the variable.
Under Content, enter or select a value to save in the variable. The options you have depend on the variable type you selected, or are absent if you selected Null.
If required, click Add new variable to add additional variables to set at the same time.
If the block contains more than five variables, it will be collapsed by default the next time you view the Answer, so you can scroll through the Answer’s content more easily. To expand the block and view all of the variables, click the arrow icon next to the trash can icon in the upper-right corner of the block.