Serve time-specific content using the Scheduled block
Serve time-specific content using the Scheduled block
Overview
The Scheduled block allows you to set days of the week and time ranges for your bot to deliver different responses.
For example, your bot can offer to hand chatters off to a human agent when agents are scheduled to be available, or offer to send an email request when agents aren’t available.
Create a schedule
Before you start using the Scheduled block, you need to create a schedule so your bot knows when to deliver different responses.
-
On the Ada dashboard, click Settings, then click the Schedules tab. The Schedules page displays.
-
Click New Schedule. The New Recurring Schedule window opens.
-
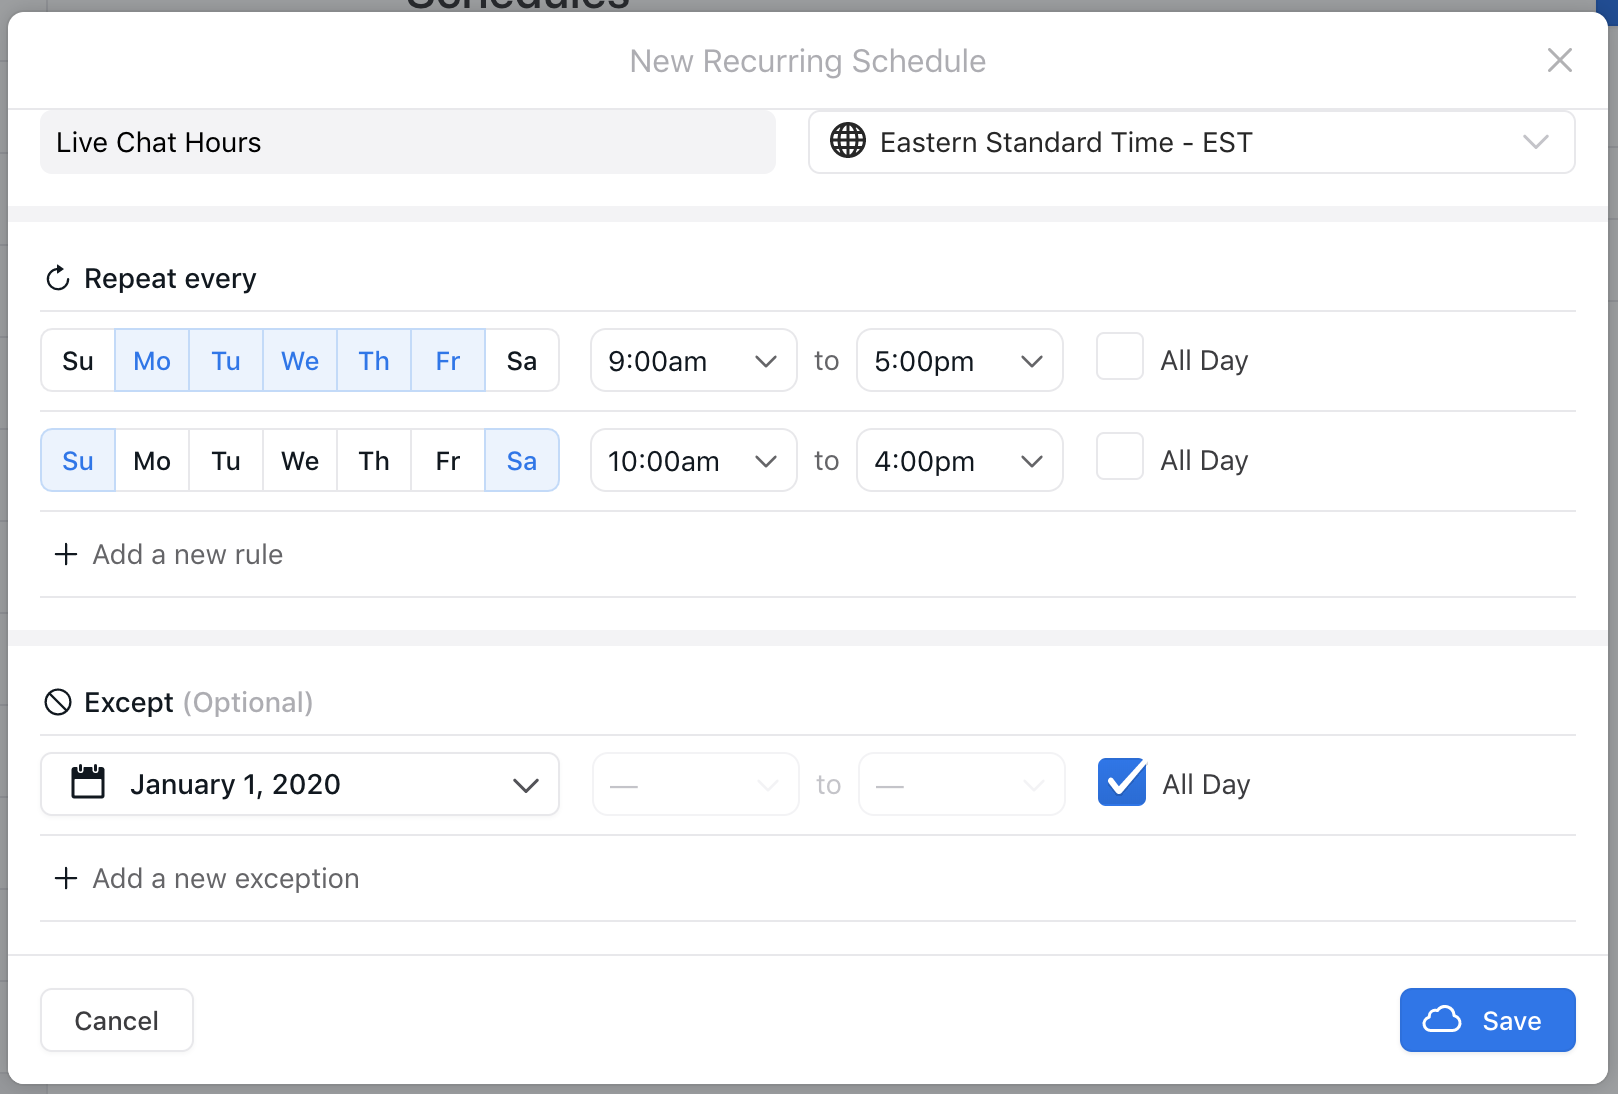
In the New Recurring Schedule window, configure the following settings for your schedule:
- Under Schedule Name, provide a unique name for your schedule.
- Under Timezone, select your time zone.
- Under Repeat every, select the days of the week for your schedule to be active. Then, for the days you selected, select either a window of time or click All Day to make the schedule active for the entire 24-hour period.
If required, click Add a new rule to add additional days and times.
- Optionally, under Except, you can add exceptions to your regular
schedule for events like holidays.
For example, if your regular hours are 9 a.m. to 5 p.m., but on December 10 your hours are 9 a.m. to 1 p.m., create an exception for December 10 from 1 p.m. to 5 p.m., during which you can set handoffs to be unavailable.
If required, click Add a new exception to add additional exceptions.
-
Click Save. Your schedule is now available for selection in the Scheduled block.
Add the Scheduled block to an Answer
- On the Ada dashboard, go to Build > Answers, then open the Answer you want to put scheduled content into.
- Drag and drop the Scheduled block from the block drawer into your Answer.
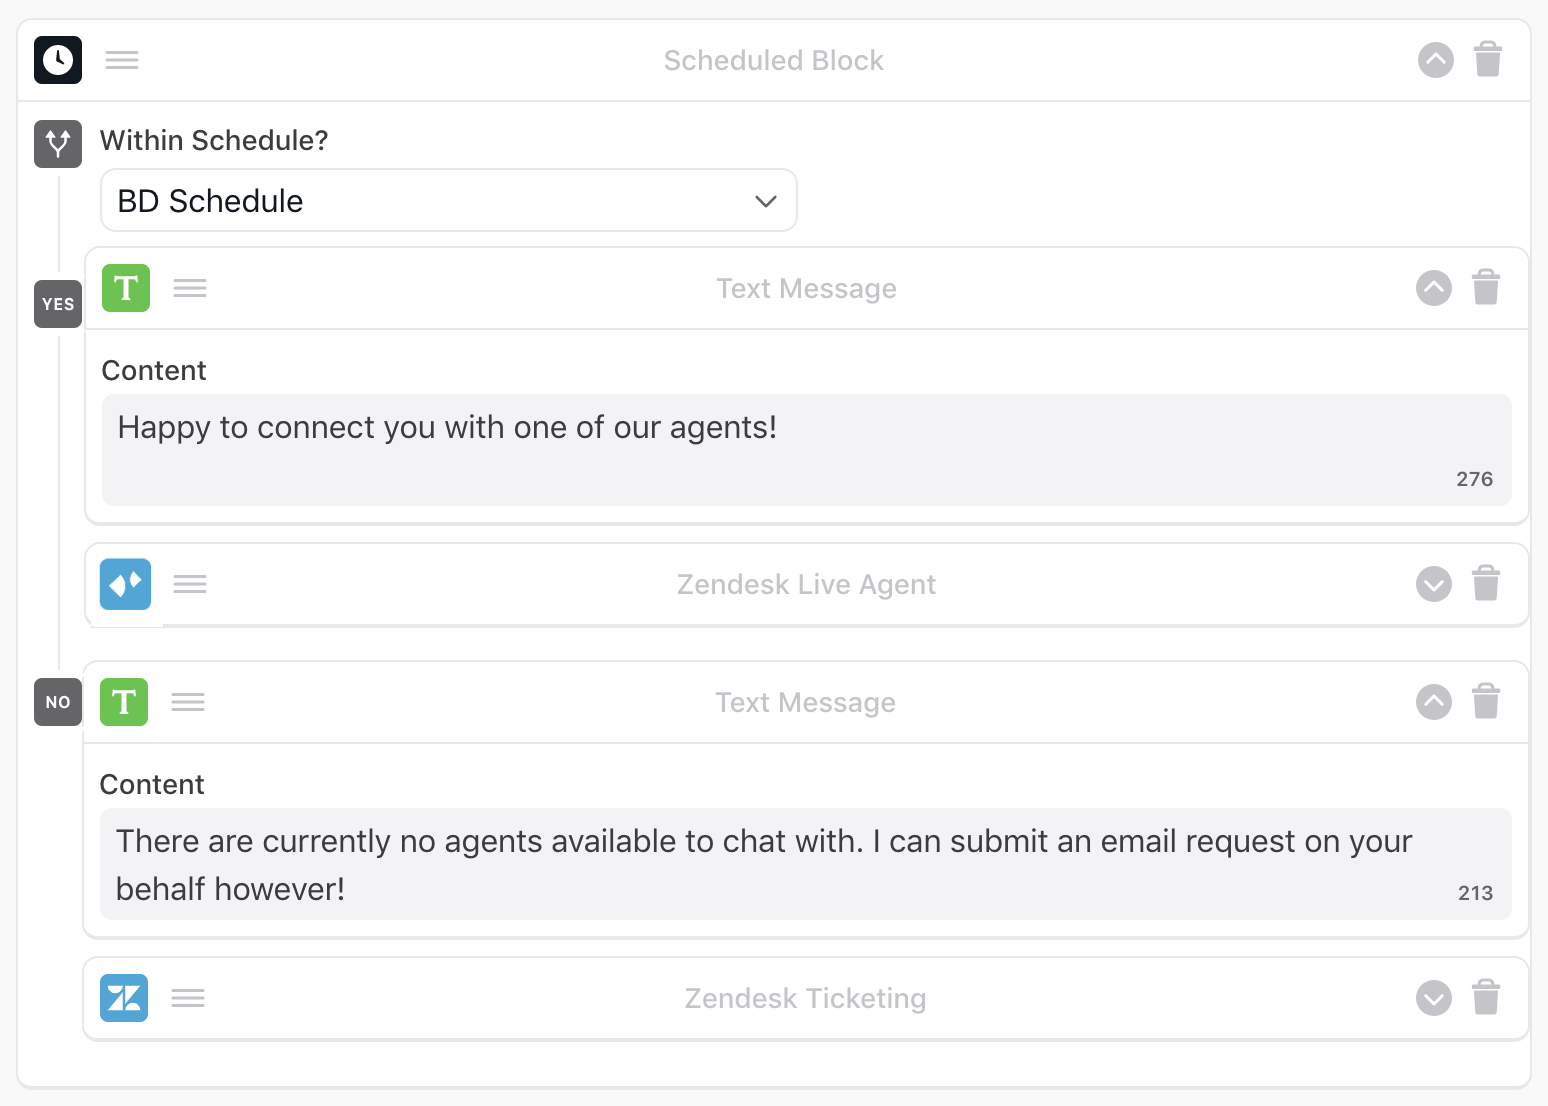
- Under Within Schedule?, select the schedule you want your bot to follow.
Drag and drop blocks into both the Yes and No fields, and add content to them as required.
- If the chatter’s question occurs within the date and time range, your bot identifies the current state as Yes, and serves the corresponding block content.
- If the chatter’s question occurs outside the date and time range, your bot identifies the current state as No, and serves the corresponding block content.
- Make sure you have content in both the Yes and No fields, or else you won’t be able to save your Answer.
- You can’t nest Conditional blocks inside Scheduled blocks.
- Click Save. Your bot can now serve custom content based on your schedule.