For AI agents: a documentation index is available at the root level at /llms.txt and /llms-full.txt. Append /llms.txt to any URL for a page-level index, or .md for the markdown version of any page.
Login
HomeDocs
HomeDocs
    • Work with scripted bots
    • Before you begin
    • Build and maintain your bot
      • Work with blocks and apps
      • Train and manage Answers
      • Create conversations
      • Personalize conversations
      • Change your bot's look and feel
      • Test your bot
      • Manage your bot and your team
        • Manage users and permissions
        • Manage your user profile
        • Set up single sign-on (SSO) for your bot
      • Understand the settings chatters can control
      • Create phone conversations with Voice
    • Integrate Ada with other tools
    • Use Ada with your website
    • Measure success
Login
LogoLogo
On this page
  • Add a user
  • Delete a user
  • Understand user permissions
Build and maintain your botManage your bot and your team

Manage users and permissions

Previous

Manage your user profile

Next
Built with

Add a user

  1. On the Ada dashboard, go to Settings > Team.

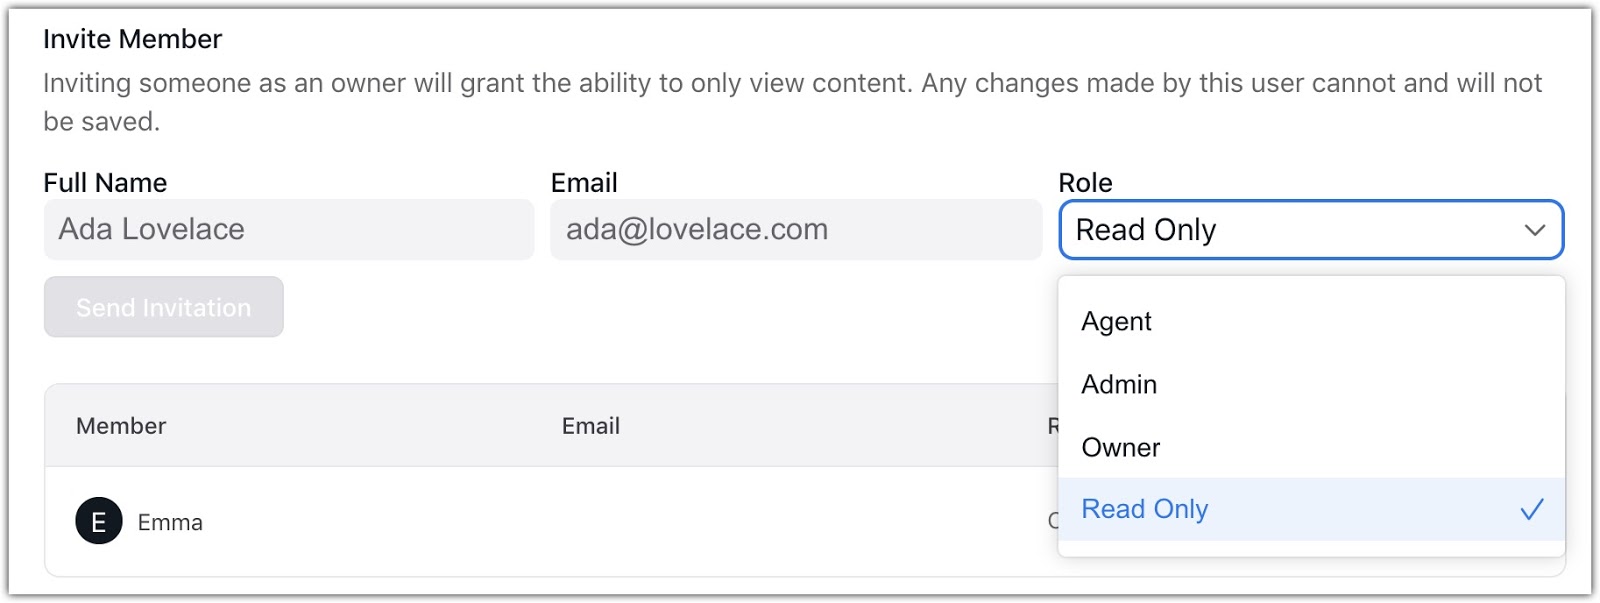
  2. Under Invite Member, enter your team member’s name and email address.

    You must enter a business email address. Domains like gmail.com or outlook.com are not accepted.

  3. In the Role dropdown list, select a permission level for the user.

  4. If your bot has SSO enabled, in the Login Type, choose whether the user logs in using a password or with SSO. Each user can use only one login method. For more information, see Set up single sign-on (SSO) for your bot.

  5. Click Send Invitation. Your bot sends your team member an automated invitation email. The email includes a signup link that expires after 24 hours; afterwards, they can set their password using the “Forgot Your Password?” link on the login page.

    The new user appears in your list of team members.

If your organization has multiple bots, you must add users separately to each bot. Access to one bot doesn’t allow users to log into another or access its data.

Delete a user

  1. On the Ada dashboard, go to Settings > Team.

  2. In the list of users, click the Remove user button . In the confirmation message that appears, click OK. The user’s name is removed from your list of team members.

Understand user permissions

Users in the Ada dashboard can have different permissions levels according to the type of access they need within the Dashboard. The different roles that a user can have are Owner, Admin, Agent, and Read Only:

  • Owners have complete administrative access.

  • Admins have complete administrative access except for editing Owner team members.

  • Agents only have permissions to edit content in Ada.

  • Read Only access provides access to view, but not edit, content in Ada.

ActionOwnerAdminAgentRead Only

Answers

Edit Answers

✔

✔

✔

✘

View Answers

✔

✔

✔

✔

Questions

Train Questions

✔

✔

✔

✘

View Questions

✔

✔

✔

✔

Conversations

View Conversations

✔

✔

✔

✔

Analytics

View Analytics

✔

✔

✔

✔

Settings

Customize Bot Colors

✔

✔

✘

✘

Customize Bot Names

✔

✔

✘

✘

Edit Clarifications

✔

✔

✔

✘

Edit Tags

✔

✔

✔

✘

View Team Members

✔

✔

✔

✔

Add/Remove Team Members

Can edit all other team members

Can edit all team members except Owners

✘

✘

View Filters and Redactions and Privacy

✔

✔

✘

✘

Edit Filters and Redactions and Privacy

✔

✔

✘

✘

View Approved Domains

✔

✔

✘

✘

Edit Approved Domains

✔

✔

✘

✘

Edit Handoff Integration

✔

✔

✘

✘

View Handoff Integration

✔

✔

✘

✘

View Answer Settings

✔

✔

✔

✔

Export Answers

✔

✔

✔

✔

Edit Answer Review Settings

✔

✔

✔

✘

View Multilingual Settings

✔

✔

✔

✔

View Multilingual Settings

✔

✔

✔

✔

Edit Multilingual Settings

✔

✔

✔

✘

View Authentication Settings

✔

✔

✘

✘

Edit Authentication Settings

✔

✔

✘

✘


Have any questions? Contact your Ada team, or email us at help@ada.cx.