Send emails using the Email app
Overview
The Email app enables your bot to send emails automatically. Use this app to create a basic email handoff Answer for your chatters. The block allows you to customize your handoff email as you see fit.
How the Email app works
All emails sent using the Email block originate from Ada, and show an Ada email address as the sender email. You must specify a separate reply-to email address—Ada does not handle email replies from your chatters. You can also customize the sender name, reply-to name, and more.

Use the Email app block
The Email app block is located under Action Apps in the Ada dashboard block drawer. Drag and drop the block in your Answer, at the point where you want the email process to occur.
Use a Capture block before the Email app block to collect the chatter’s email address.
Configure the Email app block
On the Ada dashboard, go to Build > Answers, then open the Answer you want to trigger an email in.
From the block drawer, drag the Email block into your Answer.
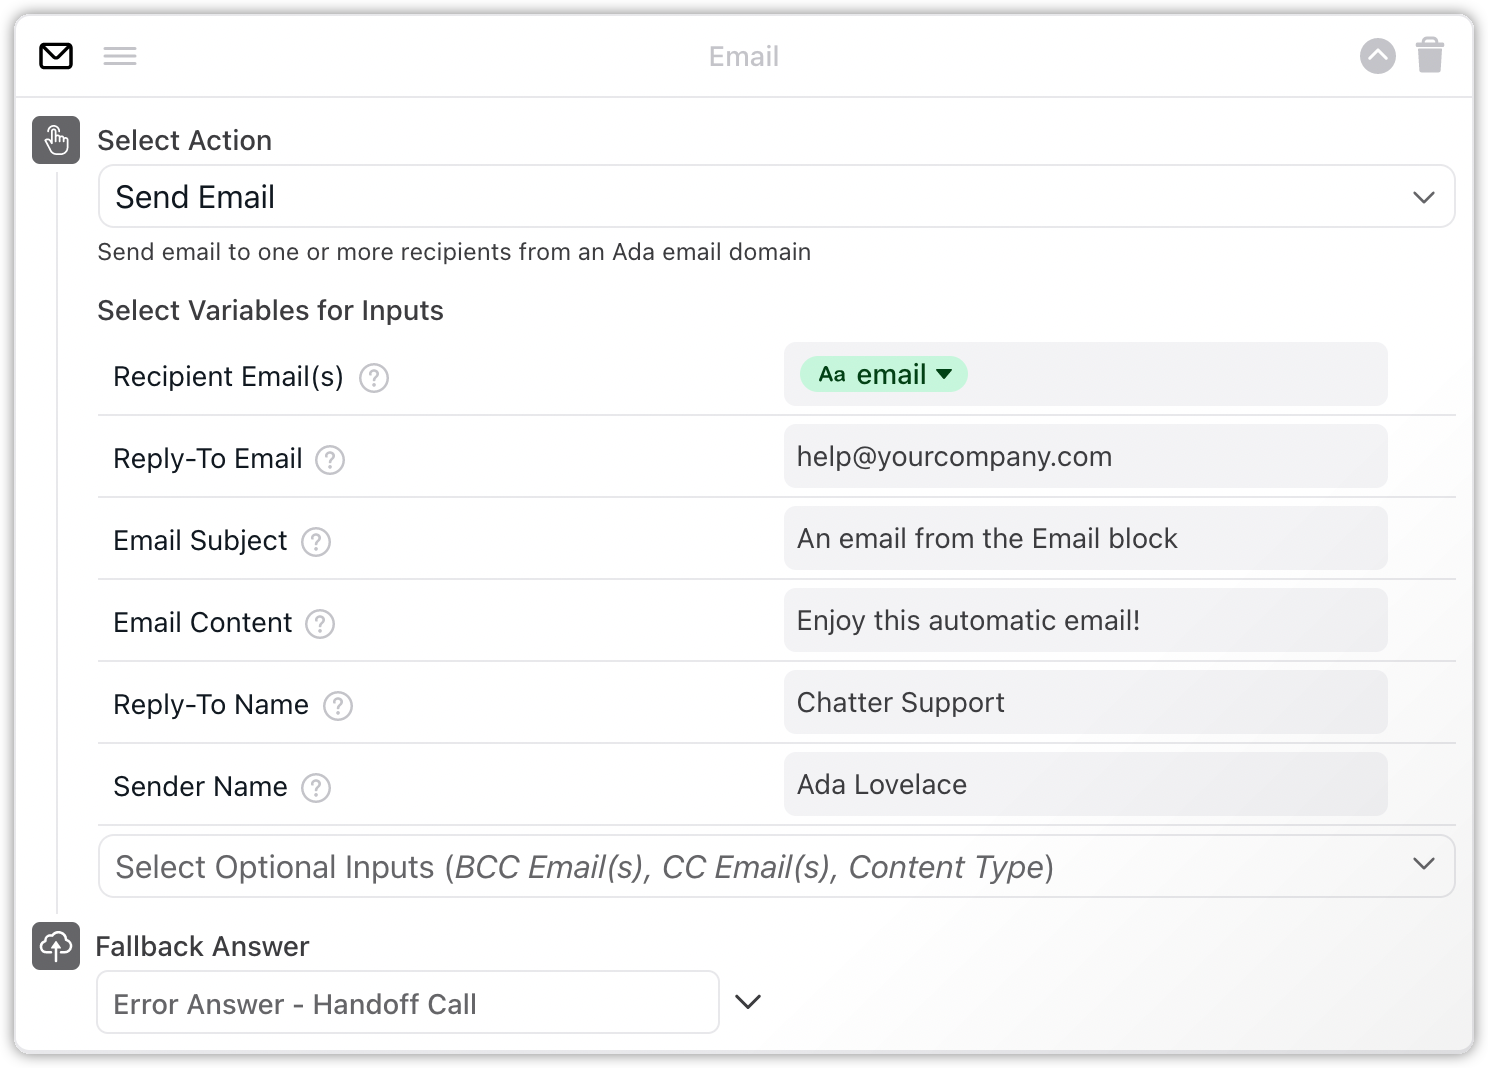
In the Select Variables for Inputs section, complete the mandatory variable fields:
- Recipient Email(s): Add the primary recipient email address. You can add the email variable, or manually enter the recipient’s email address. Separate multiple email addresses with a comma.
- Reply-To Email: Enter the Reply-to email address you wish to assign to receive replies to your email.
- Email Subject: Enter the email subject.
- Email Content: Enter the body text of the email.
Click the Select Optional Inputs drop-down menu, then select any optional variable fields you’d like to add:
- BCC Email(s): Add blind carbon copy recipient email addresses. BCC addresses are not visible to other recipients.
- CC Email(s): Add secondary recipient email addresses. These addresses are visible to other recipients.
Content Type: Enter the MIME type you want to use in your email:
- If you just want to enter plain text, or if you’re not sure what to use, enter
text/plain. - If you want to use HTML tags, enter
text/html.
- If you just want to enter plain text, or if you’re not sure what to use, enter
- Reply-To Name: Enter the name of the Reply-to recipient.
- Sender Name: Enter the name of the email sender. This appears in the From field.
Under Fallback Answer, select an Answer to appear as a fallback if an error occurs.
Click Save. The Email block is now configured to send emails to your chatters.