Deploy your bot on mobile using Zendesk Messaging SDKs
You can use Zendesk Messaging SDKs to allow chatters to interact with your bot on their web or mobile devices. There are several other ways to do this, including using Ada’s SDKs, but this method is convenient if you already have an integration with Zendesk configured.
Understand chatter experience with Zendesk Messaging SDKs
The chatter experience through Zendesk Messaging SDKs is very similar to Ada’s default web experience in a lot of ways, with some exceptions. Here are some basics:
-
Chatters can use the same conversation window to exchange messages with both your bot and with human agents, with seamless handoffs to Zendesk Messaging in between.
-
Chatters and agents can send files to each other. For information on how Zendesk validates files, see Working with attachments at Zendesk’s documentation.
-
After the chatter has been handed off to an agent, the chat window is reserved for their conversation with the agent. Only the agent can disengage the conversation by marking the ticket as “solved.” After this, depending on your organization’s trigger settings, Zendesk automatically marks the ticket as “closed.”
Until the ticket is marked as “closed,” any messages the chatter sends go to the agent, not the bot. The chatter has to wait until the ticket is closed to be able to send messages to your bot again.
-
You can use Zendesk’s multi-bot routing feature. For more information, see Connect Zendesk social channels to multiple bots using Sunshine Conversations.
Understand how Ada features work with Zendesk Messaging SDKs
-
The language the bot sends messages in depends on the chatter’s browser settings. You can override the default language by setting the locale manually. For more information, see the Set locale section of Zendesk’s Core messaging Web Widget API documentation.
-
The reports that provide an overview on your bot’s performance should perform as expected. However, some detailed reports may not contain information about conversations that took place on Zendesk channels, depending on the data they require.
-
You can manage whether your bot remembers chatters between conversations in Agent Workspace. You can choose to retain conversation history, or to treat all chatters as anonymous, with no saved previous conversation history. For more information, see the instructions in Zendesk’s troubleshooting documentation.
This setting only applies to Zendesk’s Web Widget, and not mobile; on mobile, Zendesk saves chatter history by default.
-
You can control which website domains chatters can see your Zendesk Web Widget on. For more information, see Creating an allowlist for the Web Widget at Zendesk’s documentation.
Set up Zendesk Messaging SDKs with your bot
Setting up your bot to work with Zendesk Messaging SDKs requires some work in your bot, in Sunshine Conversations, in Zendesk, and finally in your own website. If you have any trouble with any portion of these procedures, don’t hesitate to contact your Ada team for assistance.
Before you begin
Before proceeding, do a quick check to see that you have the following:
-
Access to Zendesk Messaging (on Agent Workspace)
-
A subscription to Zendesk Suite Professional, Enterprise, Enterprise Plus, or a standalone Sunshine Conversations license add-on
-
Access to the Zendesk Conversations API through Zendesk Admin Center, so you can create API keys
-
A completed Sunshine Conversations integration in your Ada bot. For more information, see Connect Sunshine Conversations with Ada
-
Your bot’s name configured in your Ada dashboard, so the bot’s name appears on messages in your widget and in Zendesk tickets. For more information, see Access branding customization options
Additionally, contact your Ada team to make sure your bot is ready for the next steps. There are some features you may need Ada staff to enable on your behalf that you can’t proceed without.
Configure your Zendesk widget
You can customize your web or mobile widgets in Zendesk Admin Center:
-
For information on how to customize how your widget looks, see Configuring the widget launcher at Zendesk’s documentation.
-
For more detailed information on additional settings you can change, see Zendesk Web Widget and SDKs at Zendesk Developers’ documentation.
Install your Zendesk widget on your website
After configuring your Zendesk widget, you can install it on your website so chatters can interact with it.
-
To install your widget on your website, find the installation script in your Admin Center and add it to your website’s code.
-
Optionally, you can choose to enable your widget on your Zendesk Help Center.
For installation instructions, see Installing the Web Widget at Zendesk’s documentation.
Configure settings in Zendesk Admin Center
In Zendesk Admin Center, you can configure two settings for your bot’s behavior:
-
You can set up triggers to automatically close tickets a certain amount of time after the agent marks them as “solved.” For more information, see Understanding and managing handback events at Zendesk’s documentation.
-
To collect customer satisfaction data, you can set up Zendesk’s CSAT survey. For more information, see About CSAT ratings in messaging at Zendesk’s documentation.
Lastly, to allow your bot to start interacting with chatters, you have to connect your bot with Zendesk. For more information, see Connect your bot with Zendesk Admin Center.
Set up handoffs using HTTP Request blocks
Instead of using Ada’s usual handoff blocks, Zendesk Messaging SDKs use API requests to hand chatters off to human agents.
When configuring handoffs using the HTTP Request block, make sure you toggle on the Count as Handoff setting on the block to collect data for your reports.
For complete documentation on Sunshine Conversations’ API, see Metadata sent to Zendesk at Sunshine Conversations’ developer documentation. To get started, however, you can use these values using the variables in your Ada bot.
Here’s an example of a completed handoff using an HTTP Request block:

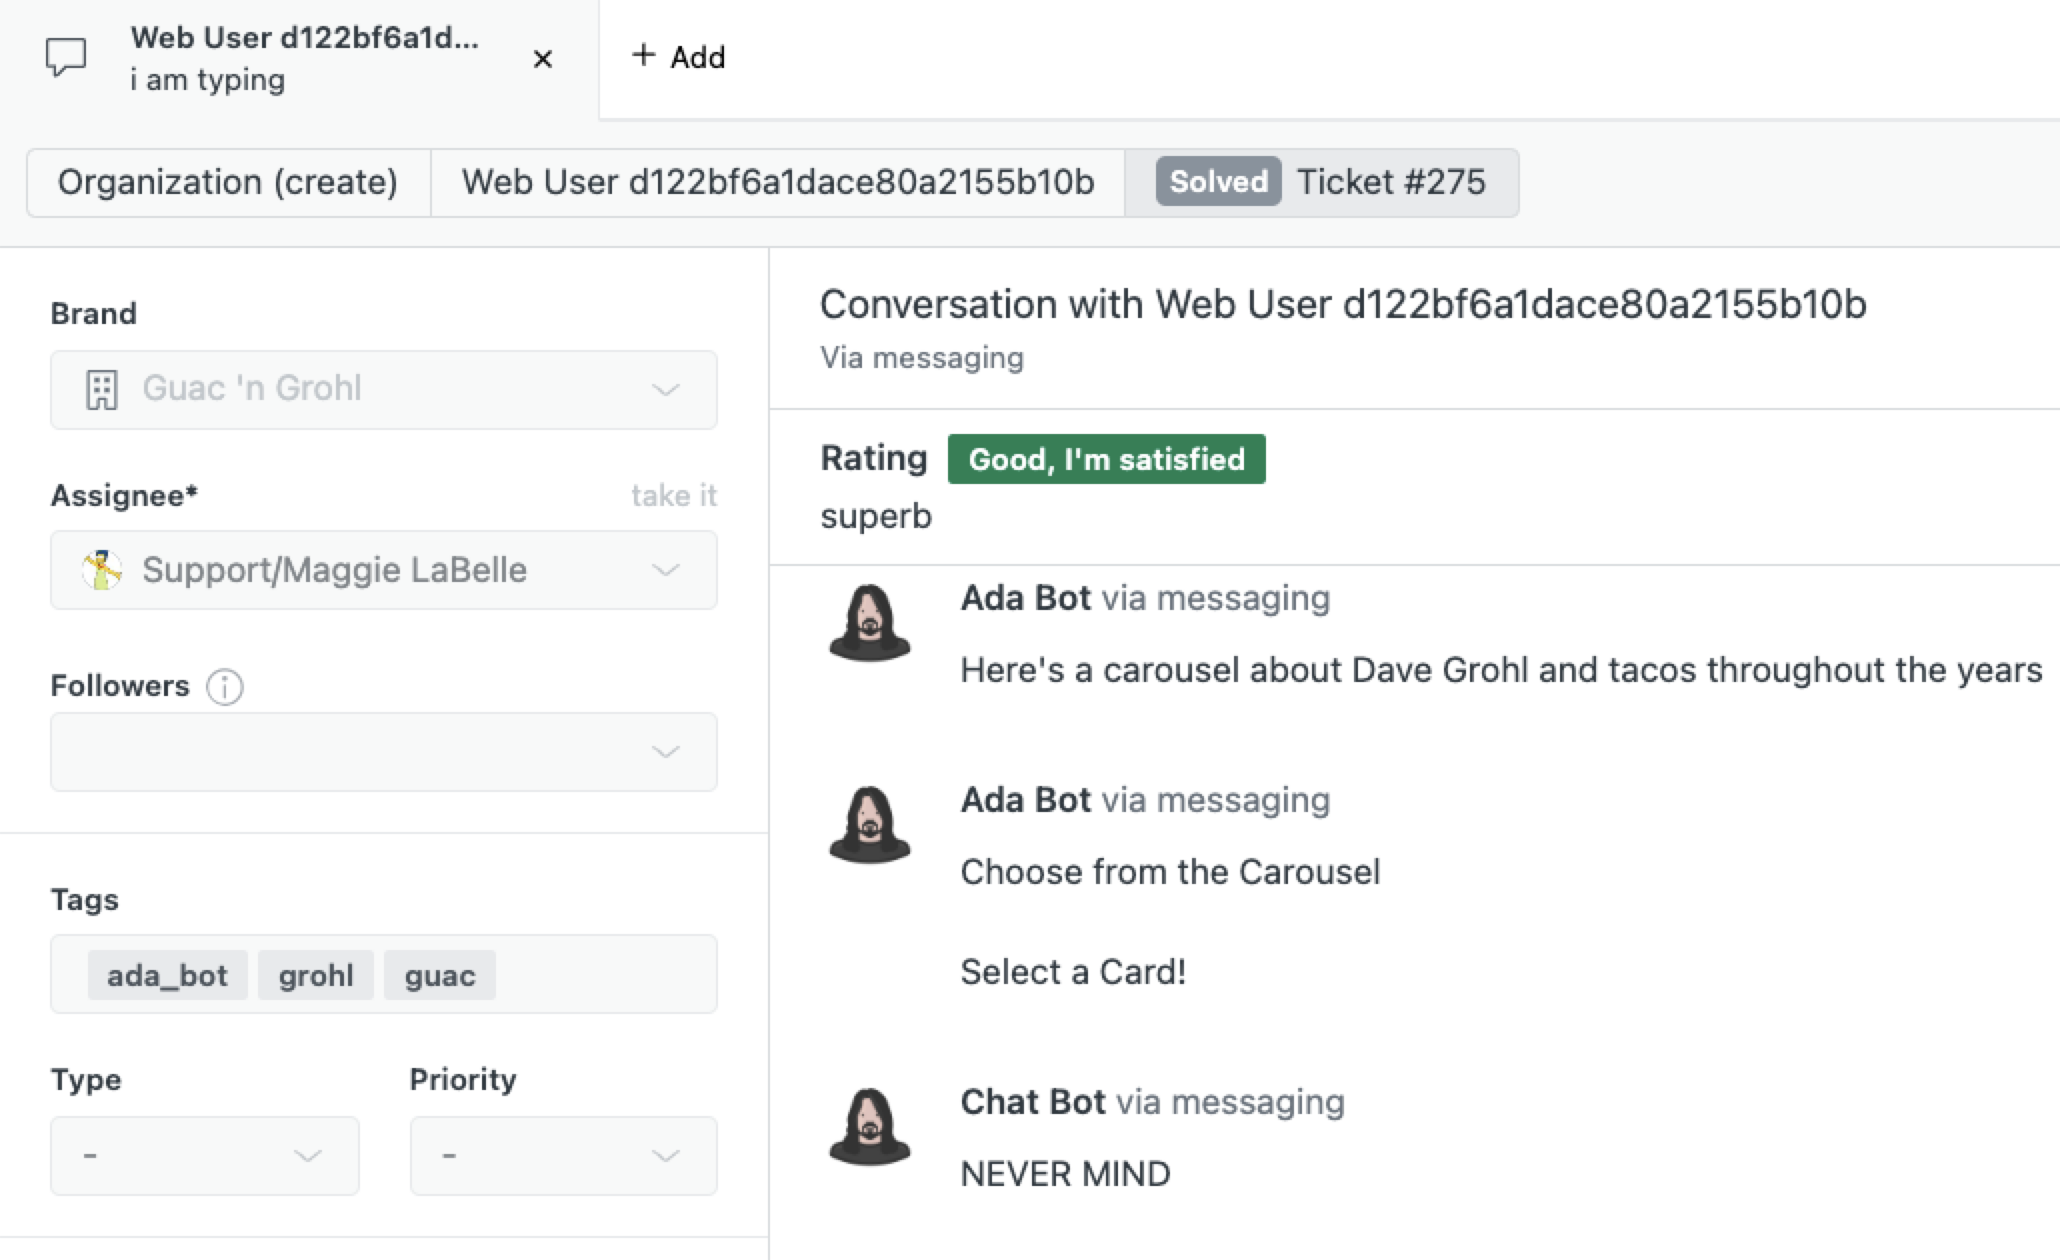
In the above example, the request block also passes tags into Zendesk. This is how they look in the human agent’s conversation with the chatter:
