Create basic email tickets using the Zendesk Handoff block
Overview
Our Zendesk Ticketing integration allows the bot to create email tickets for your support team directly in your Zendesk instance. Customize the subject line and tags in your email tickets to align with triggers and routing rules in Zendesk.
Set Up
In Zendesk
Before you can set up Zendesk email ticketing handoffs in Ada, you’ll need the following information from Zendesk:
-
Your company’s Zendesk subdomain
-
Your Zendesk login email
Once you have this information, you’re ready for set up in Ada.
In Ada
-
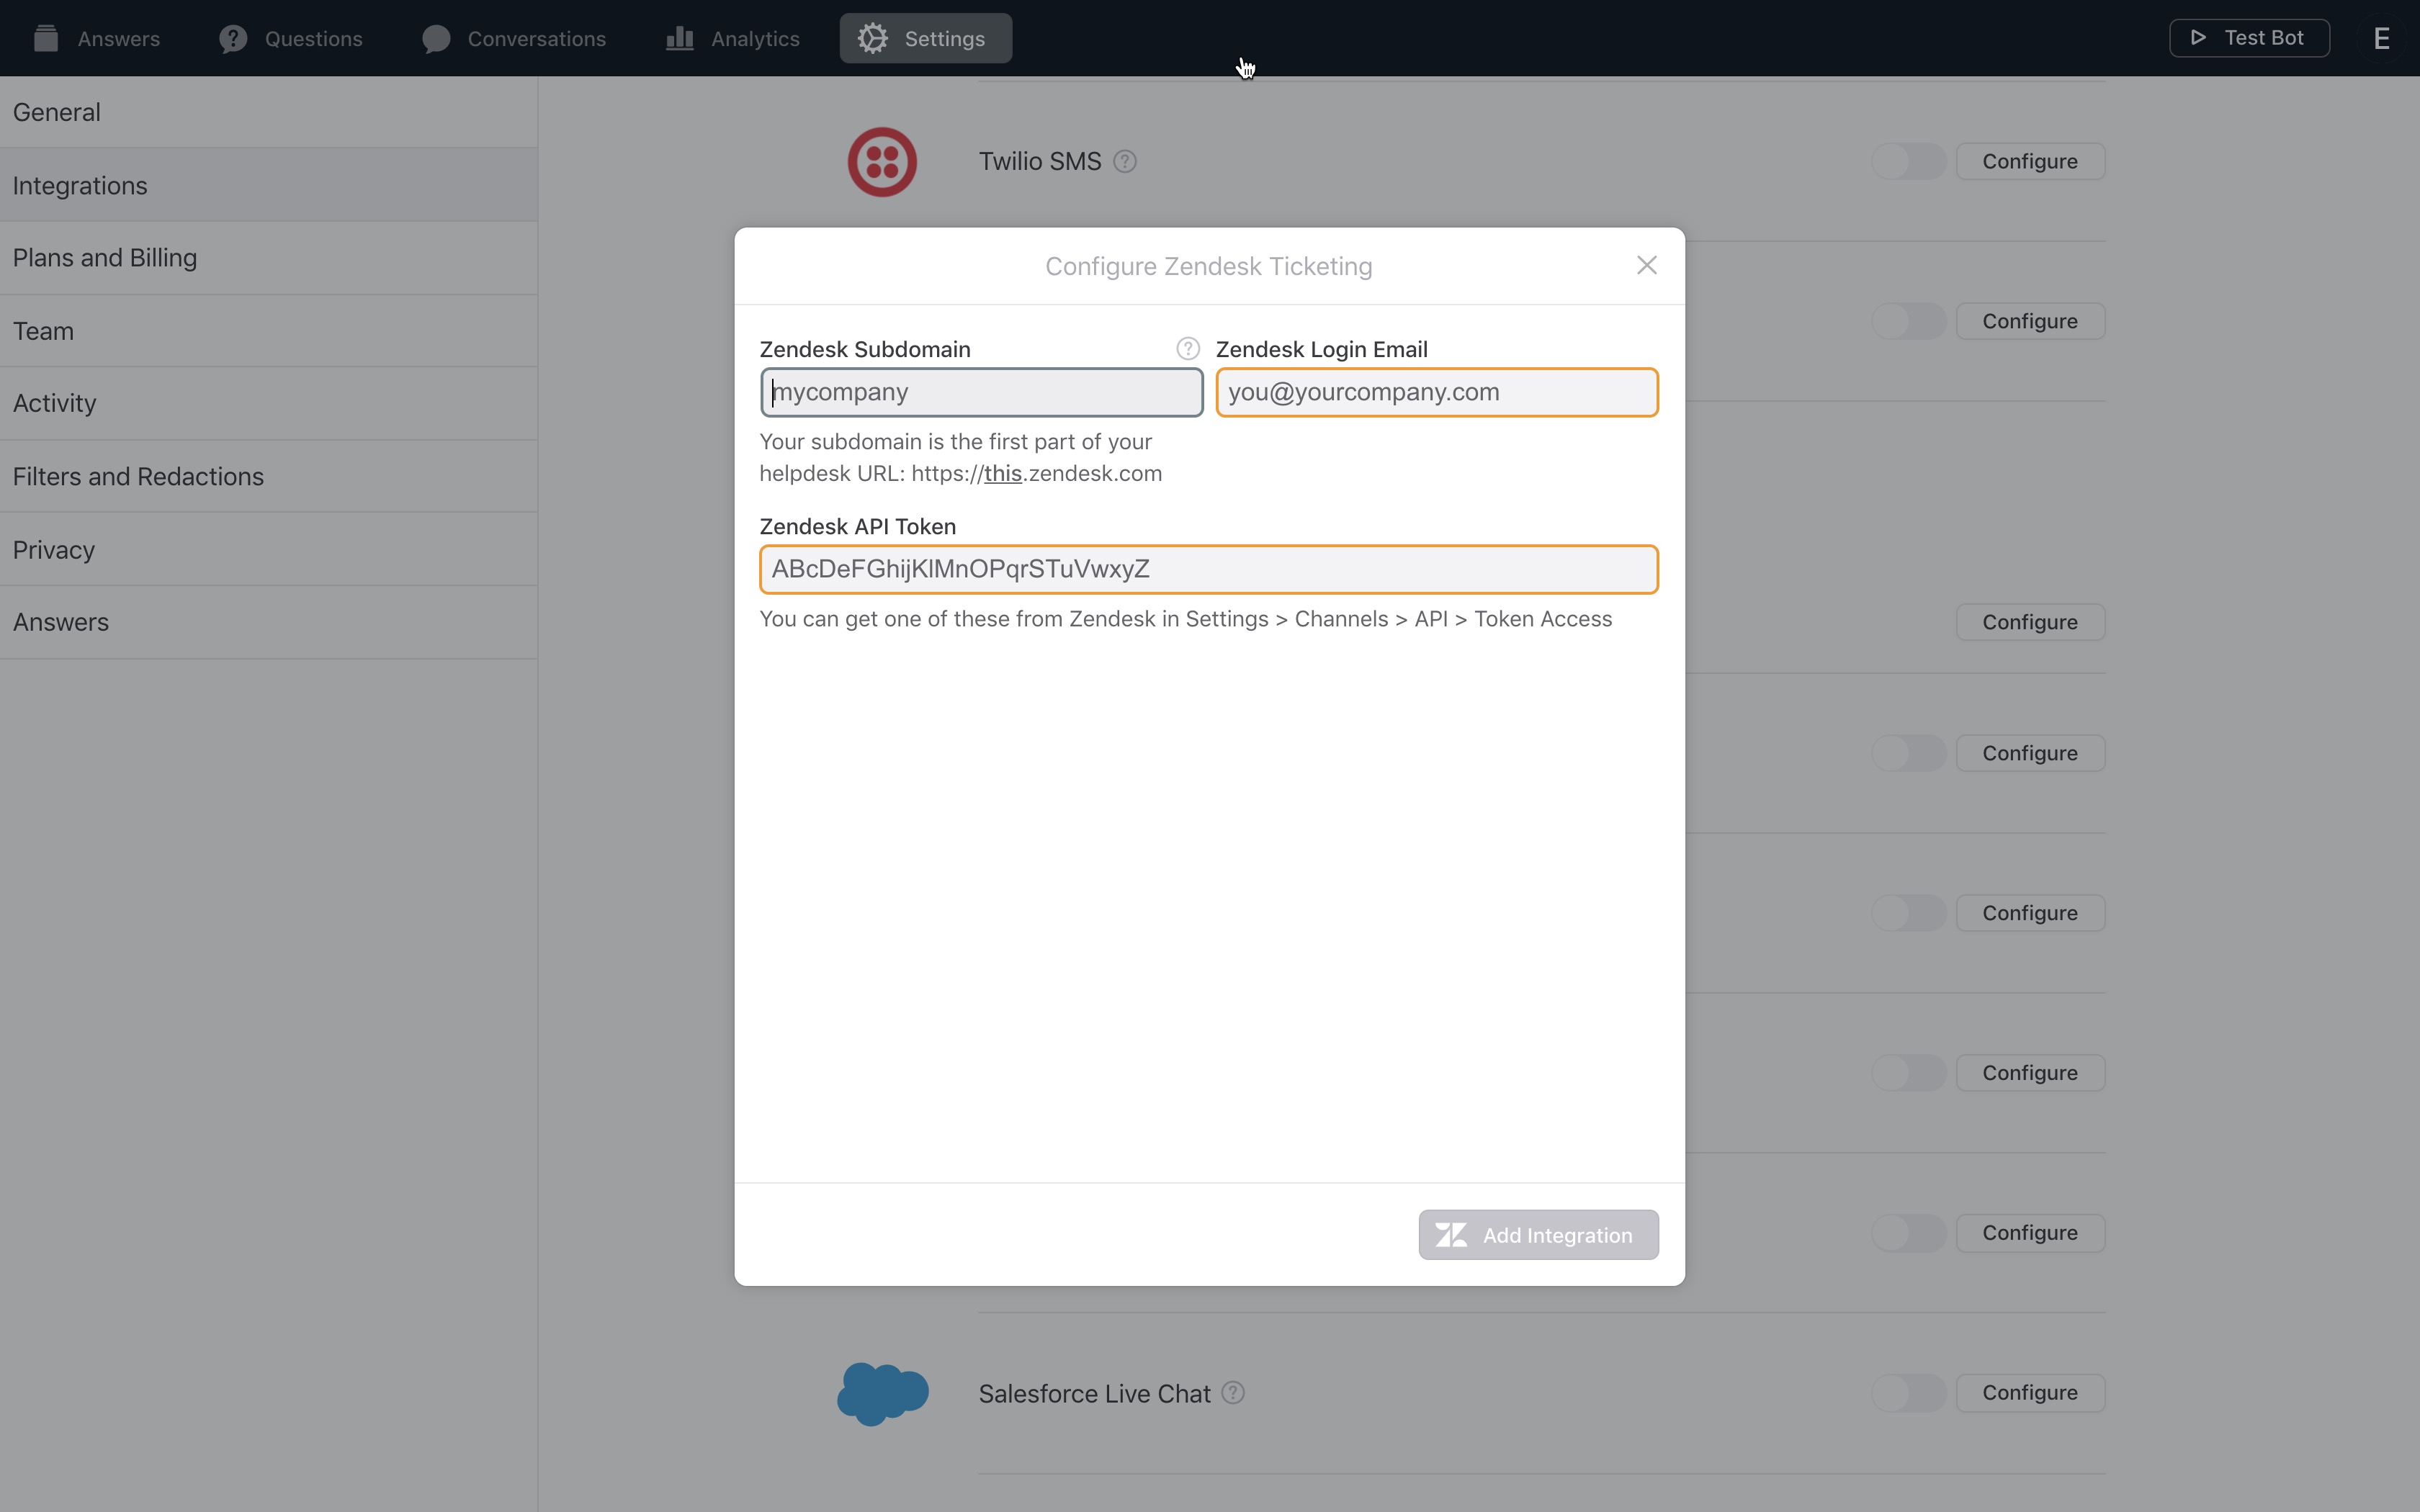
In the Ada dashboard, click Settings > Integrations.
-
Switch the Zendesk Support toggle to on. The configuration window appears.
-
In the configuration window, enter your Zendesk Subdomain.
-
Enter your team’s Zendesk Login Email. This must be an admin level account.
Use a general admin account that’s not associated with a specific person. If, for any reason, you downgrade or remove this person’s Zendesk account, then the integration will break and support tickets are no longer sent. On the other hand, a general admin account is not very likely to have its admin privileges revoked.
-
Enter your Zendesk API Token (use the same admin account to create one in Zendesk).
-
Click Add Integration.
Usage
Now that you’ve completed set up, the final step is using a Zendesk Handoff block in your Answers.
-
In the Answer’s View, select or create your Handoff Answer.
-
If you previously had an Email Handoff block in the answer, delete it.
-
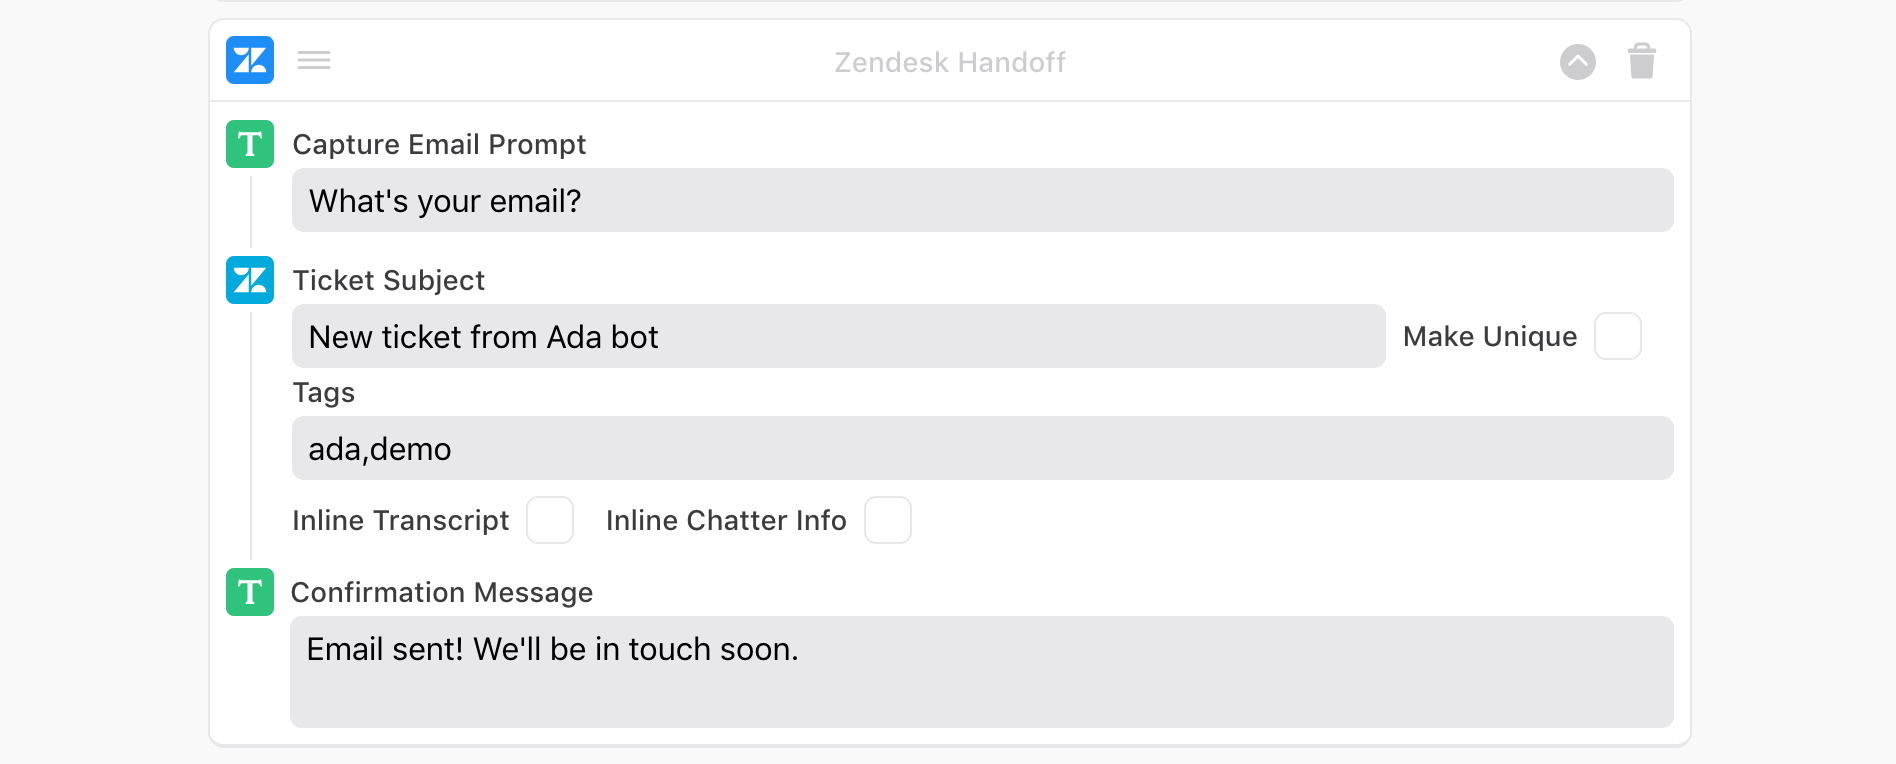
Add a ‘Zendesk Handoff’ block to the end of your answer.
-
Input a subject line in the ‘Ticket Subject’ field. This will be the subject line of the tickets that are created in Zendesk from these handoffs. Click the ‘Make unique’ checkbox to add the chatter’s email to the subject line of each Zendesk ticket. Please note that Zendesk triggers require an exact match to the content of the ‘Ticket Subject’ field.
-
Add your Zendesk Tags in the ‘Tags’ field (you can add multiple by separating each tag with a comma and no spaces).
-
Place a checkmark next to ‘Inline Transcript’ and ‘Inline Chatter Info’ if you want the transcript of the chatter’s conversation with the bot, and the metadata collected on the chatter, to be included directly in your ticket. If these options remain unchecked, the transcript and metadata will be attached to the ticket as a separate file.
-
Provide a ‘Confirmation Message’ that chatter’s will receive indicating that their submission was sent.
-
Save your answer.
Ticket
Email tickets will include a transcript of the conversation that preceded the ticket creation. Tickets will also include chatter information that was collected by the browser, as well as any variables captured in the answer that houses the Zendesk ticket handoff block (see this page on variables).
Here’s an example of what that would look like (note that for this scenario the “Inline Chatter Info” option was selected).
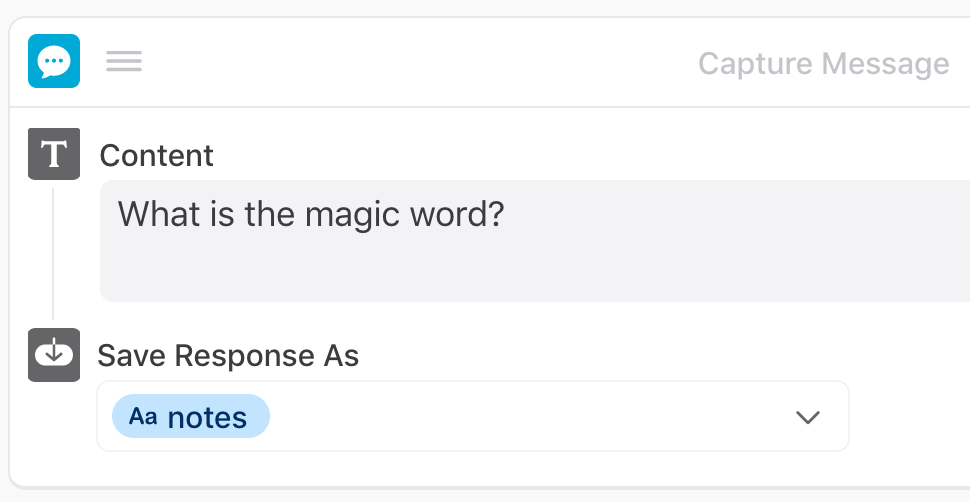
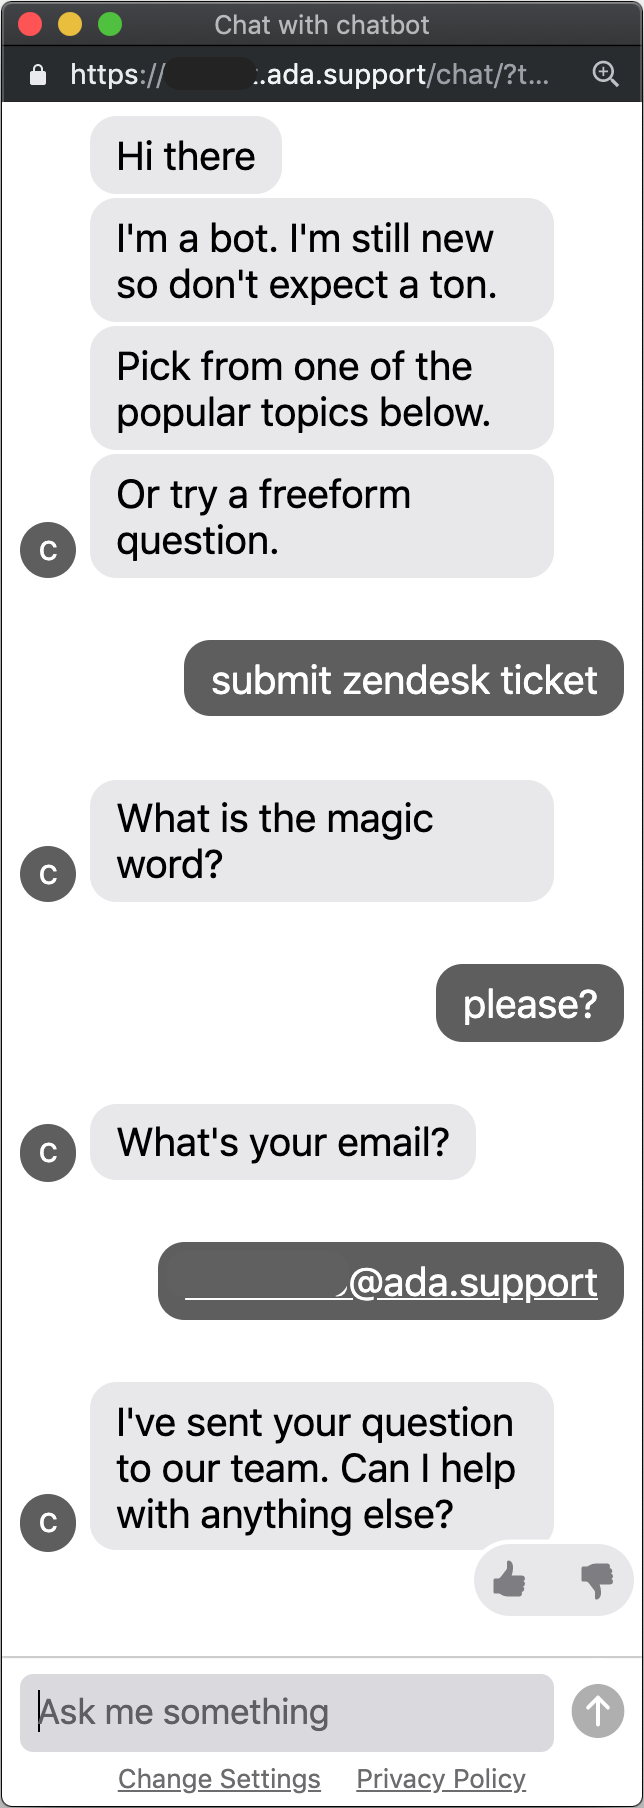
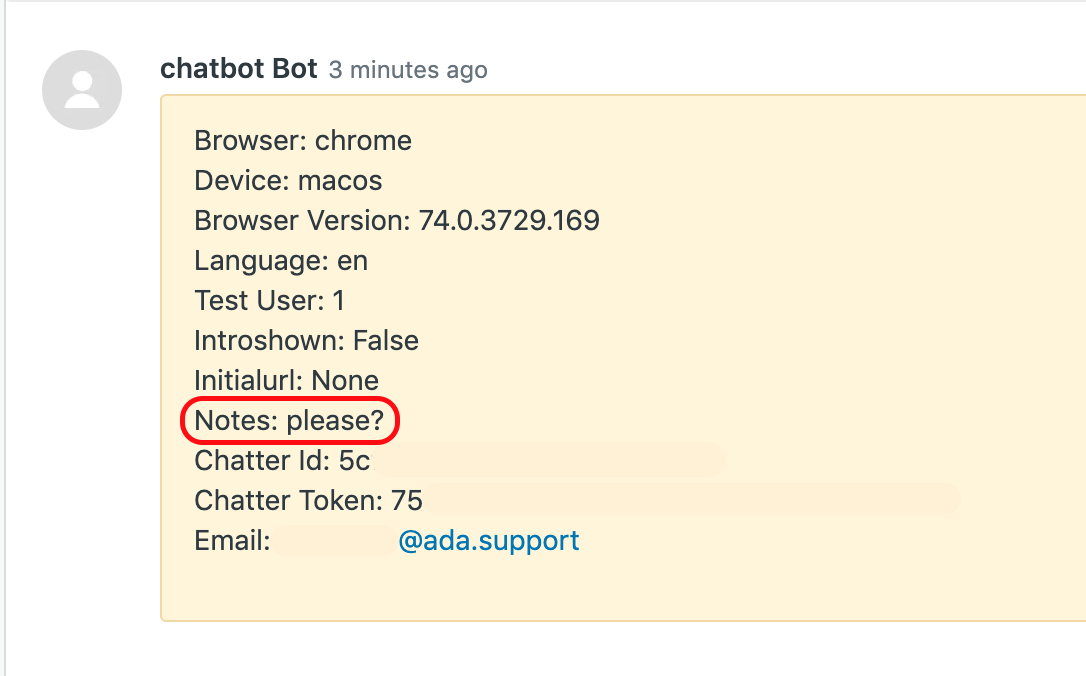
The input “please?” has been saved as the variable “notes”.
-
If a global
namevariable is captured anytime during a conversation, the ticket will be associated with that name. -
If a global
emailvariable is captured anytime during a conversation, the bot will not ask a user to input their email address again. -
If errors occur with a ticket being created, those with bot credentials will be notified.
-
If you try to create a ticket using an email address that is associated with a seat in your Zendesk environment, it will appear as though the ticket has been successfully submitted, it will generate an error and the ticket will not actually be submitted.
-
The Zendesk Handoff block will not be available for you in your block drawer until the configuration has been successfully completed.