

Getting started
This page is the Snapshot API procedure: what to set up on the target Agent by hand, then each call. Every request and response comes from a real run, so you can compare against it.
For what a snapshot carries, the pre-import checks, and the limits, see the Snapshot API overview and What a snapshot includes.
Quick start
The shortest safe path, in seven steps. The sections below give the full checklist, each request with a real response, and what to do when a job fails.
Get the target Agent ready
Work through the Prerequisites: connections, features, tags, secret values, and an export of the target if it has anything on it.
Export the source Agent
GET /v2/config/ with the source key. Poll the job until completed, then download result.url.
Choose what to import
Decide which sections you need, for example ["playbooks"]. Leave include out only when you mean to replace everything.
Validate on the target
PUT /v2/config/ with {"mode": "validate", "include": [...]} and the target key. Upload the archive to upload.url. Poll until completed, then read result.blockers, result.changes, and result.selection.
Fix every blocking issue
Each one names its fix. Repeat the validate until result.status is valid, and read the delete counts.
Apply
PUT /v2/config/ with {"mode": "apply", "include": [...]} and the target key. Upload the same archive to the new upload.url. Poll until completed. apply is the only mode that writes, and you have to ask for it by name.
Finish on the target
Work through After the apply: read warnings, enter what the snapshot could not carry, then test before going live.
Prerequisites
Nothing in this list can be done through the Snapshot API. Work through it in the dashboard before the first validate. Your Ada team does the items marked Ada on request.
Both Agents
-
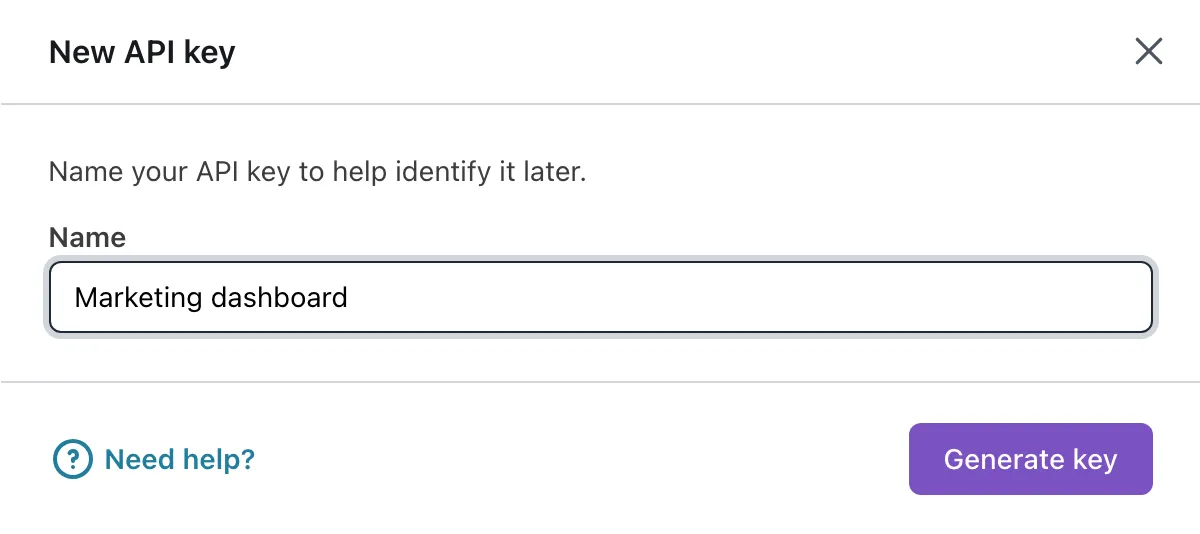
An API key for each Agent. Go to Config > PLATFORM > API keys and click New API key. Name it, then copy the key from the dialog. It is shown once.
Target Agent, before the first validate
-
Export the target first if it has anything on it. That archive is your only way back.
-
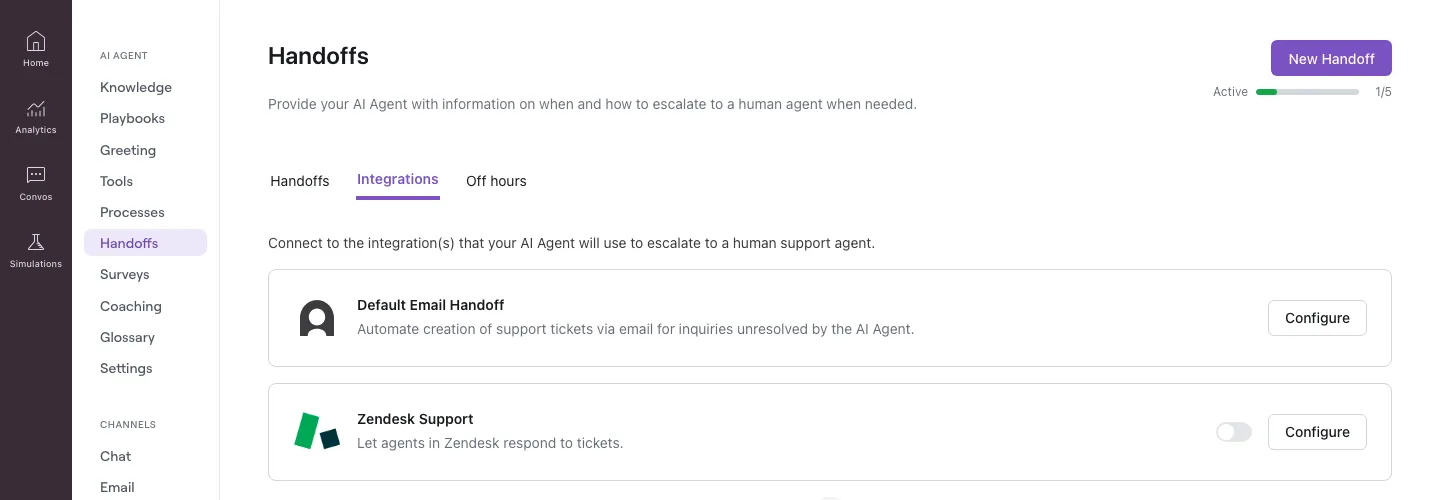
Live-agent platforms connected. Every platform the source’s Handoffs route to is connected and enabled under Config > AI AGENT > Handoffs > Integrations. A card that is disabled, or that still shows Connect, blocks the import.
-
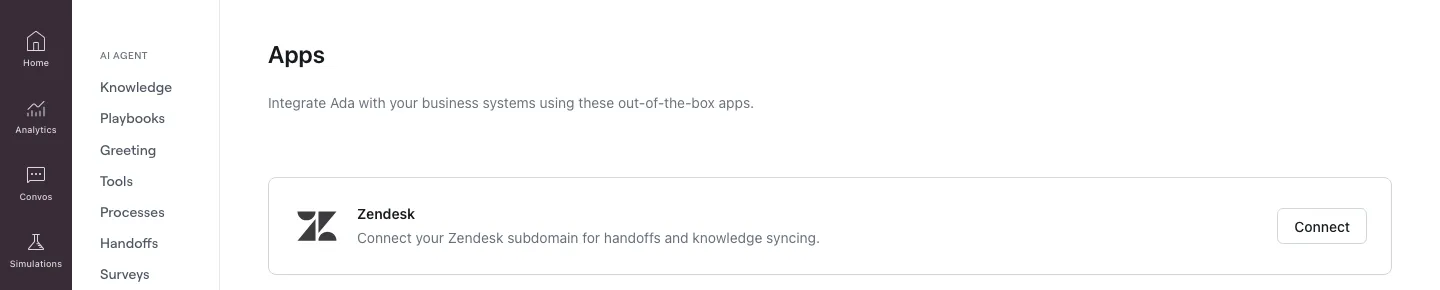
Same accounts as the source. Under Config > PLATFORM > Apps, Zendesk and Salesforce must point at the same subdomain or org the source uses. A different account blocks the import. The checks do not detect the same account with wrong credentials; check it yourself.
-
Integrations enabled and connected. Every integration the source’s API tools or Handoffs call is both enabled and connected on Apps. Enabled without credentials blocks the import.
-
Customer login set up, if any API tool on the source signs end users in. It does not travel, and the checks do not report it. Set it up under Config > AI AGENT > Tools > Manage tokens. After the import, edit each API tool that used it to select the new token.
-
Knowledge sources reconnected, pointing at the same knowledge base as the source, so imported articles keep syncing. Web import sources need nothing; their crawl settings travel.
-
Knowledge tags created. Every tag the source’s articles use must exist on the target with the same id. Create them through the Knowledge API. An article whose tag is missing fails to import. A same-Agent restore is unaffected.
-
Features match the source (Ada). Ask your Ada team to enable on the target whatever is enabled on the source. A missing feature blocks the import when the checks can see it. When they cannot, the import succeeds and the Agent misbehaves later.
-
Secret values at hand. Read
result.secretson the source export job for the names. These are the static tokens your API tools use, under Config > AI AGENT > Tools > Manage tokens. Have each value ready for the apply request. -
Room for the snapshot. The target’s limits on enabled API tools, live Custom instructions, Glossary terms, and articles must fit what the snapshot carries.
Authenticate
Every call except the archive upload carries the API key of the Agent it targets. The examples below use EXAMPLE.ada.support and an ADA_API_KEY environment variable; substitute your Agent’s host and key.
Export a snapshot
An export starts a background job and returns its id. The archive becomes available on the job once it completes. An export always captures the whole Agent; you choose what to import.
To export an AI Agent:
-
Start the export.
If an export is already running for this Agent, the response carries that job’s id and its current status, which may already be
in_progress. Poll thejob_ideither way. -
Poll the job until
statusiscompleted. -
Download the archive with
curl, or with a browser that keeps the file as.tar.gz. Safari unpacks the file and keeps the name, and the import then rejects it.-fmakes curl fail on an expired link instead of saving the error page as your snapshot. If the link has expired, poll the job again for a fresh one. -
Note the names under
result.secrets. These are the secret values the target must have; you supply them in the apply request.
Keep the archive somewhere safe. The job record, and with it the download link, is gone after 7 days.
Choose what to import
The import request takes an optional include list. Name the sections you want, and the import brings along whatever those sections reference. Leave include out to import the whole snapshot.
The section names, and what each import replaces or only adds to, are under Choosing sections.
A name that is not a section is refused before any upload:
The examples below import Playbooks only. To import everything, leave out include and read every delete count before you apply.
Validate a snapshot
A validate reads the target and reports what an apply would do, without writing anything. The one exception is secrets: values you send are stored on the Agent at once, so leave it empty until the apply. A validate is also what an import does when you send no mode.
To validate a snapshot against the target Agent:
-
Request the import in validate mode, using the target Agent’s host and key.
-
Upload the archive to
upload.url. No Authorization header, no content type, the raw file in one request.A
200with an empty body means the upload succeeded. Check the status code yourself; the job cannot see this request. If no archive arrives, the job fails after about 90 minutes withupload_not_received. If the upload failed, request the import again. A job still waiting for its archive is replaced, not refused, and ends asfailedwithsuperseded. -
Poll the job until
statusiscompleted. Allow up to two minutes inwaiting_for_uploadafter the upload arrives.This example is a same-Agent restore of one Playbook.
selectionshows that the Playbook pulled in one API tool and one variable, andchangesnames them. Nothing is created or deleted. -
Read the result.
status: blockedwith entries inblockersmeans the apply would be refused for the same reasons. Fix each one on the target (see Pre-import checks) and validate again. Readwarnings,changes, andselection.unresolvedbefore you apply. Every non-zerodeletecount is a real deletion the apply will perform.
To validate the whole snapshot, send the same request without include. The result then has selection: null and a changes entry for every section, including the articles:
knowledge.articles.delete is the number to check before applying to an Agent with live Knowledge.
Apply a snapshot
An apply makes the changes. Run it only after a validate with the same archive and the same include returned valid, and you have read its warnings and change counts.
To apply a snapshot to the target Agent:
-
Request the import in apply mode, with the same
include. Add the secret values the source export listed.The response has the same shape as the validate request, with a new
job_idand a newupload.url. -
Upload the same archive again, to the new link. The link from the validate round cannot be reused.
-
Poll the job until
statusiscompletedorfailed.articlesis zero becauseknowledgewas neither requested nor pulled in.post_apply_blockersempty is the healthy answer. -
Finish on the target: work through After the apply.
After the apply
- Read
warningson the job. Each names a section and what to do. - Enter what the snapshot could not carry: secret values not passed in the request,
Authorizationheaders on API tools, and tags. Reconnect MCP servers and re-select them in Playbook steps. Re-select any off-hours response a warning flagged. - Add conversation start events to imported Playbooks. They do not travel. The “When to use this Playbook” text does.
- Confirm connected Knowledge sources are syncing, and allow time for search to catch up.
- Run test conversations before anything goes live.
When a job fails
One endpoint reports every job. failure_reason is a short code; failure_detail is a sentence you can show someone. The most common failures:
The full list of codes is under Failure reasons. HTTP errors on the request itself, such as 409, are listed under Error responses.
Move a snapshot between regions
An archive exported from an Agent in one region imports into an Agent in another. Download it from the first Agent’s host and upload it to the second Agent’s upload link. The two regions need no access to each other. Everything in Prerequisites applies unchanged.
Choose a tool
The calls above are plain HTTP and work from any client. Two guided paths:
- Export and import with Postman: build a collection from the Agent’s own API specification, then run the three requests from its
configfolder. - Export and import with an AI assistant: one prompt that runs the whole flow with confirmation before anything is written.