

Authentication
Ada APIs use API keys for authentication. An API key is required to authenticate requests and enable integration with Ada’s platform.
- Support for Multiple Keys: Maintain multiple active API keys to enable seamless key rotation when needed.
- Non-Expiring: API keys remain valid until manually revoked.
- Access: API keys grant both read and write permissions for all APIs available to your organization.
To create a new API key, follow the steps in Generate an Ada API key.
To use an API key, simply include it as a Bearer token in the Authorization header of your requests. See Authenticate your requests for detailed instructions.
If you are already using API-specific keys, they will only work for the v1 version of the designated API. These keys are labeled with the API name followed by “(Legacy)”.
Generate an Ada API key
You can generate a new Ada API key from the Ada dashboard, which works for all APIs your organization has access to.
-
On the Ada dashboard, go to your API settings.
-
If you’re using a generative AI Agent, go to Config > PLATFORM > API keys.
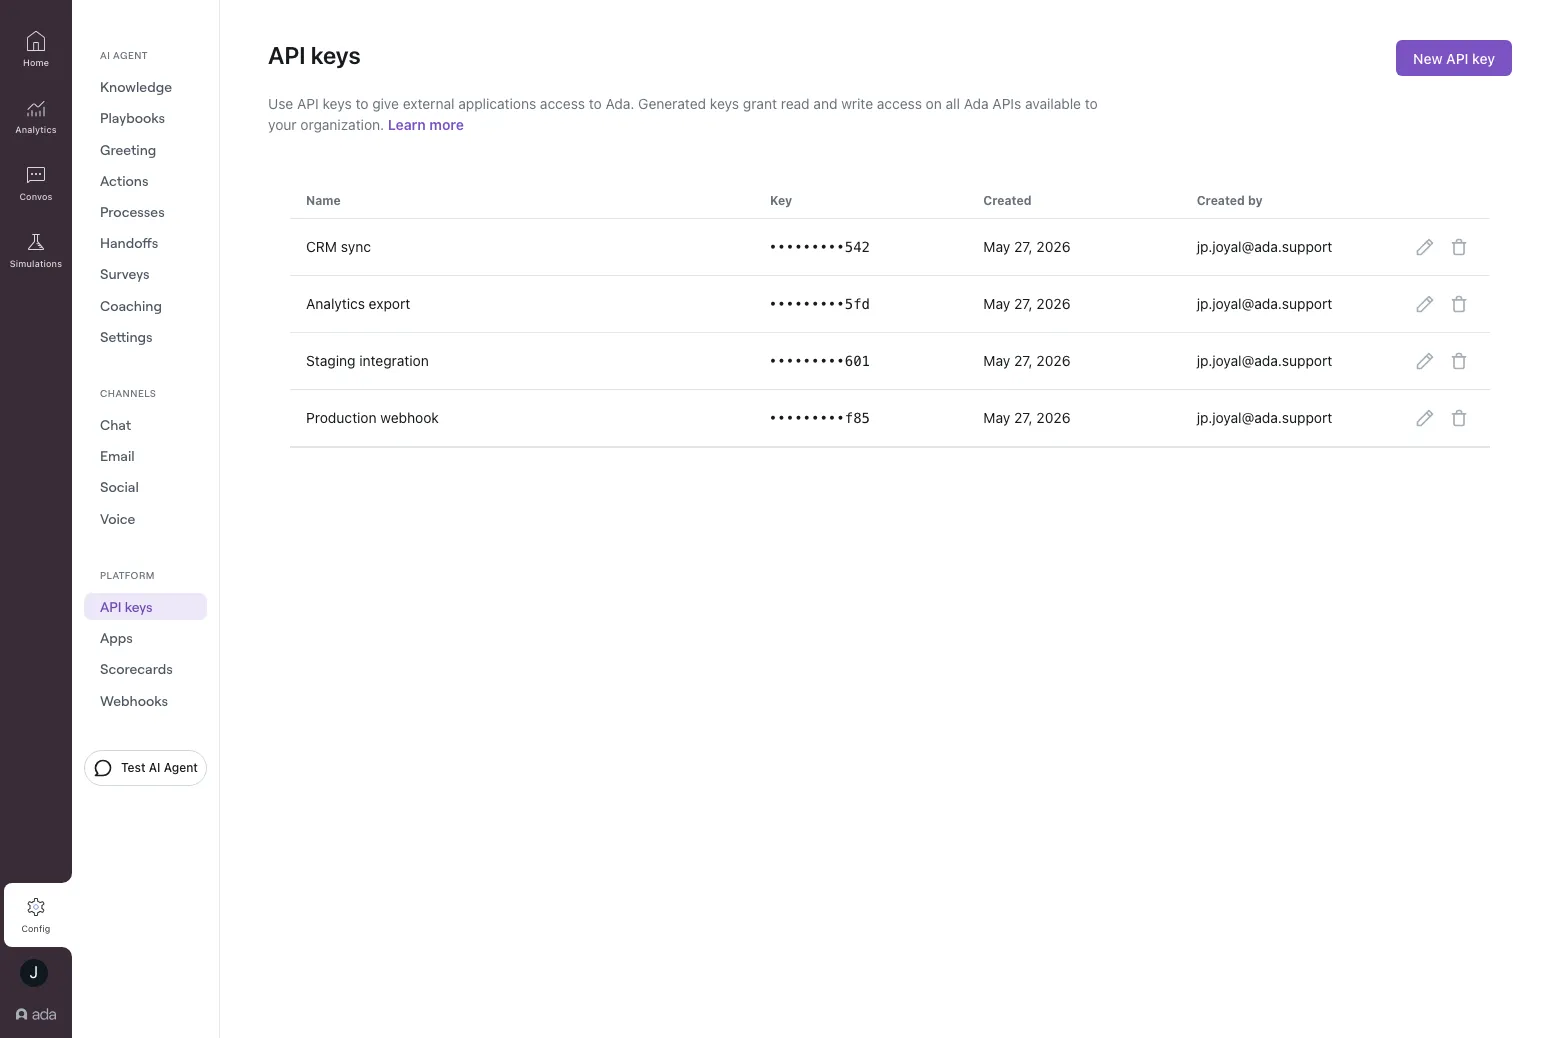
-
If you’re using a scripted bot, go to Settings > Integrations > APIs.
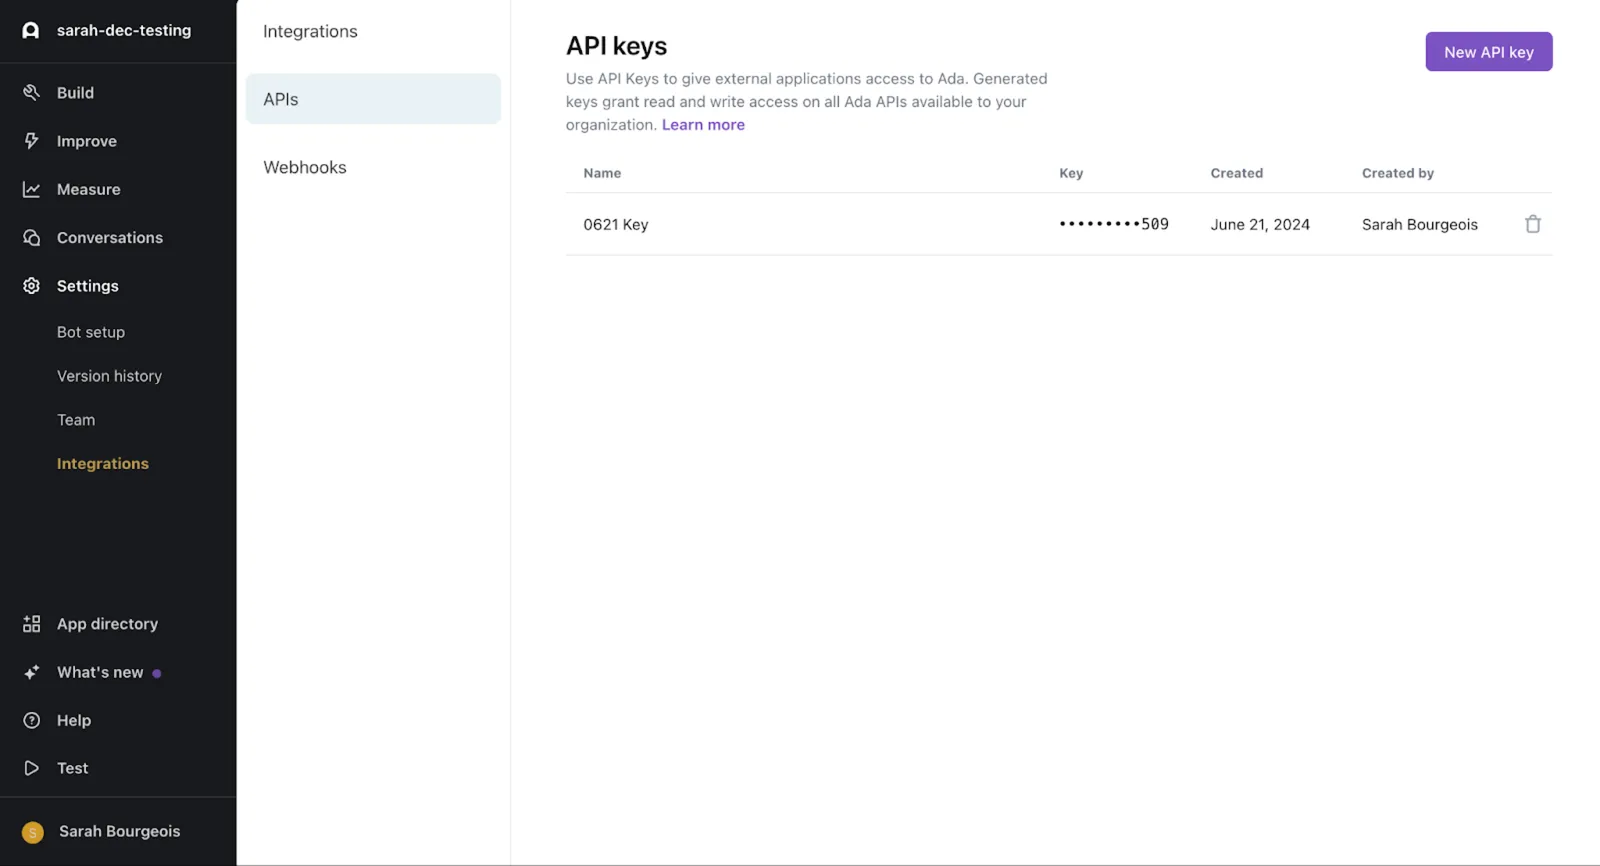
The API keys page opens.
-
-
Create a new API key:
- If your AI Agent doesn’t have any API keys, click Get started.
- If your AI Agent has existing API keys, click New API key.
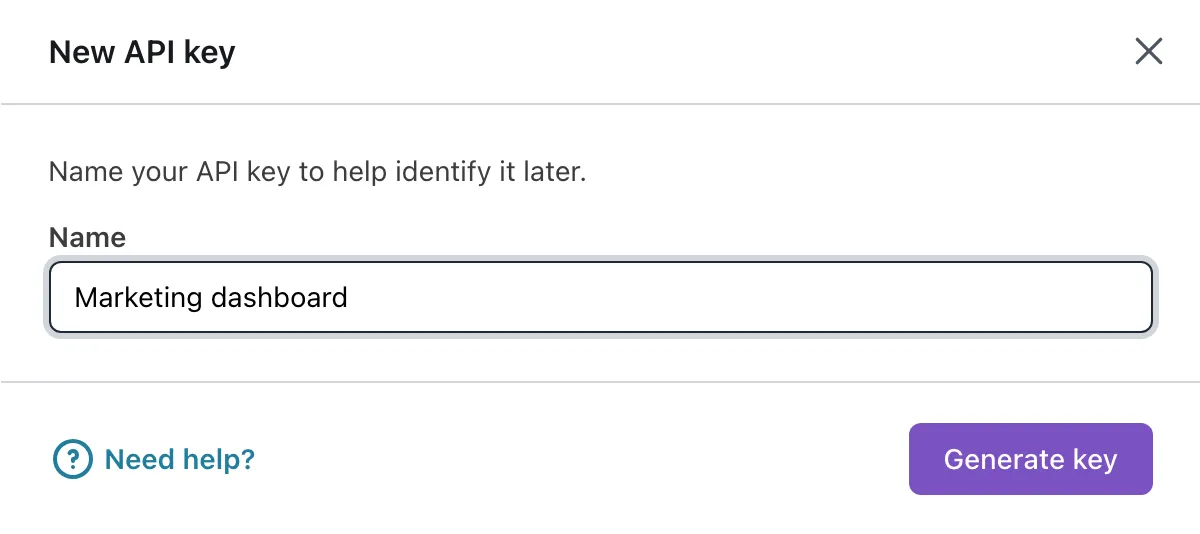
The New API key window opens.
-
In the New API key window, enter a Name for the key, then click Generate key. The name can be edited later if needed (see Edit an API key name).
-
Click Copy to copy your API key, then save it in a secure place immediately.
For security reasons, the Ada dashboard only displays your API key once. If you lose this key, you’ll need to create a new one. -
Click Done to close the New API Key window and protect your new API key.
Edit an API key name
To rename an existing API key, click the Edit (pencil) button beside it on the API keys page, update the Name field, and click Save. The key’s value, permissions, and creation date remain unchanged, so external integrations using the key continue to work without reconfiguration.
Legacy API keys (those labelled with an API name followed by “(Legacy)”) cannot be renamed.
Delete an Ada API key
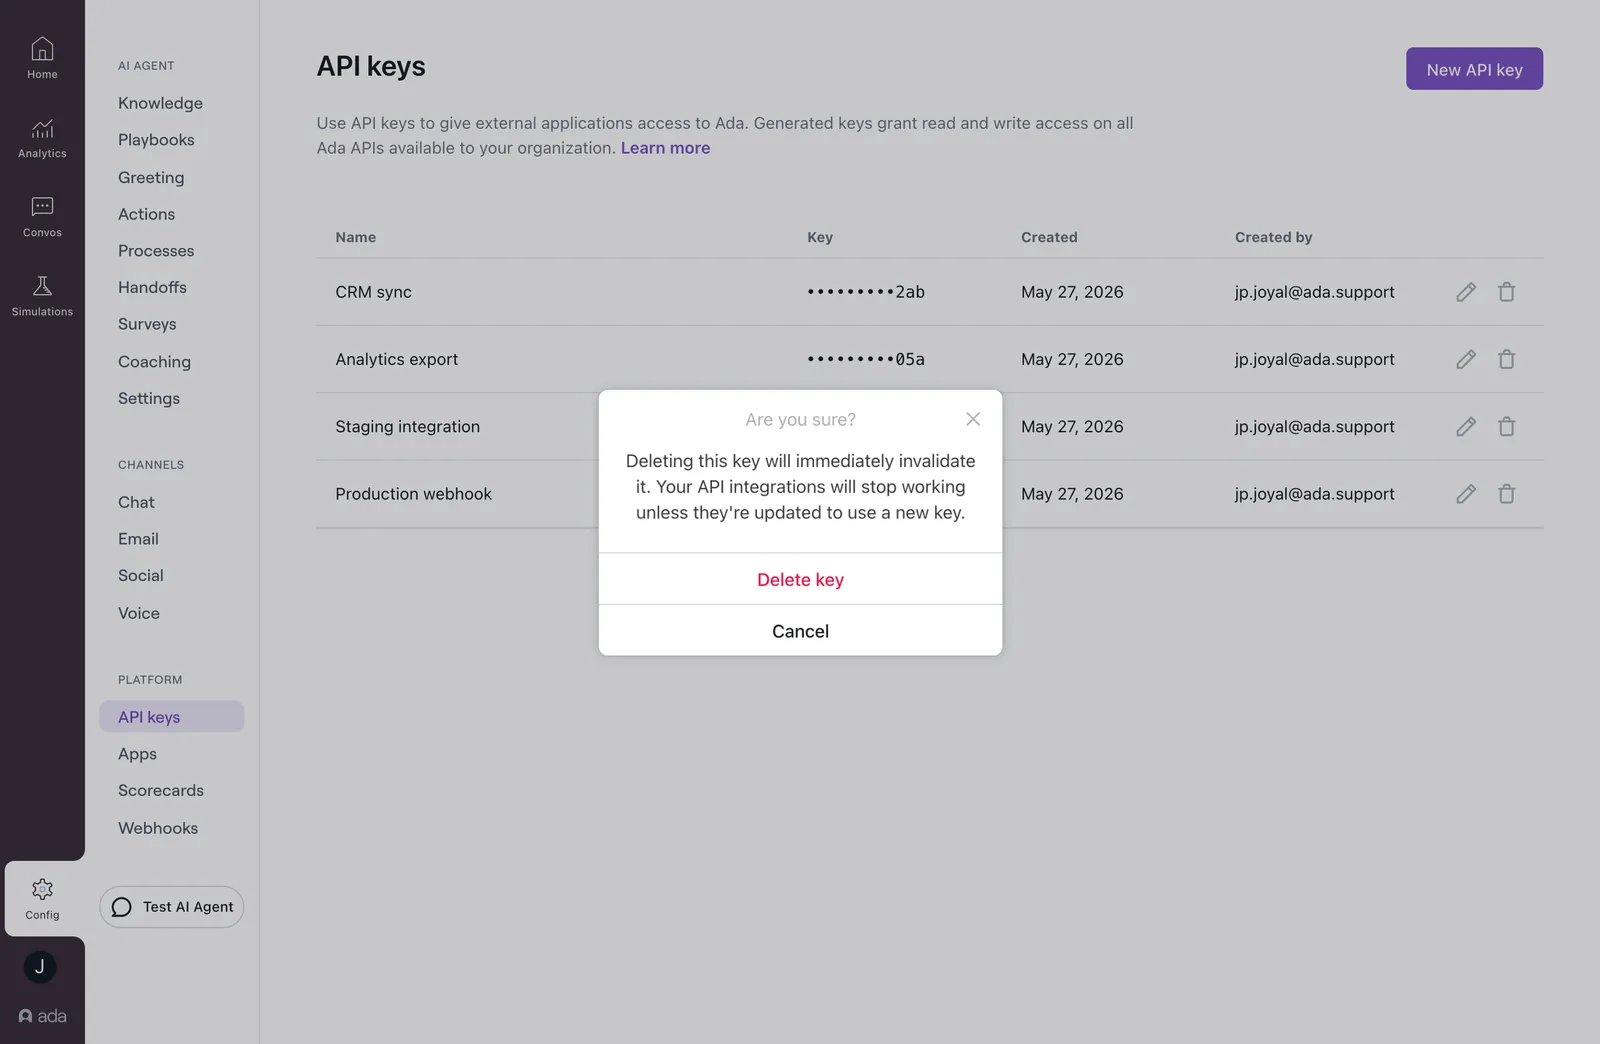
If you ever need to invalidate an old API key, click the Delete button beside it.
Authenticate your requests
To authenticate your requests, you have to send your API key in the Authorization header in all requests to the API. Without it, your requests will fail.