Getting started
The End Users API lets you create and work with end-user data in Ada and respond to changes as users interact across channels. This page highlights common integration patterns to help you get started quickly.
The guides below show how to:
- Create an end user with context before a conversation starts (custom channels only)
- Pass sensitive metadata securely
- Use end-user attributes to influence conversations in real time, such as changing the conversation language based on a user’s selection.
- Receive webhook notifications when an end user is created or updated, so your systems stay in sync with Ada.
For end-to-end examples and advanced patterns, see the developer guide. For a complete overview of end-user concepts and available endpoints, see the End Users API Overview.
Create an end user with context before a conversation
setMetaFields() instead.Use POST /v2/end-users/ to create an end user with profile data (language, metadata) before starting a conversation. This ensures the AI Agent has full context from the greeting onward.
Before you begin
- An API token
- A custom channel configured in the Ada dashboard
Steps
- Create the end user with language and metadata:
- Copy the
end_user_idfrom the response. - Start a conversation using the
end_user_id: - The greeting fires in the correct language (
pt-BR), with metadata values available as metavariables for Playbooks, Actions, and article rules.
Pass sensitive metadata securely
Use the sensitive_metadata field to pass auth tokens, session IDs, or personally identifiable information through a secure, write-only pathway. Values are encrypted at rest, redacted from the dashboard, excluded from LLM context, and automatically deleted after 24 hours.
sensitive_metadata is available on both POST /v2/end-users/ (custom channels) and PATCH /v2/end-users/:id (all channels).
Set sensitive metadata at user creation time
The sensitive_metadata values do not appear in the response. The AI Agent can use them to execute authenticated Actions.
Update sensitive metadata mid-conversation
Remove a sensitive metavariable
Set the key to null:
Reuse end users across conversations with external_id
Use the optional external_id field to reference end users by a stable identifier from your own system — for example a CRM contact ID or a phone number. The same value can be used to look up, create, or update end users across conversations without storing Ada’s end_user_id.
external_id is available for custom channel (Conversations API) integrations only. Native chat, social, and voice channels are out of scope.Before you begin
- An API token
- A custom channel configured in the Ada dashboard
- A stable identifier from your system for the end user (maximum 36 characters, must not contain
<or>)
Steps
-
Look up the end user by external ID:
A
200response returns the existing end user. A404response means no end user is mapped to thatexternal_idyet. A400response indicates the value failed validation — for example, an empty value, a value longer than 36 characters, or a value containing<or>. -
If the lookup returned
404, create the end user with theexternal_id:POST /v2/end-users/is idempotent whenexternal_idis supplied. If a user with thatexternal_idalready exists, the response is200with the existing record. A new user returns201. -
Start a conversation with the returned
end_user_id: -
To clear an
external_idlater (for example to reassign it), send aPATCHwithexternal_idset tonull.profileis required onPATCHrequests, so pass an emptyprofileobject when you only need to clearexternal_id:
Change conversation language based on end user’s selection on any channel
Before you begin
Before you start, make sure you have everything you need:
- An API token stored securely in Ada’s Token Vault
Configure languages in your AI Agent
- In your AI Agent’s language settings, configure the following:
- Ensure multilingual and auto-translation are enabled in your AI Agent.
- Enable language support in your dashboard for one or two additional languages. We’ll use French and Portuguese in this example.
- In your AI Agent’s greeting, use a List Option block to present the language options you selected to your user.
- Use a Request block to set the end user’s language to their list selection.
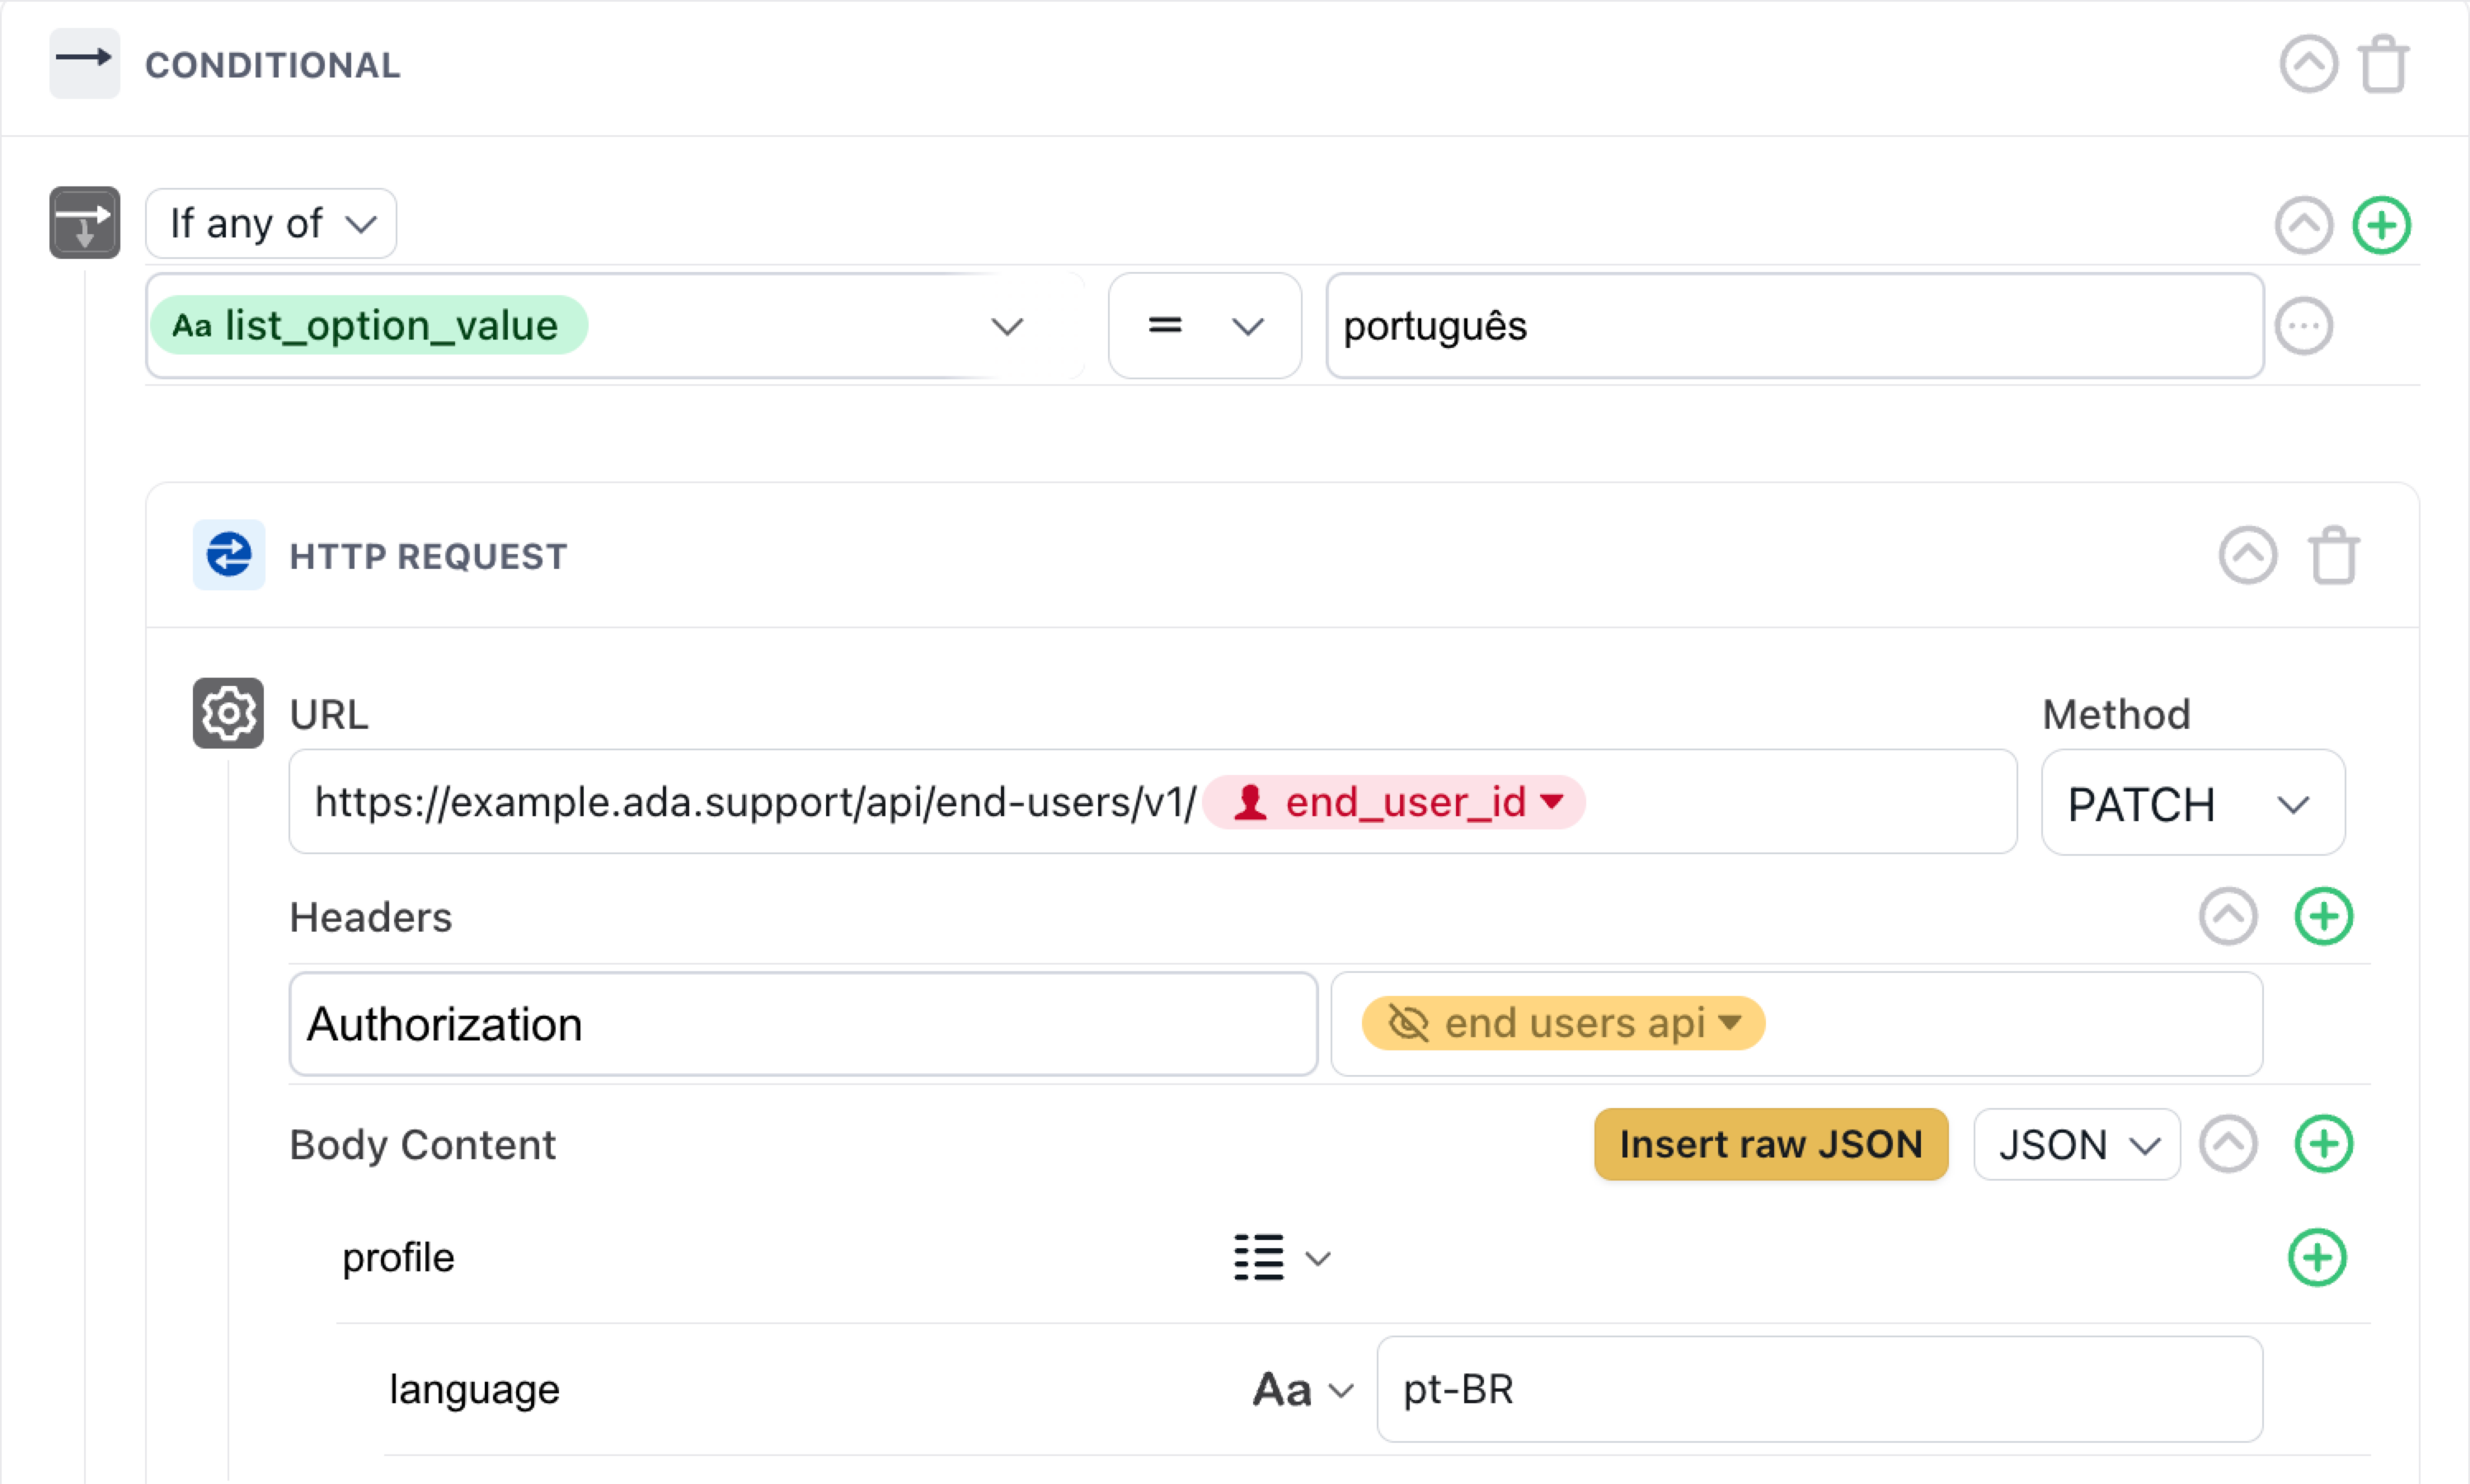
Language codes must be in BCP 47 4-digit format, per the End Users API schema.
- Save your greeting.
- Test the greeting in your Test Bot, embed, or any other channel. The conversation language should change immediately based on the end user’s selection, and the AI Agent should immediately respond using the appropriate translation.
Get notified at your webhook when an Ada end user is created or updated
Before you begin
Before you set up your webhook, make sure you have everything you need:
- An Ada dashboard with the Test Bot enabled (or any other supported channel where your bot is active)
- An API token
Set up your webhook
- Set up a test webhook, or bring your own, with Ada’s webhooks manager.
- On the Ada dashboard, find your webhook settings.
- If you’re using a generative AI Agent, go to Platform > Webhooks.
- If you’re using a scripted bot, go to Settings > Integrations > Webhooks.
- Click Add Endpoint to get started. If you don’t have your own endpoint, configure a test endpoint using Svix Play.
- In the Message Filtering section, subscribe to both
v1.end_user.updatedandv1.end_user.createdevents. - Click Create to save your endpoint.
- On the Ada dashboard, find your webhook settings.
- Open your Test Bot in a new tab or window and start a conversation.
- In a separate tab, open the Webhooks Logs to monitor new events. You’ll see the conversation with your Test Bot has created an end user! There will be a corresponding log entry called
v1.end_user.created. - Click on the log to see the webhook event payload and copy the
end_user_idvalue. - Make a PATCH request with the following payload:
JSON
- Check the Webhooks Logs tab. A successful PATCH request will generate a
v1.end_user.updatedlog. - You can continue to chat with Test Bot while making these changes to the end user. The End Users API can update records at any point whether a conversation is active or not. Go ahead and send a few messages to your AI Agent!
- Finally, go the Conversations View and find your conversation. You’ll see that the metavariables are updated from the PATCH request.
That’s it! You have the building blocks to create an integration between your customer data platform and Ada’s End Users API. Your integration can ingest webhook events and use the PATCH endpoint to send user details to Ada so that features such as Article Rules can be applied automatically for your end users.