Configure and use the ServiceNow app
Overview
The ServiceNow app connects your chatbot to your ServiceNow account. Once connected, your bot can create ServiceNow incidents in your system within any Answer you choose.
Connect the ServiceNow app
Before you can use the ServiceNow block, you must connect Ada with your ServiceNow account. Before you start, have your ServiceNow subdomain, username, and password ready.
-
On the Ada dashboard, go to Settings > Integrations.
-
In the Integrations view, scroll down to App Integrations. Find the ServiceNow integration card in the list, then click Connect. The ServiceNow configuration dialog opens.
-
In the ServiceNow configuration dialog, complete the three fields with your ServiceNow account credentials:
-
Subdomain
The subdomain is the portion of your ServiceNow account URL unique to your account, found just in front of service-now.com (
https://SUBDOMAIN.service-now.com). -
Username
-
Password
-
-
Click Save.
The ServiceNow Answer
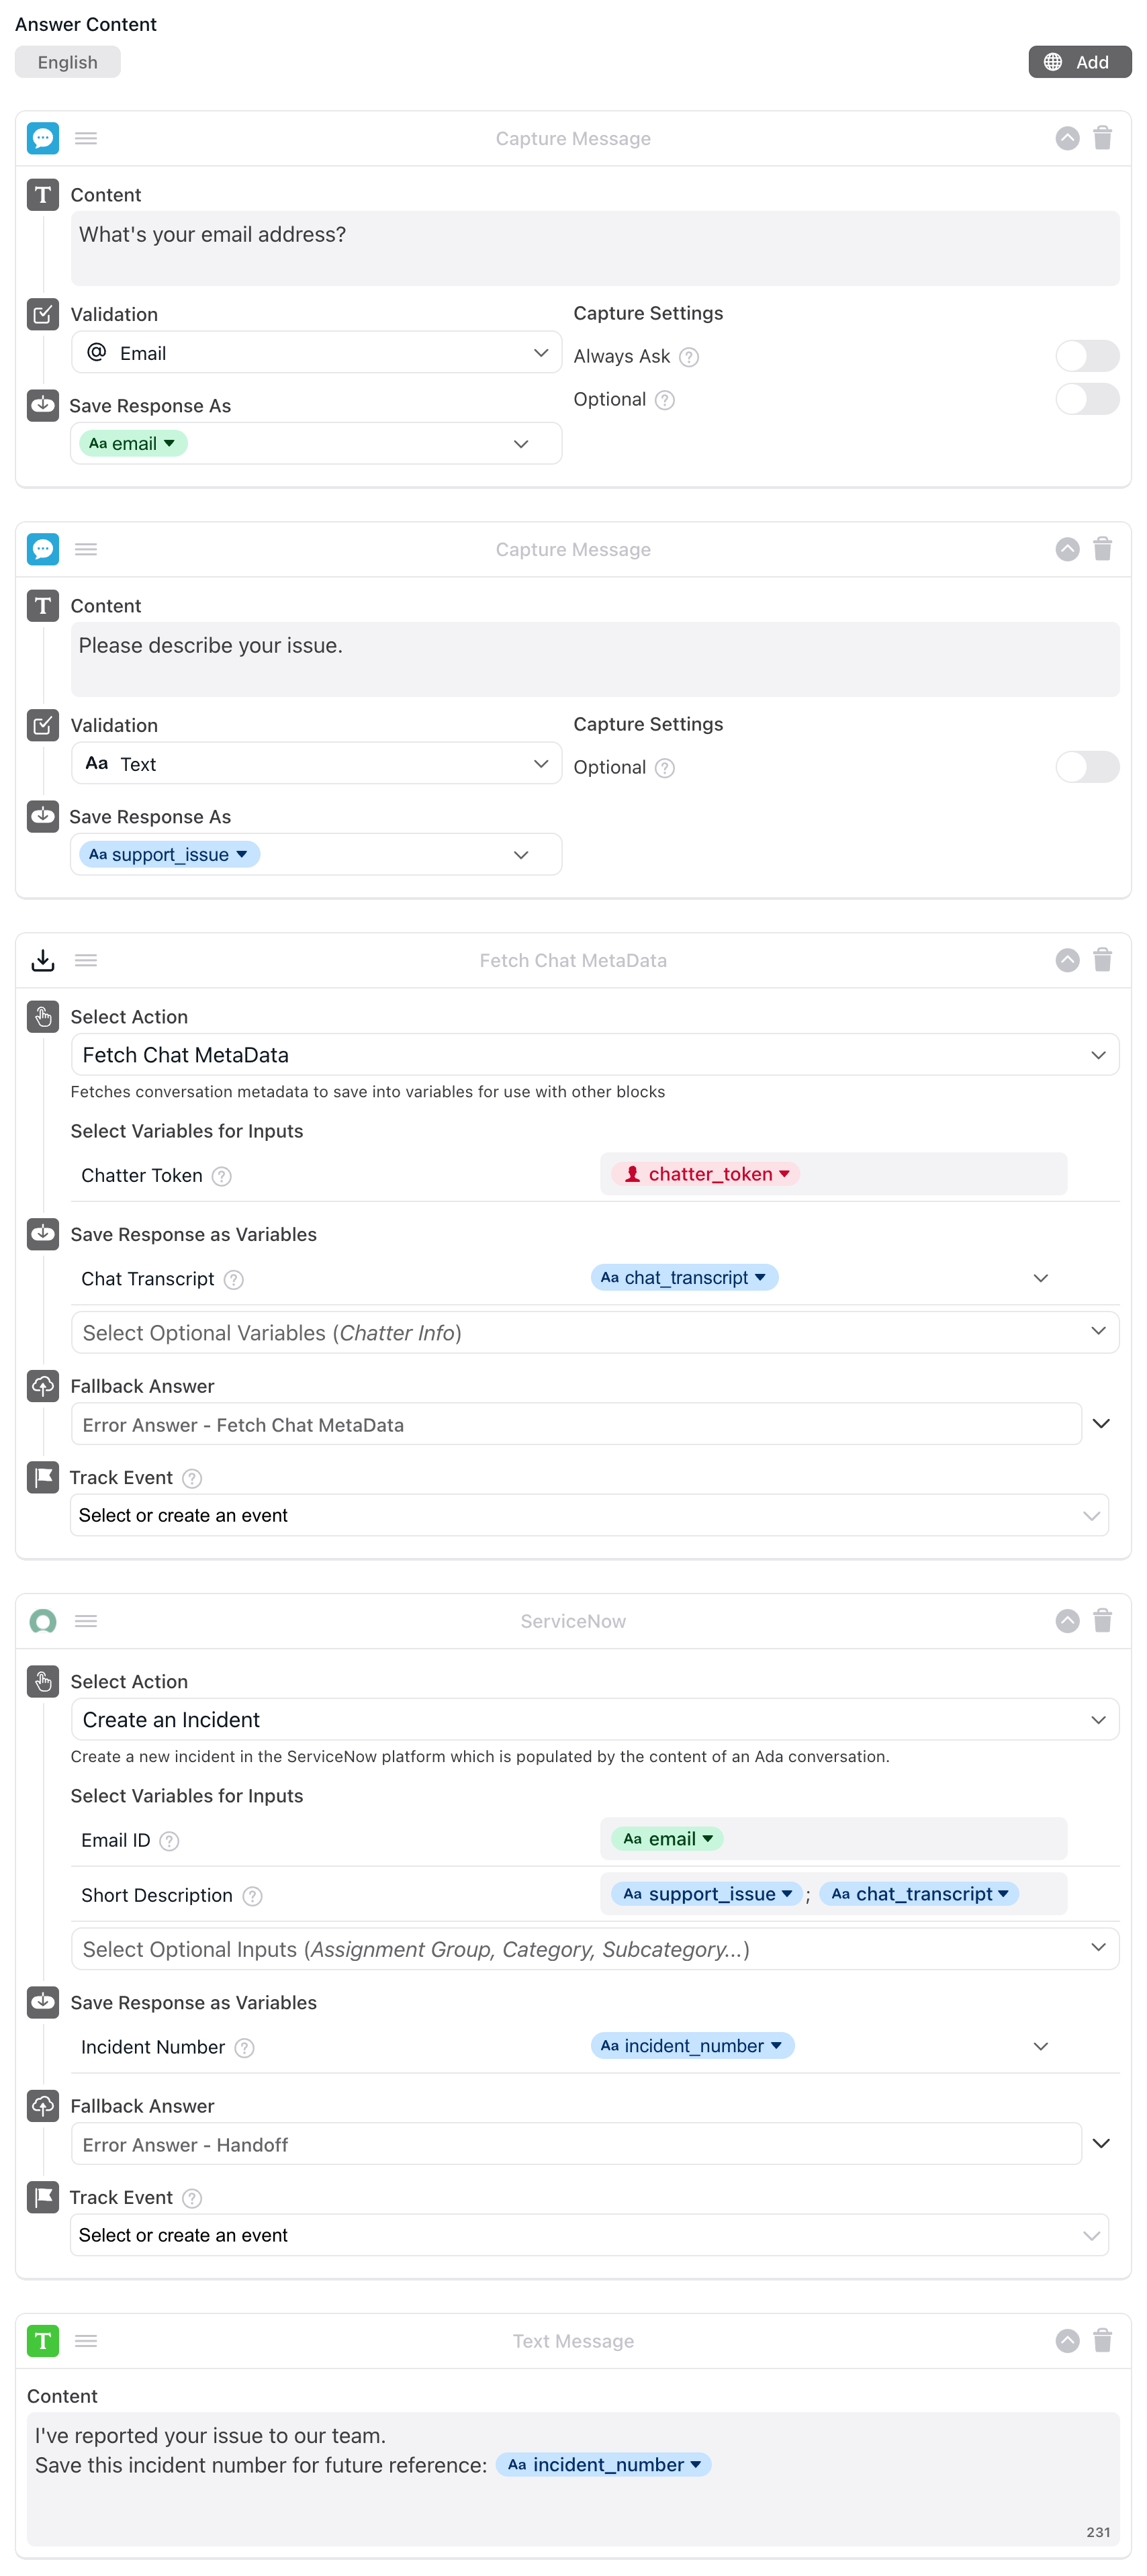
The ServiceNow block connects your bot to your ServiceNow account, creates a ticket, and attaches the incident information. Since block itself simply transfers the information, how do we get the information in the first place? The answer is in how you build the Answer. Let’s look at how to build an ServiceNow Answer.
There are two fields you need to complete for the ServiceNow block:
-
Email – Capture the email variable directly from the chatter using the Capture block. It can also be passed to your bot as a metavariable from your database.
-
Short Description – This field contains the issue your chatter is reporting. Use a Capture block to ask the chatter to describe their issue directly and save it in a variable. You then add that variable to the short description field. You can also use the Fetch Chat Metadata block to export the entire chat transcript to another variable.
Your ServiceNow Answer must include blocks positioned to capture this information before the ServiceNow block. A typical setup serves the blocks in this order:
-
Capture block (email)
-
Capture block (chatter’s issue)
-
Fetch Chat Transcript block (chat transcript)
-
ServiceNow block

Now that we’ve seen how to organize a ServiceNow Answer, let’s look at how to configure the ServiceNow app and set up the Answer block.
Configure the ServiceNow block
Once you’ve connected your bot with your ServiceNow account, you’re ready to configure the ServiceNow block.
-
Go to Build > Answers, open an Answer or create a new one, then drag and drop the ServiceNow block into your Answer.
-
In the ServiceNow block, click the Select Action drop-down menu, then select Create an Incident. The Select Variables for Inputs and Save Response as Variables sections appear.
-
Under Select Variables for Inputs, complete the two mandatory fields:
-
Email ID – Add the email variable to this field to attach the chatter’s email address to the incident.
-
Short Description – Add the chat transcript variable captured by the Fetch Chat Metadata block.
-
-
Click the Select Optional Inputs drop-down menu, then select any of the following optional input fields you’d like to include with your ServiceNow incident:
-
[Optional] Under Save Response as Variables, click the Select Optional Variables drop-down menu, then select Incident Number.
-
Click the Choose a Variable drop-down menu, then choose an existing variable or create a new variable to capture the Incident Numbers.
-
Under Fallback Answer, click the Choose an Answer drop-down menu, then select a fallback Answer with messaging for your chatters should something prevent the block connecting to the ServiceNow API.
-
[Optional] Under Track Event, click the Select or Create an Event drop-down menu, then select an Event from the list, or create a new one. Doing this records the event in the Event Performance report.
-
Click Save.