Support multiple languages in the same bot
Understand multilingual content support
Communicating with your customers in their preferred language makes them feel like VIPs. Ada lets you do just that! Use your bot’s multilingual functionality to provide that VIP experience to each of your customers.
While Ada offers a variety of languages for communicating with customers, the dashboard is always only in English.
There are two translation methods available to you:
-
Automatic translation – When chatters ask questions in different languages, your bot automatically sends your English Answer content to Google Translate, then responds with the translated content.
-
Custom translation – Manually add your own message translations. Adding a custom translation to an Answer overrides automatic translation for that Answer in that language.
This feature may not be included with your organization’s subscription package. For more information, see Ada’s Pricing page, or contact your Ada team.
Supported languages
Ada’s multilingual functionality supports the following languages:
For supported right-to-left languages, the chat is tailored for the best chatter experience. This includes flipped UI components such as settings, quick replies, loading bar, etc.
Turn on multiple language support and automatic translation
To enable multilingual functionality in your bot, follow these steps:
-
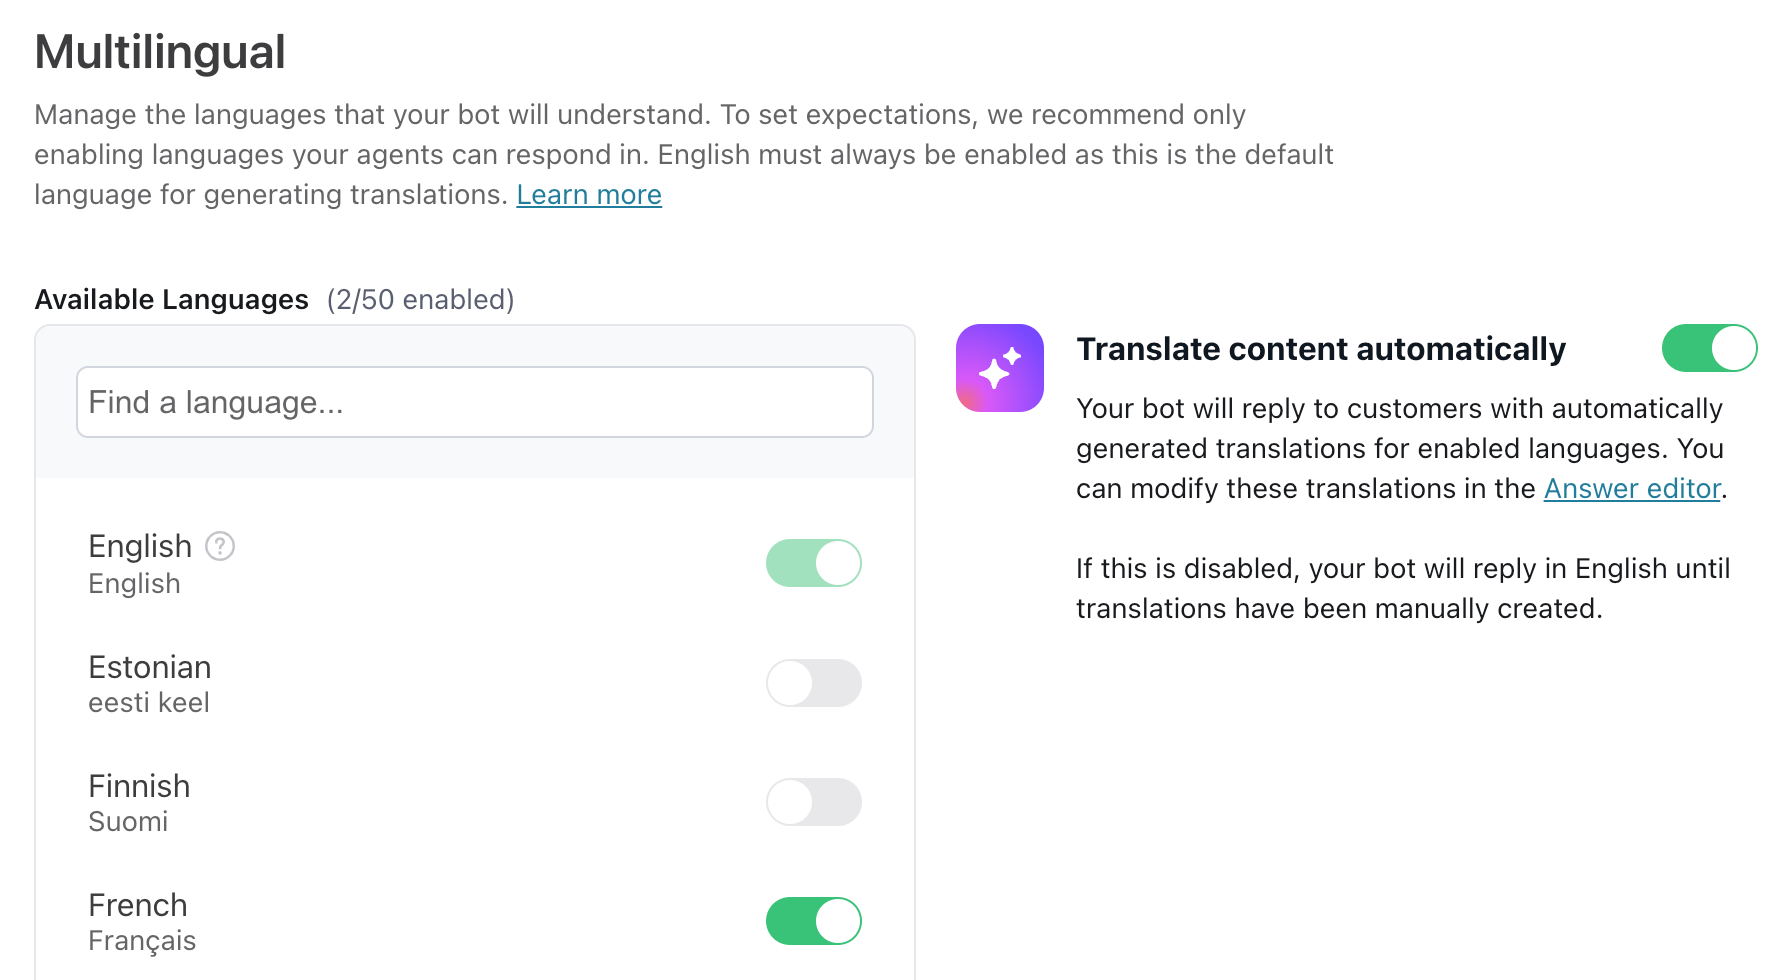
On the Ada dashboard, go to Settings > Bot Setup > Multilingual.
-
Under Available Languages, select any languages you want your bot to be able to send messages in, in addition to English, which is always enabled.
-
By default, the Translate content automatically toggle is on, which allows your bot to serve automatically translated content in non-English languages so you don’t have to manually translate each Answer. For more information on how this toggle works, see the Understand how automatic translations work section below.
Enable only the languages you need
Tempted to enable every language you possibly can? Hold off! Consider the following best practices:
-
You should only enable languages that your agents speak. Otherwise, you might hand off chatters to agents who can’t help them.
-
For each language you enable, you should have someone on your team who speaks that language. That way, they can review your Answer content and add custom translations where necessary.
Understand how automatic translations work
English is the default support language in all Ada bots. You can’t disable it - your bot will always be able to reply to English-speaking customers. Your bot can always understand chatter questions in any of Ada’s supported languages, regardless of whether they’re enabled in your bot, but can only respond in the languages that are enabled in the multilingual settings.
If the Answer your bot selects to serve to the chatter has a manual translation for the chatter’s language, your bot always responds with that manual translation. Otherwise:
-
If the Translate content automatically toggle is on, your bot runs your English Answer content through Google Translate and responds with the translated content.
-
If the Translate content automatically toggle is off, your bot responds with your English Answer content, regardless of the chatter’s language.
We always recommend serving content in the same language chatters are writing in. As a result, we don’t recommend turning off this toggle.
Set your bot’s starting language
The starting language is the language your bot starts web chats in. If most of your customers speak the same non-English language, you can choose to set it as your bot’s starting language. Your bot will automatically begin every conversation in this starting language, but of course, chatters can still change the language at any time. The starting language for all new Ada bots is English.
Add the language script to Embed2
You can change the bot’s starting language by making a small addition to the Ada Embed2 script. You might already be familiar with it, but if you need a refresher, check out our Embed2 documentation. Let’s take a look at how to set up a bot’s default language to French.
-
Find the default embed script on your webpage. It should look like this:
-
To set the bot language, add the following
window.adaSettingssnippet between the head and the script of the basic Ada Embed2 script, and add the language format code from the ISO 639-1 language format.Your revised Ada Embed2 script should look similar to this:
How chatters can change the chat language
Chatters can change the language using one of the following methods:
-
Autodetect - If a chatter types a message of at least three words and 20 characters in an enabled language, the bot will try to identify the language and change the language of the chat.
The three word minimum doesn’t include common words, such as “and,” “the,” etc.
-
Language name - If a chatter types the exact name of an enabled language (e.g., “French” or “Français”) into the chat field, the bot will change the chat language accordingly. This must be an exact match — typos or the name of the language within a longer message (e.g., “Do you speak French?”) will not trigger a language change.
-
Chat settings - The chatter can click the Settings icon
 to access the chat window settings in Ada’s web chat. They can then click Change language and select one of the languages you have enabled in your bot.
in your bot.
to access the chat window settings in Ada’s web chat. They can then click Change language and select one of the languages you have enabled in your bot.
in your bot.
Why didn’t my bot switch languages?
There are several specific reasons why your AI Agent might not switch languages as expected:
- Minimum character and word requirements for Latin-based languages
-
For messages written entirely in Latin characters, the message must contain at least 3 words (space-separated) and 20 characters to trigger a language switch
-
This requirement applies to all languages except: Greek, Hindi, Japanese, Khmer, Korean, Myanmar, Punjabi, Tamil, Thai, Simplified Chinese, and Traditional Chinese
-
Switch-disabled language pairs
-
Some languages are considered too similar by our model, so switching between them is disabled to prevent premature language changes
-
These pairs include:
- Malay and Indonesian
- Simplified Chinese and Traditional Chinese
- Spanish and Catalan
- Croatian and Serbian
-
Switch-disabled languages
- Once set to these languages, the AI Agent cannot switch out of them through language detection:
- Haitian Creole
- Tagalog
- Bosnian
- Once set to these languages, the AI Agent cannot switch out of them through language detection:
-
Non-Latin writing systems
- For languages with non-Latin writing systems (like Hindi, Chinese, etc.), we do not support recognizing Latin-based versions of these languages
- For example, Hindi written in Latin characters (like “kya hal-chal hai”) cannot be detected, while the same phrase in Devanagari script (क्या हाल-चाल है) can be recognized
-
Diacritics requirement
- For languages that use diacritics (like Vietnamese), the model requires proper diacritic usage
- Messages without diacritics may be misidentified (e.g., “voi” without diacritics might be detected as Italian instead of Vietnamese)
-
Low performance languages
- The model has lower accuracy for these languages:
- Afrikaans
- Catalan
- Croatian
- Haitian Creole
- Malay
- Norwegian
- Slovenian
- Urdu
- The model has lower accuracy for these languages:
-
Unicode-based detection
- For certain languages with unique writing systems, detection is based on Unicode rather than the model
- This applies when the entire message uses only one of these writing systems:
- Greek
- Devanagari
- Hiragana
- Katakana
- Khmer
- Hangul
- Myanmar
- Gurmukhi
- Tamil
- Thai
-
Denied words
- Messages containing certain common words across multiple languages will not trigger a switch
- These words include: “no”, “meta”, “variable”, “swish”, “support”, “agent”, “face”, “id”, “selfie”, “bet”, “confirmation”, “start”, “vacation”, “hold”, “nya”, “fuel”, “point”, “domain”
-
How automatic translations work
With automatic translation activated, your bot does the following:
-
Identify the best Answer to provide to the chatter.
-
Provide the translated Answer content to the chatter.
-
If the Answer has a custom translation for the chatter’s language, the bot serves the custom translation.
-
If the Answer doesn’t have a custom translation for the chatter’s language, the bot translates the Answer’s content from English to the chat language using the Google Translate API and serves Google’s automatic translation.
-
You can rely on automatic translations for most scenarios; however, when your Answers contain non-standard language like brand names, idioms, slang, industry-specific terminology, etc., you might run into situations where you prefer to write your own translations. To learn how to do that, see Work with custom translations.
How your bot initially determines the chatter’s language in Ada’s web chat
Your bot adheres to an order of operations when determining the chat language. It proceeds sequentially through the following criteria to determine the opening language:
-
Embed2 - If the Embed2 script defines a default language, the bot will always launch in that language. If the language is not set in the Embed2 script, it moves on to check the chatter’s browser language.
-
Browser - The bot launches in the chatter’s browser language. If the bot cannot detect the chatter’s browser language, it launches in English.
-
English - If neither a default language is defined in the Embed2 script, nor can a browser language be detected, the bot launches in English.
Regardless of how the bot determines the language to use, it can use only the languages you’ve enabled in its settings. Be sure to select each language you want to support with your bot.
How your bot initially determines the chatter’s language in other channels
Other channels don’t have as much information available for your bot to determine the chatter language. In these cases, the bot just uses Ada’s language detection feature to determine the language the chatter’s input is in.
Work with custom translations
If you have automatic translations on, you can preview translations in your dashboard and modify them if necessary. That way, you can get an idea if the translated content Google provides is sufficient for your Answer content, or if you need to enter a custom translation to really get your content across.
When you include custom translations, the bot overrides the automatically translated content and provides your custom translations instead.
View and modify translated content for an Answer
For Answers that don’t have custom translations, you can get a preview of how Google will translate the content. Then, if you want to modify the translation, you can do so.
-
Ensure you have enabled all the languages that you want to serve translated content for in your bot. For more information, see Turn on multiple language support and automatic translation.
-
On the Ada dashboard, go to Build > Answers, then open the Answer you want to see translated content for.
-
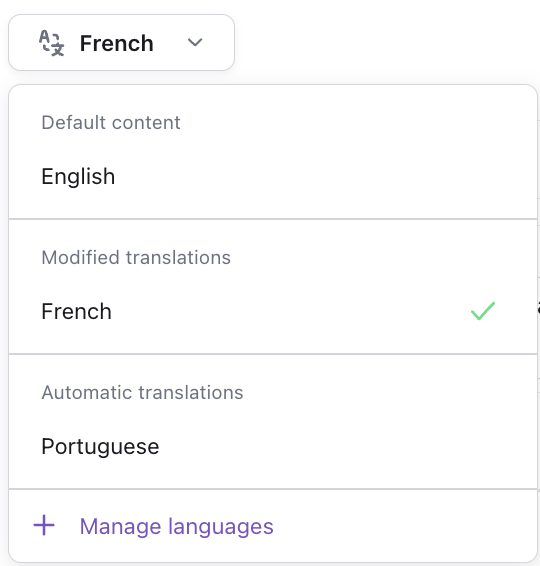
Under Answer Content, in the list of your bot’s supported languages, select the language you want to see content for.
The non-English languages can have two different headers above them, indicating the types of translations you’ll see:
-
Automatic Translations - Translated content comes directly from Google Translate and hasn’t been modified at all.
-
Modified Translations - This Answer contains custom translations and/or modifications to Google’s default translations.
If you see that the language you want to use isn’t in the list, click Manage Languages to enable that language in your bot.
-
-
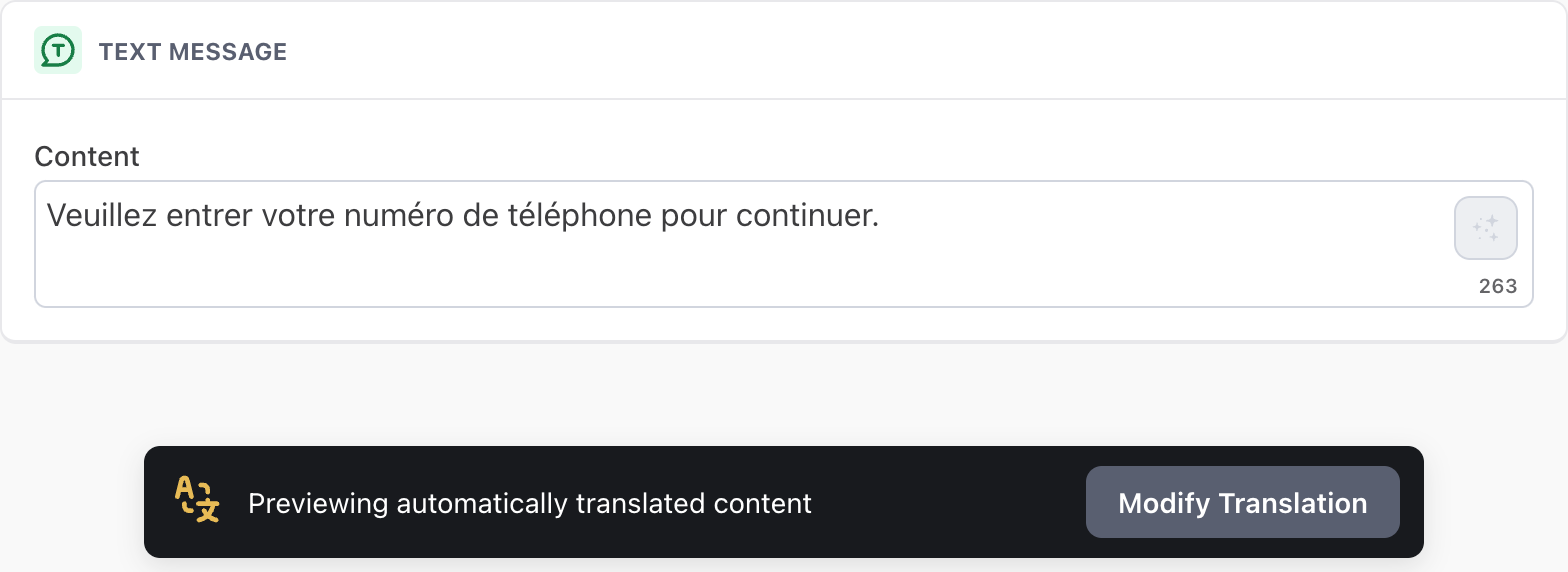
If the Answer only has automatic translations, click Modify Translation. The blocks become editable.
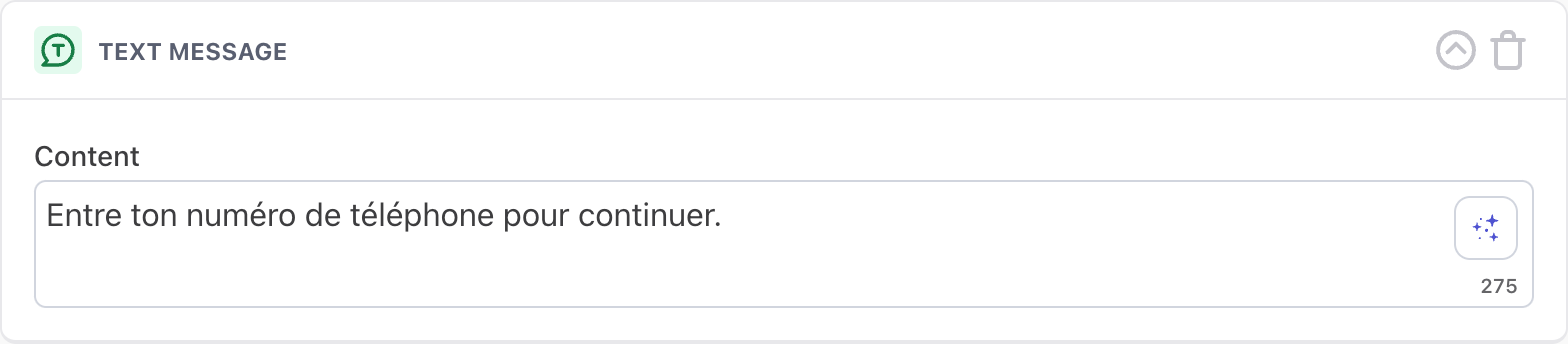
If the Answer already has custom translations, the blocks are editable as soon as you open the Answer.
-
Modify the translation as required and click Save. If the Answer didn’t have any custom translations before, the language now appears under Modified Translations in the list of supported languages for this Answer.
Remove a custom translation from an Answer
To delete a custom translation from an Answer:
-
On the Ada dashboard, go to Build > Answers, then open the Answer you want to see translated content for.
-
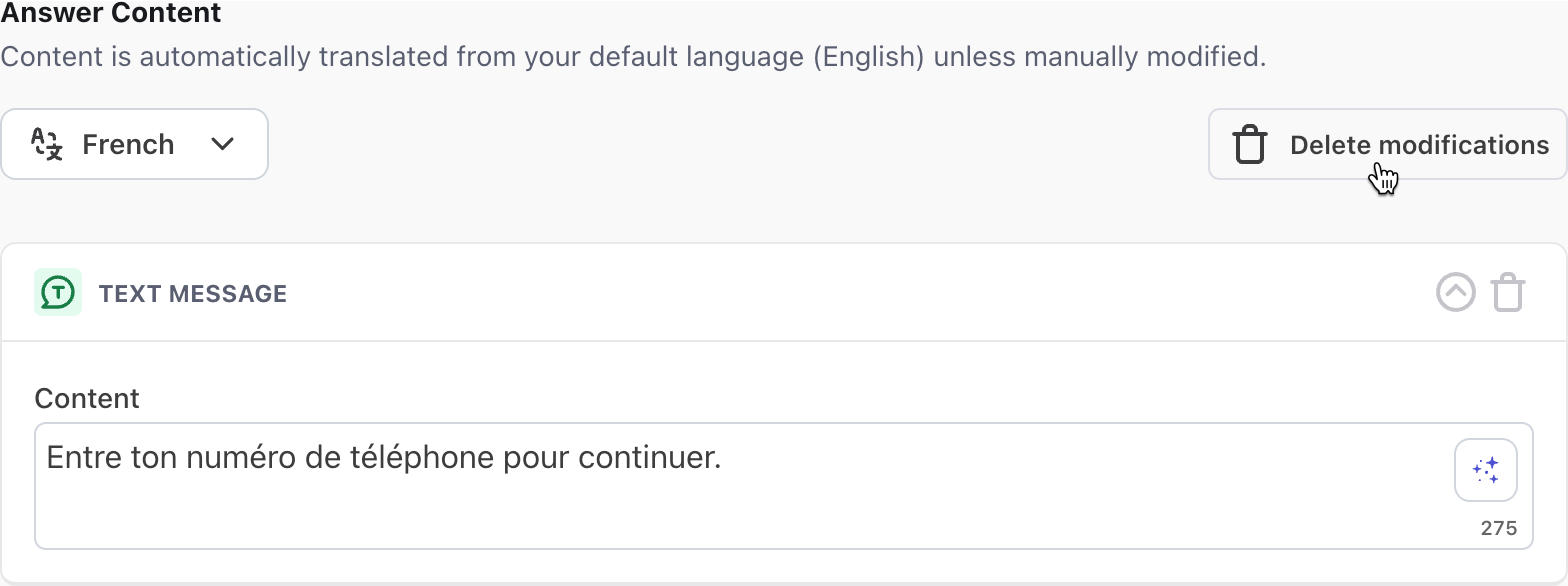
Under Answer Content, in the list of your bot’s supported languages, select the language you want to delete the custom translation for.
-
Click Delete modifications. Then, in the confirmation window that opens, click Delete.
-
If you have automatic translations turned on for your bot, your bot will go back to serving automatically translated content to chatters.
-
If you don’t have automatic translations turned on for your bot, your bot will serve English content for this Answer to chatters.
-
Translate quick reply buttons
You can use the Quick Replies block to add quick reply buttons to the bottom of an Answer. These buttons act as links that trigger other Answers.
You can rely on automatic translations for quick reply button text or add custom translations if you prefer. The table below shows how these button titles will be translated depending on the Answer’s settings.
Quick reply button text is automatically translated unless a custom translation is provided. To add a custom translation for a quick reply button:
-
In the Answer editor, click Options > Answer settings.
-
Beside the Answer Label heading, click Add.
-
Select the language you want to translate the Answer Label to. This list is populated from the languages that are enabled in your bot.
-
After you select the language, an additional Answer Label field appears. Input the custom translation for this Answer’s quick reply button.
-
Click Save.