Set up single sign-on (SSO) for your bot
With SSO, you can sign into your Ada dashboard using your organization’s authentication tool, rather than having to type in your username and password every time you log in.
Setting up SSO requires work at different stages for both your Ada representative and your organization. Your Ada representative will set up Ada’s Okta account to work with your organization’s identity provider (IDP), and you will set up your organization’s IDP. This topic walks you through the tasks you have to complete on your end. Once you have completed this process, you can use the same IDP for multiple bots.
Ada uses Okta as a service provider (SP), but that doesn’t mean you have to use Okta for your organization’s identity provider (IDP).
After you have SSO set up, you will be able to go to the Ada login page and click Log in With SSO to log into your Ada dashboard. We do not currently support logging in directly from your IDP, so you may want to hide Ada in your IDP’s dashboard when you’re setting it up to avoid confusion.
-
Contact your Ada representative so they can start setting up your IDP in Ada’s Okta instance. They will provide you with two values:
-
ACS URL -
Audience URI
You’ll need these values when you configure your SAML application in the next step.
-
-
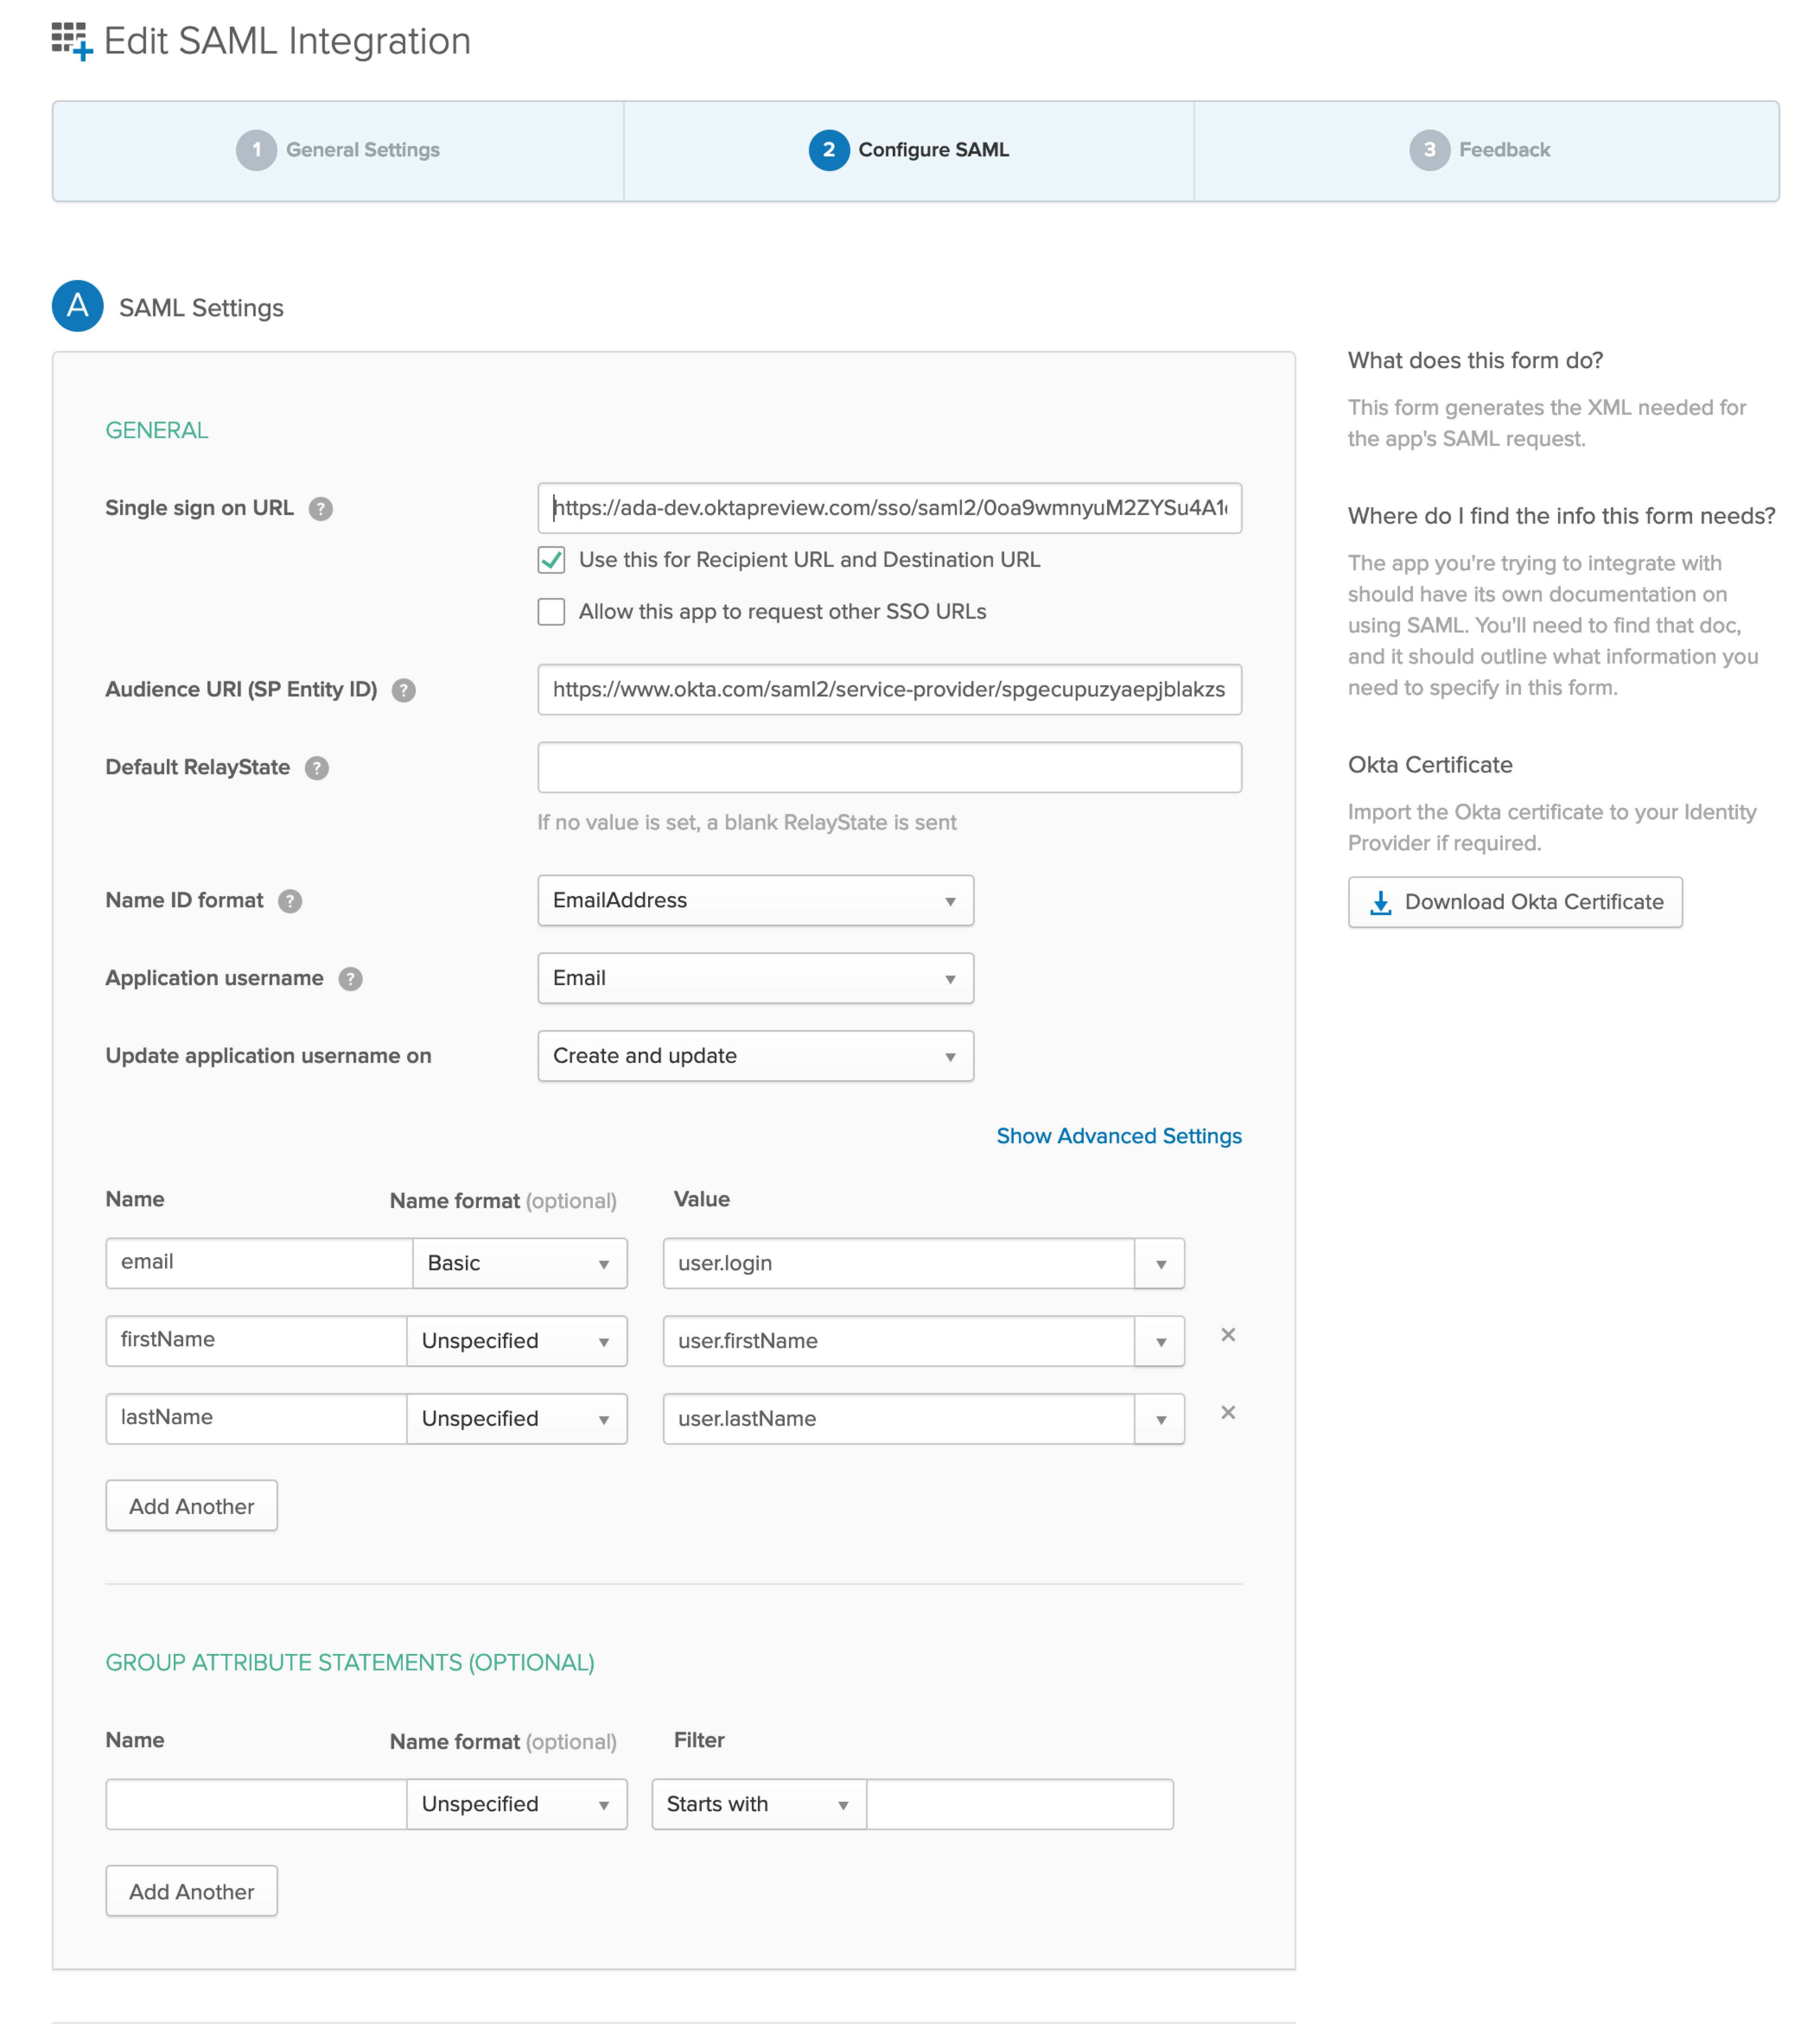
Create a SAML application in your IDP for Ada. Then, configure your SAML application with the following:
-
Assertion Consumer Service URL (aka Single Sign-On URL): use the
ACS URLyour Ada representative provided- The Recipient URL should also use the same
ACS URL
- The Recipient URL should also use the same
-
Entity ID (aka Audience URI): use the
Audience URIyour Ada representative provided -
Name ID format:
email -
Application Username:
email -
Add three more user attributes in addition to Name ID:
email,firstName, andlastName
This example shows a completed SAML application configuration in Okta. Note that there’s also a button to download a certificate, which you’ll need in step 4. Different tools make the certificate available in different places.
-
-
Find your IDP’s metadata. Again, different IDPs make this information available in different places.
As an example, this is how you can find the metadata in Okta:

In the metadata, find these two values:
-
entityID -
Single Sign-On URL
Some IDPs have different names for these values. The most reliable way to find them is to find an IDP Metadata
.xmlfile. That file contains these values in a standardized format.This is how they might look in the
.xmlfile. TheSingle Sign-On URLis listed as theLocationof theSingleSignOnServiceforHTTP-POST: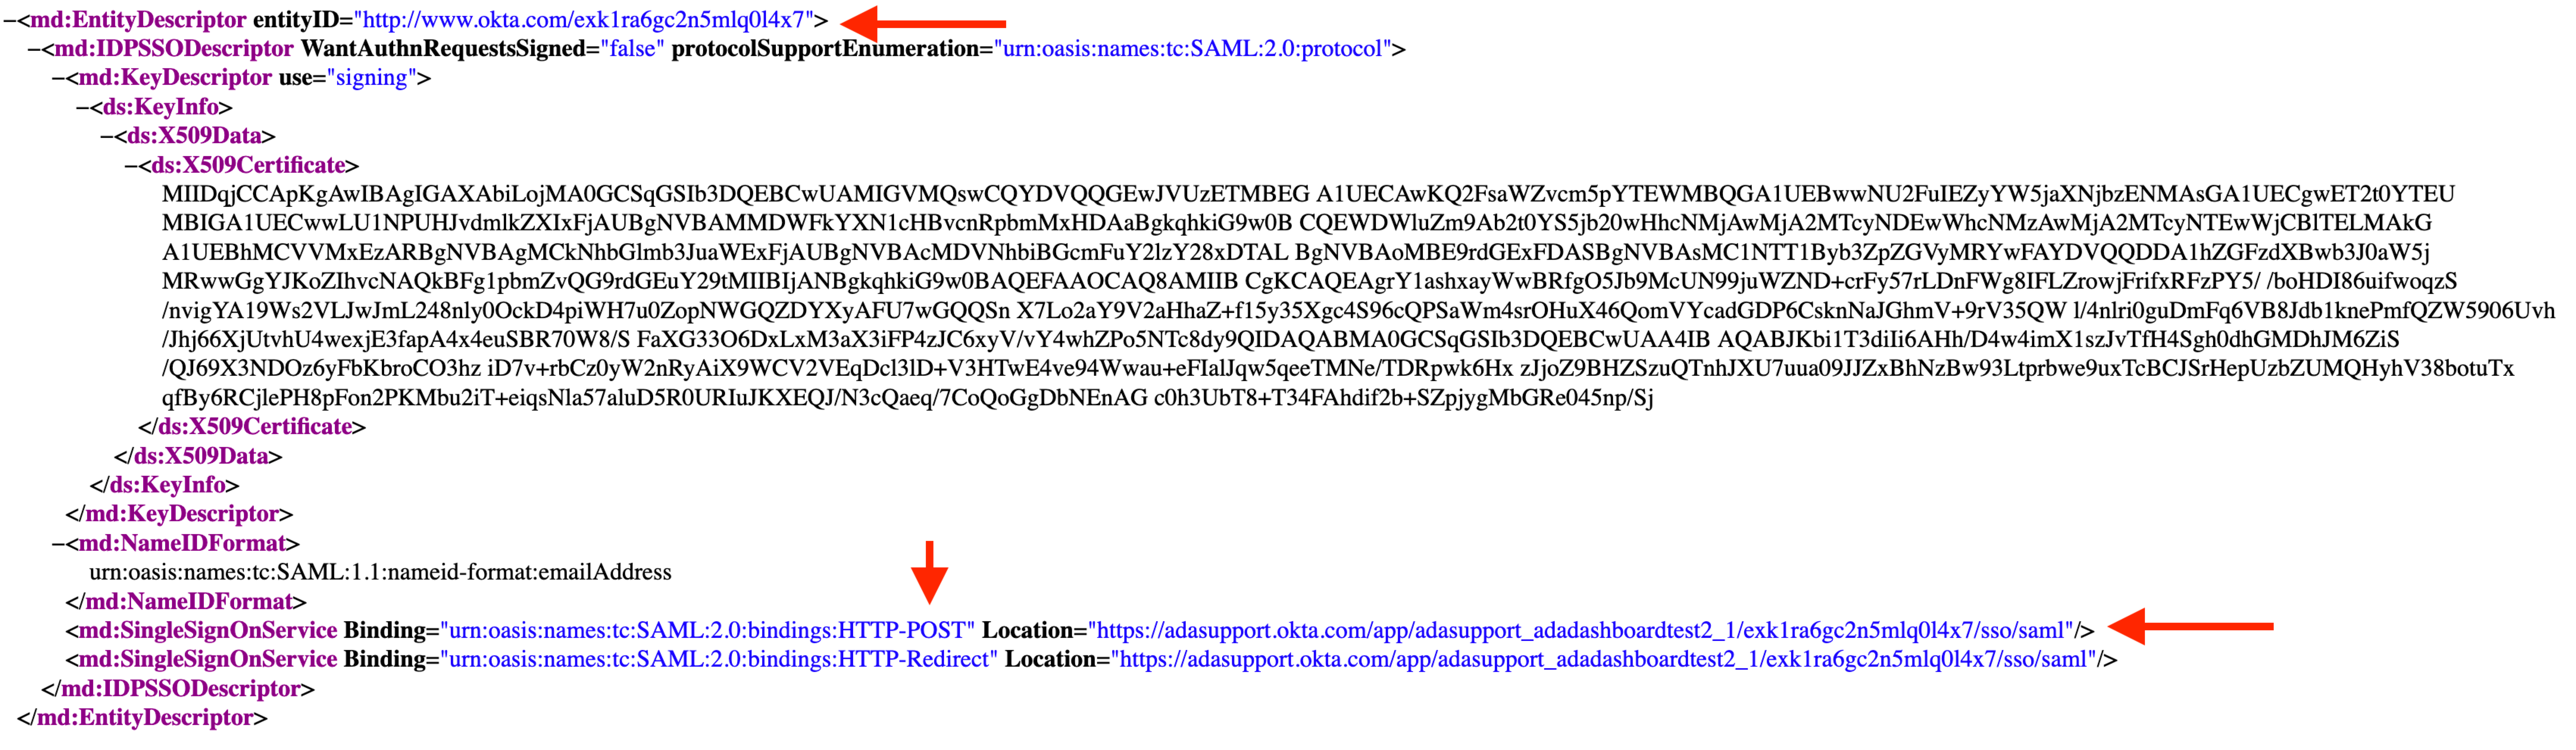
-
-
Find your IDP’s certificate, which should come in the form of a
.crt,.cert, or.pemfile.If you find a string that looks like this, paste it into a text editor and save it with a
.pemfile extension: -
Send your Ada representative the
entityIDandSingle Sign-On URLvalues and certificate from your IDP. They can then complete the setup process on their end. -
To allow users to log in with SSO, assign them the Ada Support app in your IDP. Then, in your Ada dashboard, delete their existing accounts and add them again, selecting SSO as their login type. Users can use only one method to log into Ada (password or SSO), but not both. For more information, see Manage users and permissions.