Create selectable menus using the List Option block
Overview
The List Option block lets your bot offer chatters a list of selectable items. The item the chatter selects is saved as a variable to be used as you see fit. You can create the list of options manually, or populate the list with saved variables.
This feature may not be included with your organization’s subscription package. For more information, see Ada’s Pricing page, or contact your Ada team.
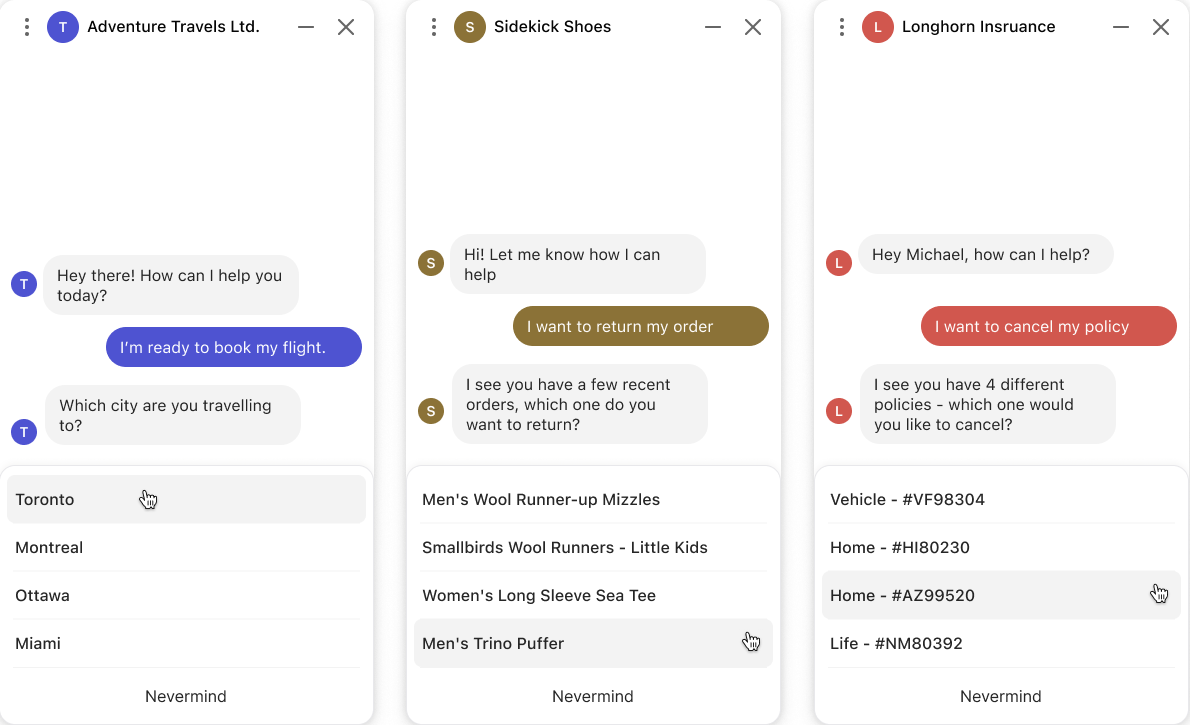
Here are some additional use cases for the List Option block:
-
Selecting a product (e.g., retail item selection)
-
Selecting items from an order list (e.g., to indicate an item missing from a delivery)
-
Identifying reasons for requesting an agent during the handoff process
The List Option block works a bit differently on social media platforms. To see how each platform handles different blocks, see Feature compatibility.
Use the List Option block
On the Ada dashboard, go to Build > Answers. Then, select an Answer or create a new one.
If you want the options in your list to populate dynamically from an API call, do the following:
- Set up an HTTP Request block in your Answer.
Use a data key to save the required portion of the API response as a variable. That portion of the API response is what you’ll use to dynamically generate your list.
Variables are limited to 100,000 characters. Particularly when you’re saving all or part of an API response as a variable, take care that you don’t exceed this limit. If you do, you may start seeing errors, because your bot might not be able to correctly parse your variable content.
Other than the variable text limit, the only limitation on how many options can be in your list is that every message Ada serves must be under 10KB. Messages virtually never reach this size.
Drag and drop the List Option block from the block drawer into the Answer editor.
In the text field at the top of the block, enter a message prompting the chatter to make a selection. It could be as simple as “Pick an option,” but should also include specific instructions when necessary. This bubble will appear right before the list of options.
Under Options Source, choose how you want to populate the list items. Then, depending on your choice, configure how you want the list items to appear under Option Setup.
Click Manual to use a static list of options. You can type these out yourself, or use variables.
Configure manual list options
By default, when a chatter makes a selection, your bot saves the text they selected as the variable value. Optionally, you can define custom values for each option for your bot to save, instead of the text that appears to chatters. When configuring manual list options, you have the option of managing those items separately:
Label: The text that chatters see
Value: The text that your bot saves when the chatter makes a selection
If you choose to make custom labels and not separate values, your bot will save the label text upon chatter selection instead.
Under Label, enter the labels you want chatters to see. You can type out text, use variables, or use a combination of the two.
To add an option to the list, click Add Option. To delete an option, hover your cursor to the right of an option row and click the Delete button that appears.
If an option label only consists of a variable, and that variable is empty, that option won’t appear to chatters.In some cases, you may need to save the chatter’s selection in the dashboard differently from how it appears to them. To do this, toggle on the Assign different values from label option. Then, in the Value column that appears, enter the values you want to save in your variables.
Different values can be useful in use cases like multilingual bots that have manual translations. You may want to use translated variables so chatters see the options in their languages, but behind the scenes, you may want the saved variable to be in English for all chatters.
Note that if your bot uses automatically generated text, values are always stored in English in the back end, regardless of the language that chatters see.
Click Dynamic to use a dynamic list of options from an API response. In this case, you must save an array from the API response so you can use all instances of an attribute in the array to appear as your list options.
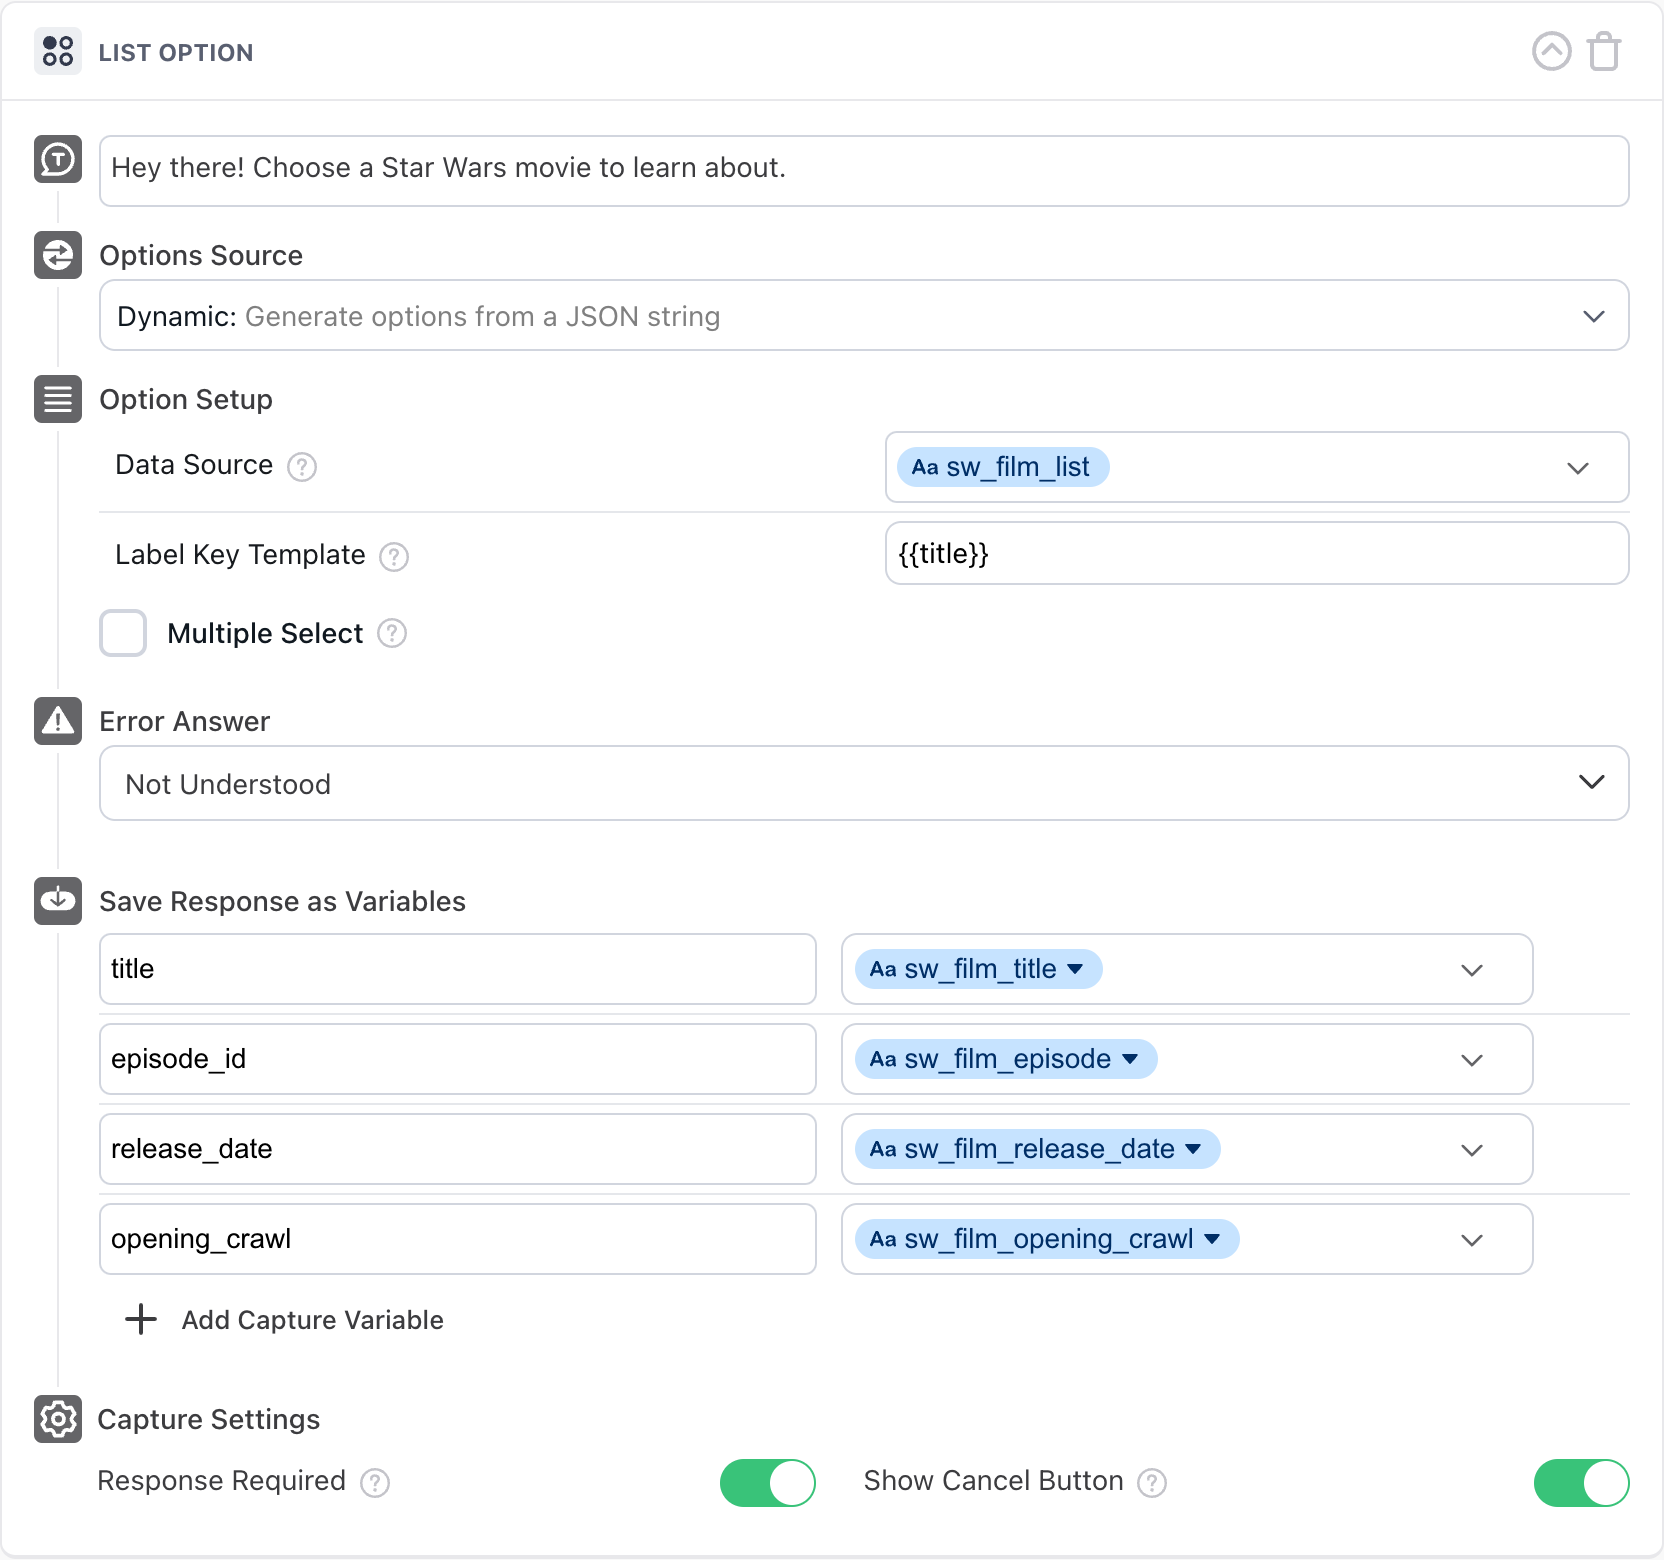
Configure dynamic list options
In the List Option block, beside Data Source, enter the variable you saved the API response portion in.
Beside Label Key Template, enter one or more attributes that appear in the variable to appear in the list options.
To include an attribute, put it in curly braces:
{{item_name}}.You can include multiple attributes, and have additional text in the items too:
{{item_name}}, ordered on {{order_date}}.
Select the Multiple Select checkbox to allow chatters to select more than one option.
Under Error Answer, select an Answer to appear as a fallback if an error occurs.
Under Save Response as Variables/a Variable, create or select a variable to save chatters’ responses in, so you can use them later. For more information about the types of variables you can save responses in, see Understand variable types.
If you turned on Multiple Select, you must save the response in a List type variable.
Under Capture Settings, choose whether you want to allow chatters to advance through the Answer without making a selection.
Turn on the Response Required toggle to ensure that chatters provide a response before being able to advance through the Answer.
If they don’t, and they click Never mind instead, your bot will exit the Answer flow and redirect the chatter to the Cancel Capture Answer.
If the Response Required toggle is off, chatters will see a Skip button that they can use to move on to the next block in your Answer.
If you turned on the Response Required toggle, a Show Cancel Button toggle appears. Turn this toggle on to show chatters a Cancel button. If a chatter clicks it, your bot will exit the Answer flow and redirect the chatter to the Cancel Capture Answer.
A completed List Option block looks like this:
Understand variable types
When creating a target variable for your options list, the variable type you choose depends on whether you allow the chatter to select only one item from the options list or multiple items. If you have multiple select enabled, you must save the response in a List variable.
Text – A Text target variable can be used with any type of option variable.
Number – To use a Number target variable, all option variables in the list must be number variables.
Yes or No – The Yes or No target variable can only be used when the option variables in the list are also yes or no variables.
List – If you allow your chatters to select more than one item from the options list, you must save their selections as a List variable. Items collected in a List variable are separated by semicolons.
Once collected using the multiple select functionality, List variables can be used as you would any other variable. Here are a few examples:
Added to a block to relay the information back to the user, with each item separated by semicolons (e.g. “The items your shipment was missing are: lipstick; mascara; blush.”)
In a Conditional block
Example: When asking a chatter to indicate items missing from an order, assume you have separate sets of instructions for chatters missing one item versus those who are missing multiple items. You can use the Conditional block to serve one set of instructions if the list length equals one item, and the second set of instructions if the list length equals two or more items.
Nesting in other blocks
You can nest the List Option block in other Operations blocks, such as the Conditional block or the Scheduled block. This is useful if you want to provide different lists of options to the chatter based on conditionals or a predetermined schedule.