View past chatter conversations
Overview
The Conversations view is where you’ll find a library of the conversations your chatters have had with your bot. Simply select a conversation from the list to view the entire transcript. This view also displays your chatter’s information, from their email address and device information, to the metavariables and global variables associated with their conversation.
What is a “conversation”?
When it comes to Ada chatbots, a conversation is the interaction between your bot and the chatter.
How are conversations organized?
The left-hand panel of the Conversations view contains the conversations library. This is a scrollable list organized by chatter, with the most recent conversations appearing at the top of the list. You can filter the list by date, or by a number of conditions, such as by a specific Answer, variable, or whether or not the conversation contains a handoff to an agent. You can learn more about the filters in the Search and filter the conversations library section of this topic.
How often are conversations updated and how long are they stored?
The All Conversations view updates to show new messages within 10 seconds of them happening. Conversations stay visible in the dashboard for six months, and then get moved to the archive.
Use the All Conversations view
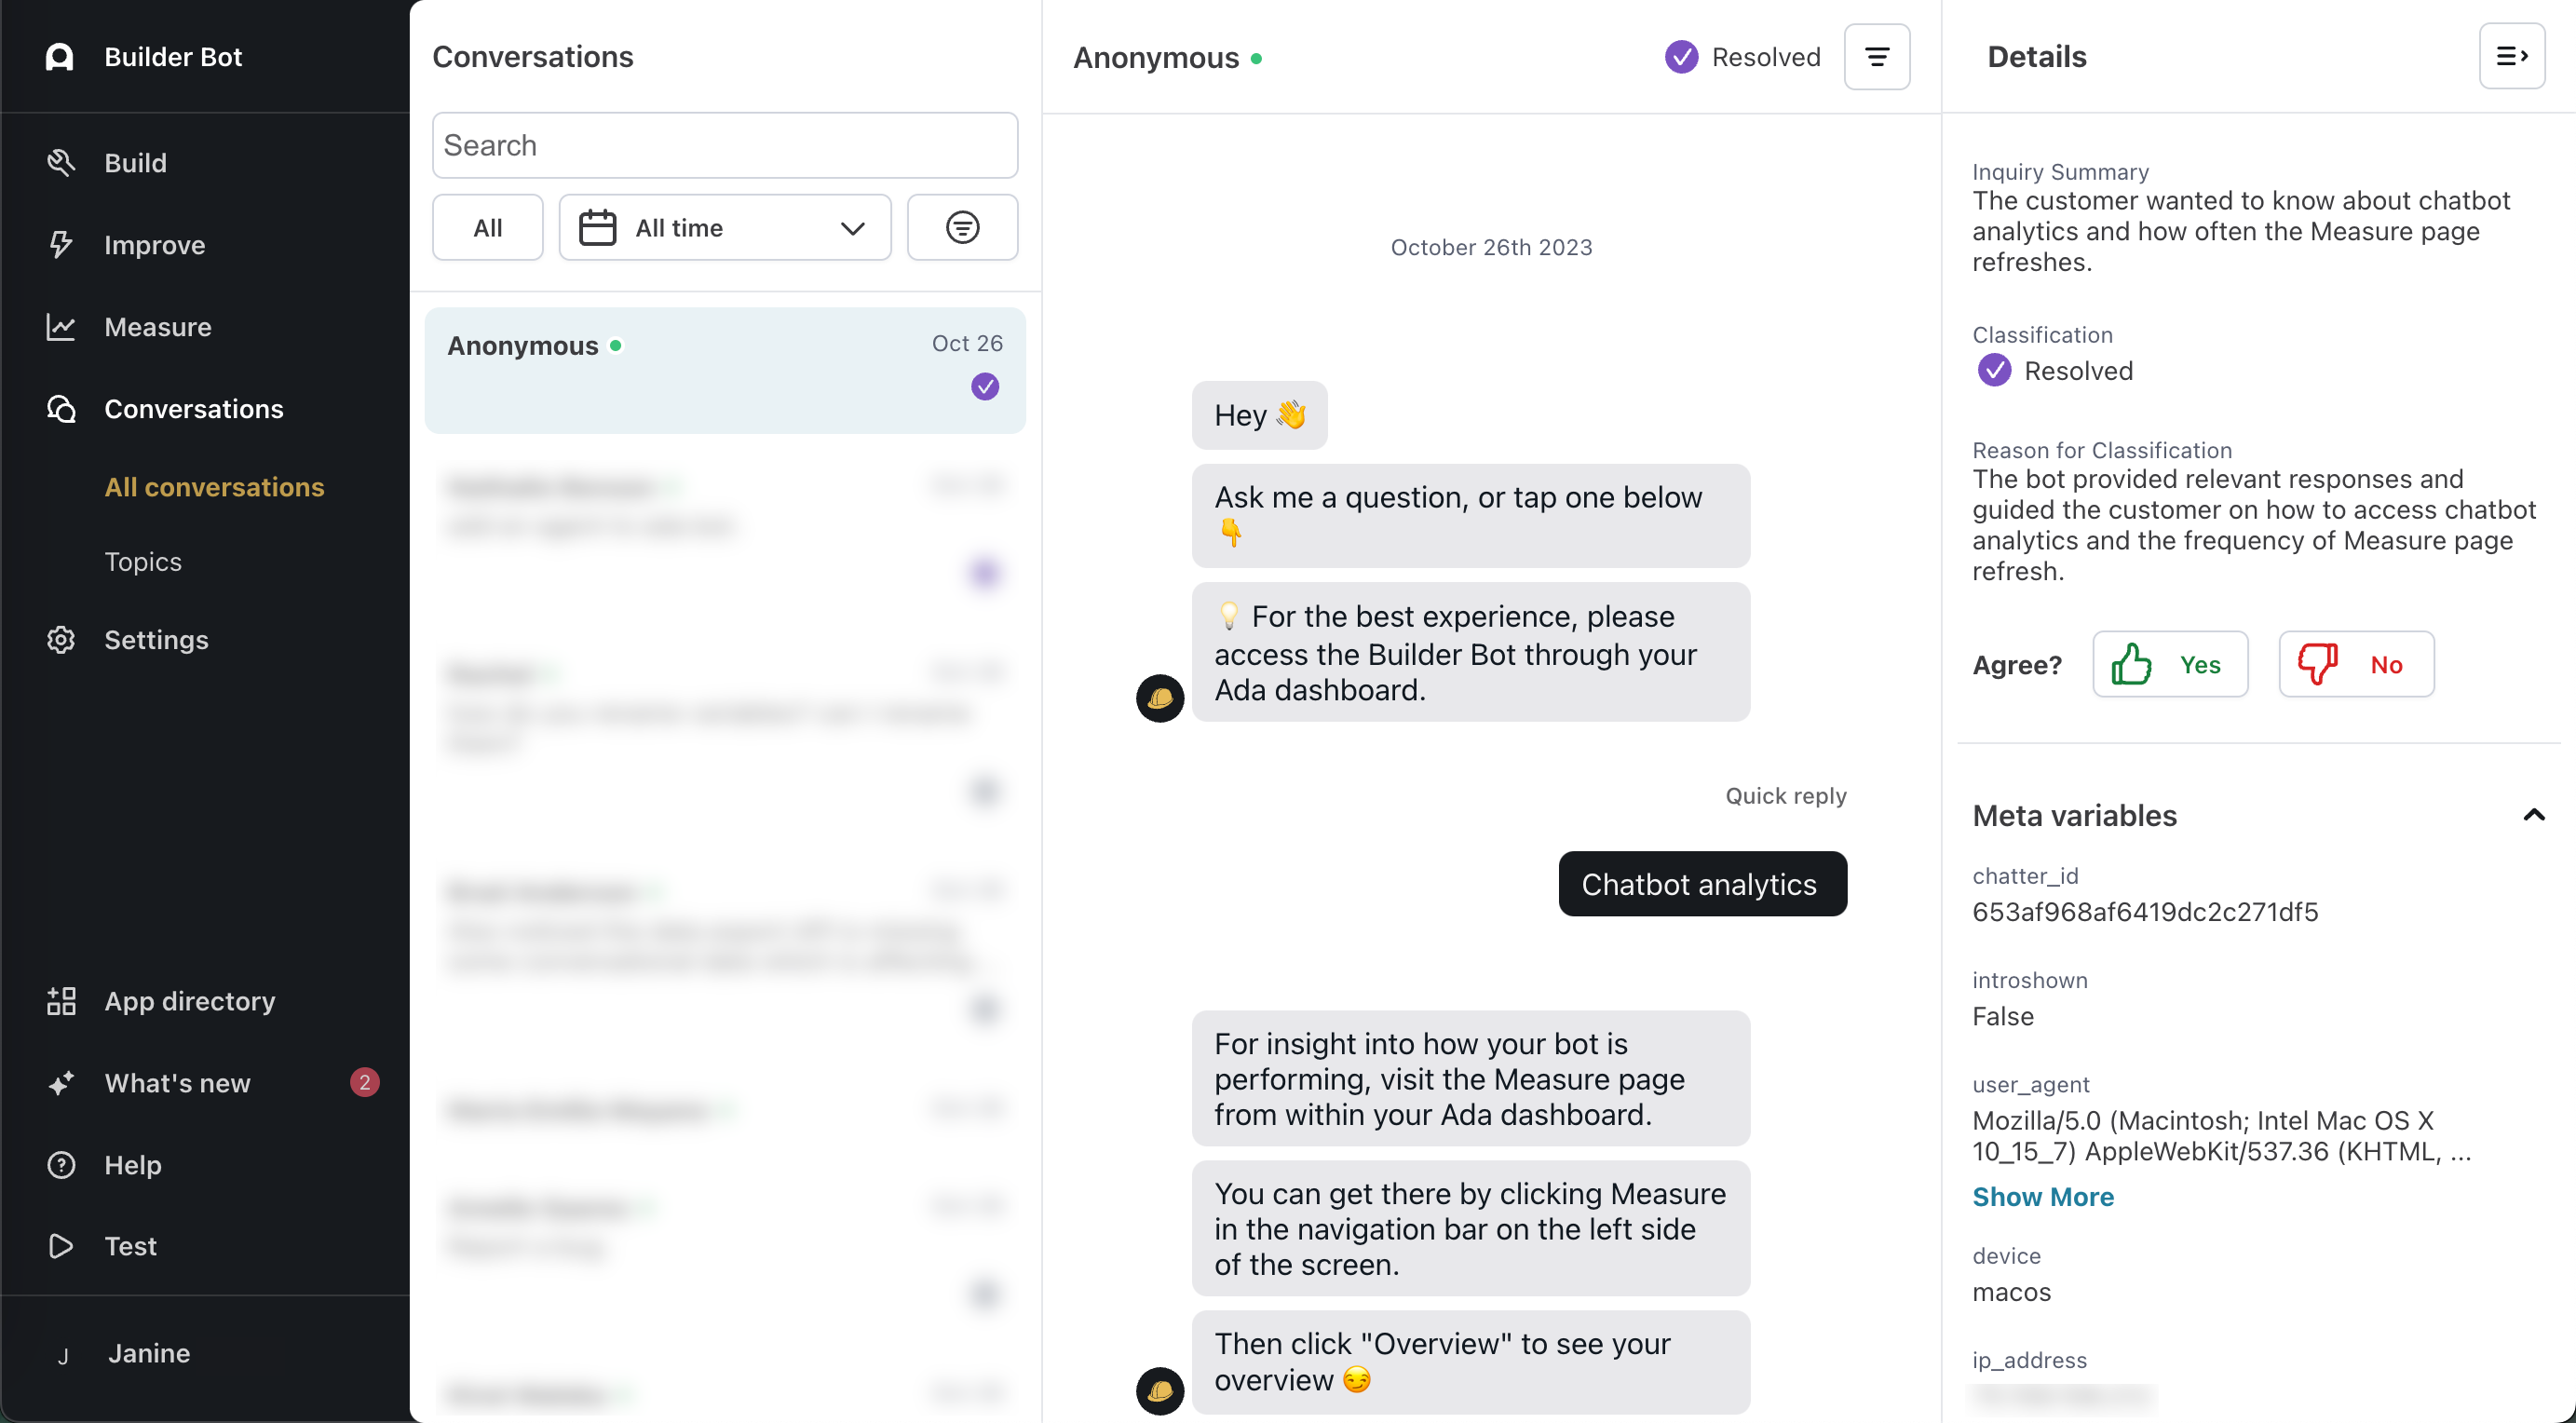
The All Conversations view contains a list of conversation cards organized by chatter. This is the conversation library. Selecting a card in the library displays the transcript of that chatter’s interactions with your bot, as well as the information your bot has collected about the chatter.
View chatter conversations
-
On the Ada dashboard, go to Conversations > All Conversations.
-
In the conversations library in the left-hand panel, click a conversation card to open it.
This displays the transcript of the chatter’s conversations with your bot in the center panel, as well as the chatter information in the right-hand panel.
-
To hide the chatter information panel, hover over it, then click the three-line menu that appears in the upper right corner. To open it again, click the Details button in the same upper right corner.
Train Answers from the conversation transcript
You can train chatter messages to Answers directly from the conversation transcript.
-
In the conversation transcript, select a chatter’s message, or highlight a portion of it.
-
Click the drop-down menu that appears and select an Answer to train the chatter’s message to.
To learn more, read our guide about how to train Answers from the All Conversations view.
Show or hide variable change messages
Depending on how your bot is configured, some bots show messages whenever a variable’s value changes. Here’s how you can change your bot’s settings:
-
In the conversation header, click the Message visibility button
 .
. -
In the list that appears, click Show system messages or Hide system messages.
Understand archived conversations
Conversations remain available in the conversations library for six months before becoming archived. When conversations are archived, you can no longer access them from the All Conversations view. If you need assistance or more information, contact your Ada team.
Understand conversation library cards
The conversations library appears in the left-hand panel of the Conversations view. By default, the conversation cards are sorted by date and time, with the most recent conversation appearing at the top.
Conversation cards, themselves, display some basic preview information about the chatter and interactions it contains. Some of this information may be clear to understand, like the chatter’s name, or the date. Other indicators may not be so straight forward at first glance.
The following list breaks down the various elements that make up a conversation card:
-
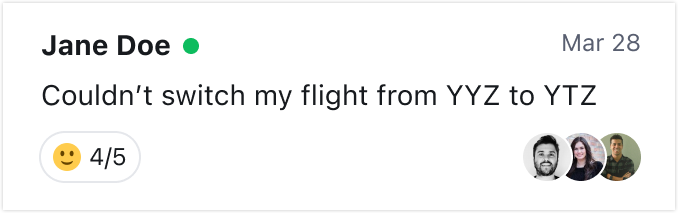
Chatter label – This label appears at the top left of each conversation card, and identifies them based on their associated chatter.
There are four ways the chatter label can identify the chatter:
-
Name or email address – If your bot collected a name or email variable for the chatter, the information from one or the other appears as the chatter label, with the chatter’s name taking precedence.
-
Anonymous – If your bot collected neither the name nor email variable, anonymous appears in place of the chatter’s name or email address.
-
Test User – This label appears for conversations you or your team create using the Test Bot.
-
-
Engagement status – The dot to the right of the chatter label indicates their engagement status. A green dot indicates they currently have a chat window open and may be engaged with the bot, while a gray dot means their chat window is closed.
-
Conversation summary – With enough dialogue to work with, your bot can discern the chatter’s statement which best summarizes their intent. When available, this statement appears beneath the chatter ID.
-
Satisfaction – An icon of a heart within a speech bubble indicates which chatters were served the Satisfaction block during their conversation. The numerical value to the right of that icon indicates the chatter’s satisfaction response.
-
Agent avatar – For those clients with an Ada Glass integration, an avatar image indicates which agent the chatter corresponded with during the course of the conversation.
Search and filter the conversations library
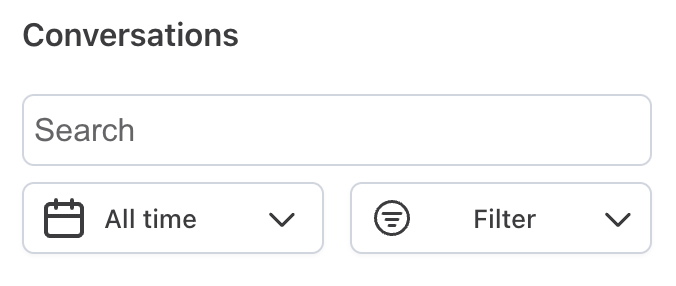
A search bar and filter drop-down menus appear at the top of the conversation library. Use these to search your conversations directly, or filter them based on the date, or other available parameters.
-
On the Ada dashboard, go to Conversations > All conversations.
-
If necessary, search for specific text in the conversation transcript, or use the filters to narrow down the conversations that appear in the list.
-
To filter conversations by when they occurred, click the calendar and either select a default time frame or choose your own dates within the last 180 days. Then, click Apply to see conversations that occurred in your chosen date range.
-
To apply additional filters, click the Filter button
 .
.
- In the Select filter type list, select a filter type:
- Answers: Select an Answer to show only conversations in which your bot served that Answer. Optionally, beside the Where Answer Review field, you can then filter conversations by whether chatters gave the Answer a positive or negative review.
- AR Classification: The automatic resolution classification for the conversation
- CSAT: The customer satisfaction rating the customer gave the conversation
- Conversation Topic: The topic your AI Agent automatically assigned to the conversation. You can choose between generated topics that your bot automatically created, or pre-defined ones you or your colleagues created
- Engaged: Conversations where a customer sent at least one message to your AI Agent
- Handoff: Conversations where your customer was handed off to a human agent
- Language: The language the conversation was in
- Channel: The channel the conversation took place over (e.g., web chat, voice)
- Browser: The browser the customer used
- Device: The device the customer used
- Variable: Select a variable, so you can search for conversations where that value had specific values associated with it
- By default, searches default to using = Is as the operator to return exact matches to your query. Depending on the filter type, you can click the = list to select a different operator.
- In the Value box, enter a value to search for.
- If required, click And
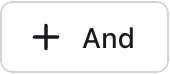 to add additional filter conditions. You can also hover over a condition and click the Delete button
  that appears to remove it.
 - Click Apply.
- To include or exclude test conversations, toggle the Include test user setting.
-
-
Select a conversation in the conversation library to read through the entire transcript.
If you want to read more conversations from the customer in an open conversation, under their name, you can click the number of conversations to change your filter to conversations your AI Agent had with them.
Conversation summaries
Conversation summaries help you understand the theme of a conversation at a glance. With enough chatter questions in a conversation, your bot can determine the chatter’s intent. Key phrases or sentences are then presented on the Answer card in the conversation library. These phrases should give you a good idea about what the chatter is trying to achieve, helping you identify conversations of interest quickly and easily.
You’ll also find Conversation Summaries at the end of the individual conversation transcripts. Of course, a chatter can have several conversations with your bot. Each of those may have their own summaries!
-
Summaries appear on conversation cards in the Conversations library.
-
Summaries also appear at the end of relevant transcripts in the center All Conversations view panel.
-
Summaries include up to three chatter messages.
-
It’s possible that a chatter’s intent is not detectable. In that case, there won’t be any summary attached to that particular conversation.
-
Summaries only consider the chatter’s text messages, and not button clicks or bot messages.
Summaries are available for conversations in all languages.
View all conversations that contain a certain Answer
To see how an Answer has performed with chatters in the past, you can view a list of all conversations that have included that Answer.
-
On the Ada dashboard, go to Build > Answers, then navigate to the Answer you want to see in chatter conversations.
-
In the top-right corner of the window, click the View conversations with this Answer button
 . The
dashboard switches to the Conversations view, with a list of
conversations that include that Answer.
. The
dashboard switches to the Conversations view, with a list of
conversations that include that Answer.