Test your bot
Overview
Your Ada Test Bot is your secret weapon in ensuring your answer flows are crisp, clean, and accurate, as it allows you to test your answers before making them available to your customers.
There are two ways to access the Test Bot. The first is via the Test Bot button in the lower left side panel of your Ada dashboard, and the second is the Test Answer button within an Answer. In both cases, you can type your question in the field that says Message..., and press Enter to see how the bot's Answers render in the chat window.
Test your bot
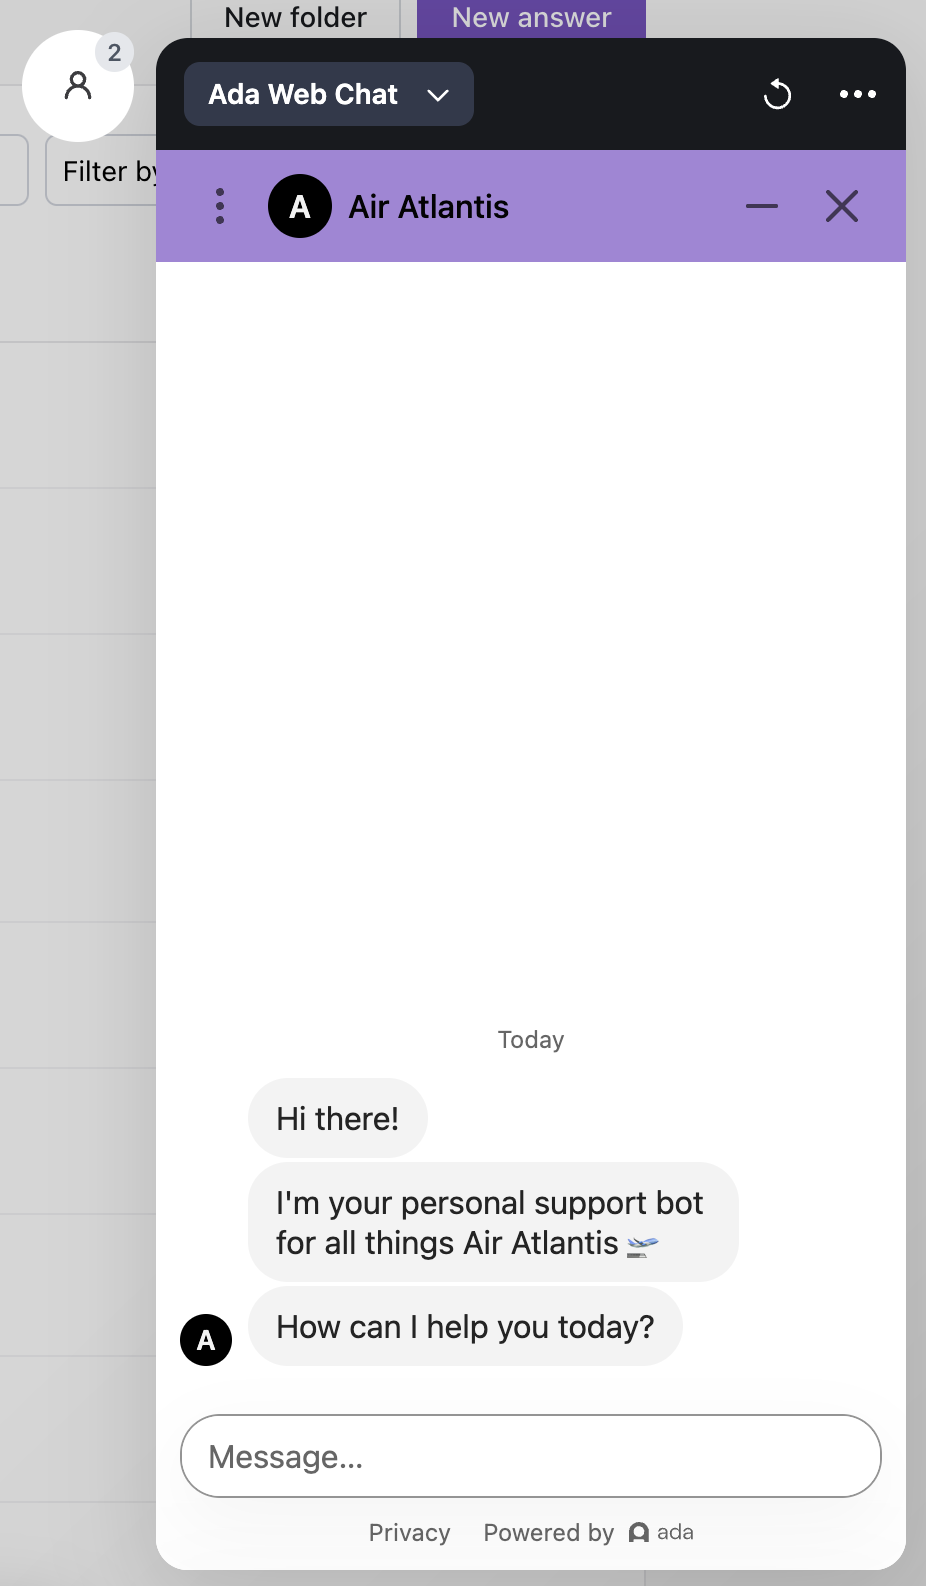
The Test Bot button is always available in the lower left side panel of your Ada dashboard. Clicking it will launch the Test Bot, allowing you the ability to interact with the bot as your chatters do, replicating their experience and testing out your flows.
Test your current Answer
The Test Answer button within an Answer is a great option when you are creating child Answers, as it allows you to test that specific Answer within your Test Bot, without having to navigate through complicated Answer flows to access it. Once an Answer has been saved, you will have the option to click the Test Answer button at the bottom of your Answer editor to launch your Test Bot, so you can automatically load the Answer you were just interacting with.
Manage your Test Bot's settings
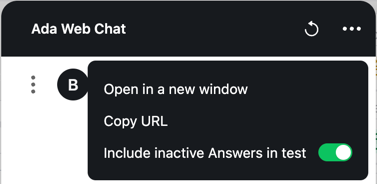
To access your Test Bot’s settings, click the More options icon  . Modifying
any of these settings will apply to this Test Bot only, and will not
impact the Test Bots of other Bot Managers within your organization.
. Modifying
any of these settings will apply to this Test Bot only, and will not
impact the Test Bots of other Bot Managers within your organization.
-
Open in a new window
Open your Test Bot in a separate browser window.
-
Copy URL
Copy your Test Bot's URL to your clipboard. You can use this URL to test your bot in any browser window, even if you're not logged into Ada.
-
Include inactive Answers in test
Turn this toggle off to exclude hidden Answers from the Test Bot. By default, hidden Answers appear in the Test Bot. For more information, see Control whether chatters can see certain Answers.
Impersonate different user types
If you've tailored your Answer content to different users based on the variables associated with them, you can set those variables in your Test Bot and verify that you're getting the responses you expect.
You can't simulate user types using sensitive variables.
-
In the Test Bot, click the User icon beside the top of the test chat.
-
Then, in the Set test variables window that opens, set the variables corresponding to the user type you'd like to test, and start chatting with your bot.
If you start typing a variable value, you can see a list of values from previous conversation data. For example, if you're using the
regionvariable, any values stored inregionfrom previous conversations will appear as options. You can click one of these options to select it, or continue typing to enter a different value.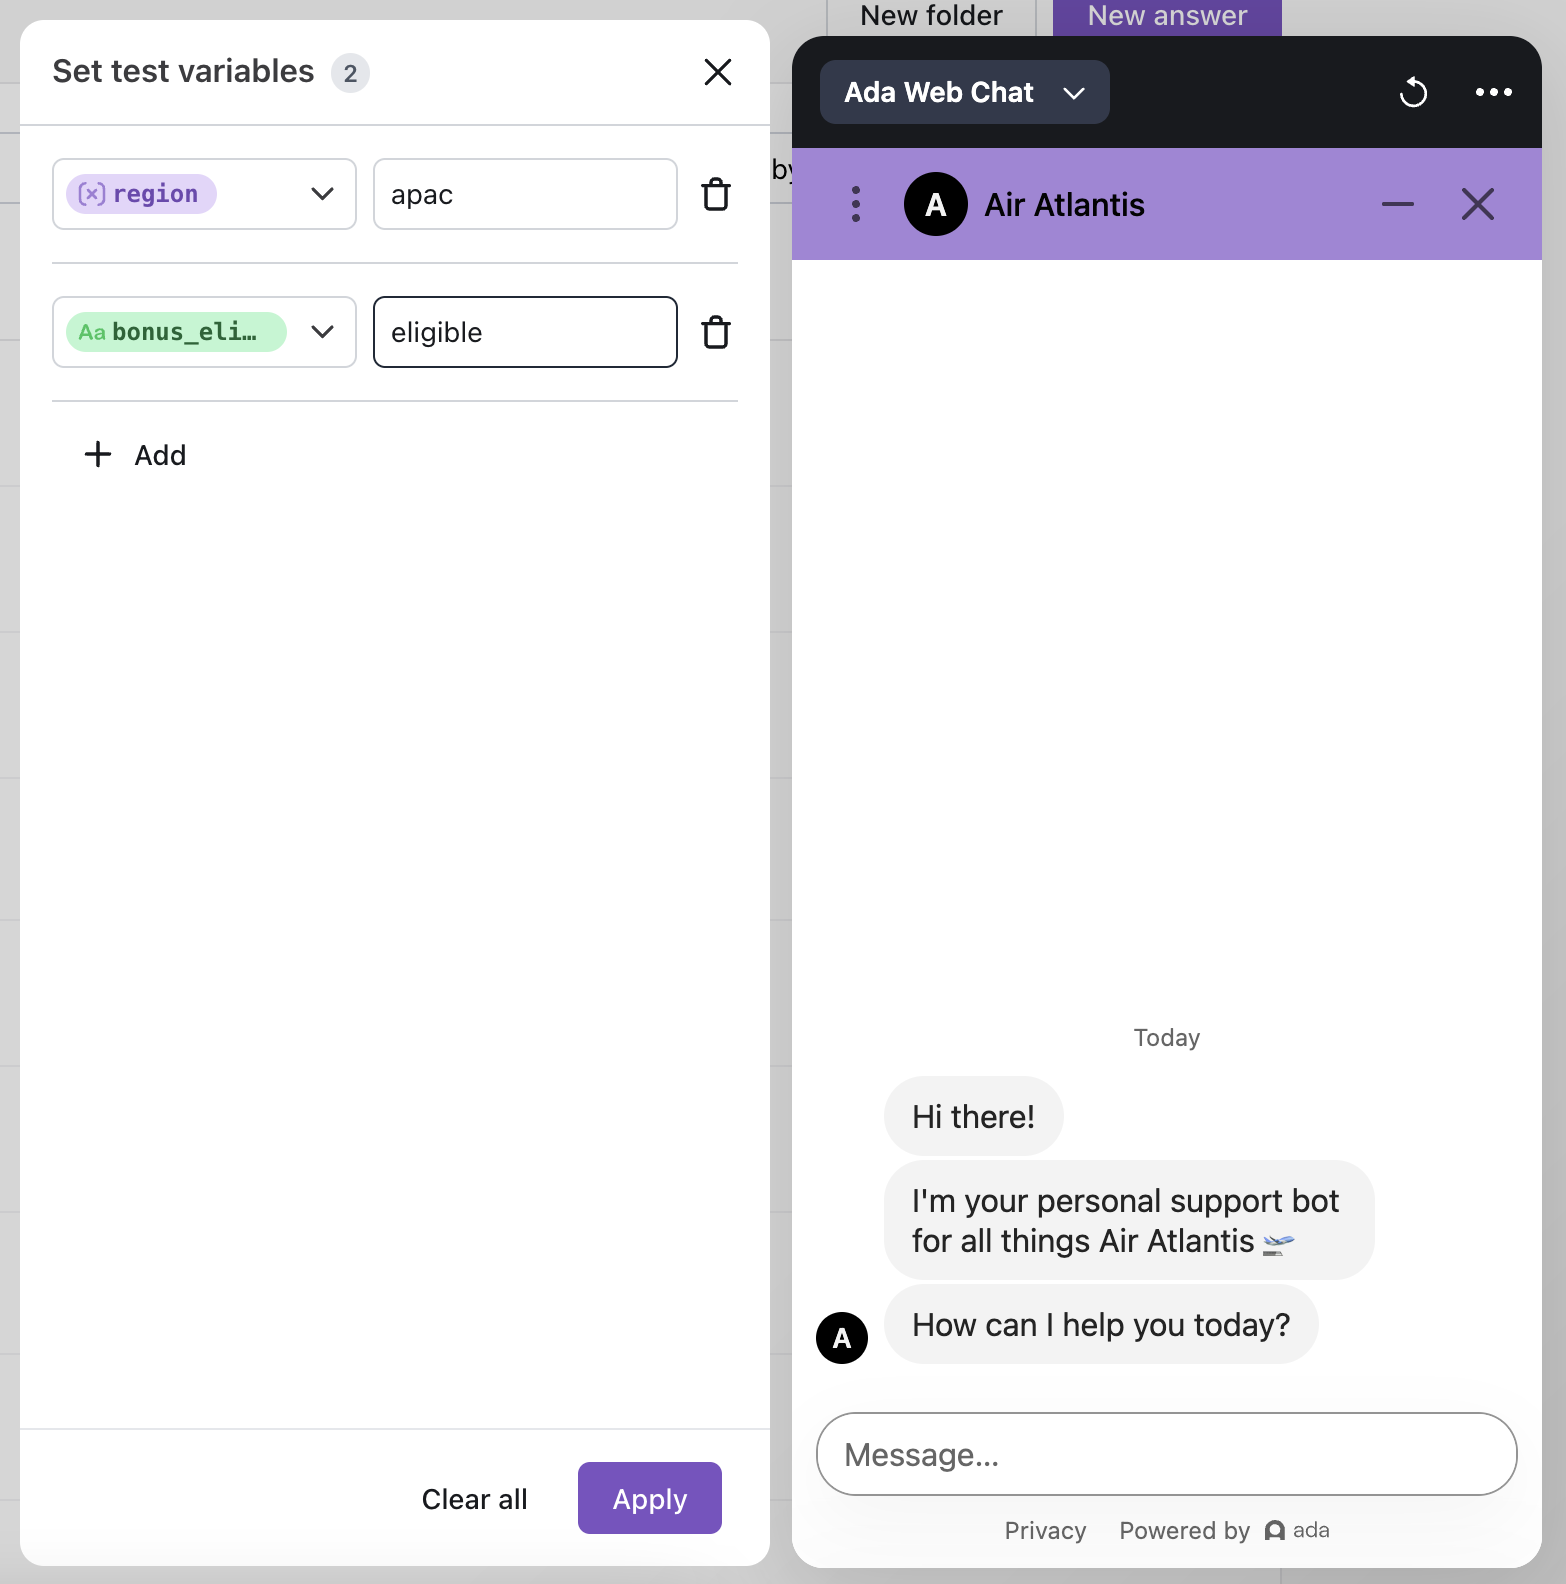
Reset or end your test chat
Clicking the Refresh icon resets your Test Bot in alignment with your chatter persistence settings. More on that is available here: Manage when your bot forgets customers.
When you are done testing and ready to return to your dashboard, click anywhere outside the Test Bot to exit.
Have any questions? Contact your Ada team—or email us at [email protected].