Organize Answers in your dashboard
Overview
Answer folders are an organizational tool that help you manage your bot’s Answer list. Folders work a lot like they do on your computer. You can create and name folders as you see fit, nest folders within folders, and bring order to your bot universe.
Folders and the Answers view
Answer folders are, of course, found in the Answers view. With that in mind, builders familiar with the pre-Answer folders Ada dashboard should take note of an important change to this view. In addition to the traditional sidebar Answer list, there is now also a full-width version called the Answer index.
The Answer index
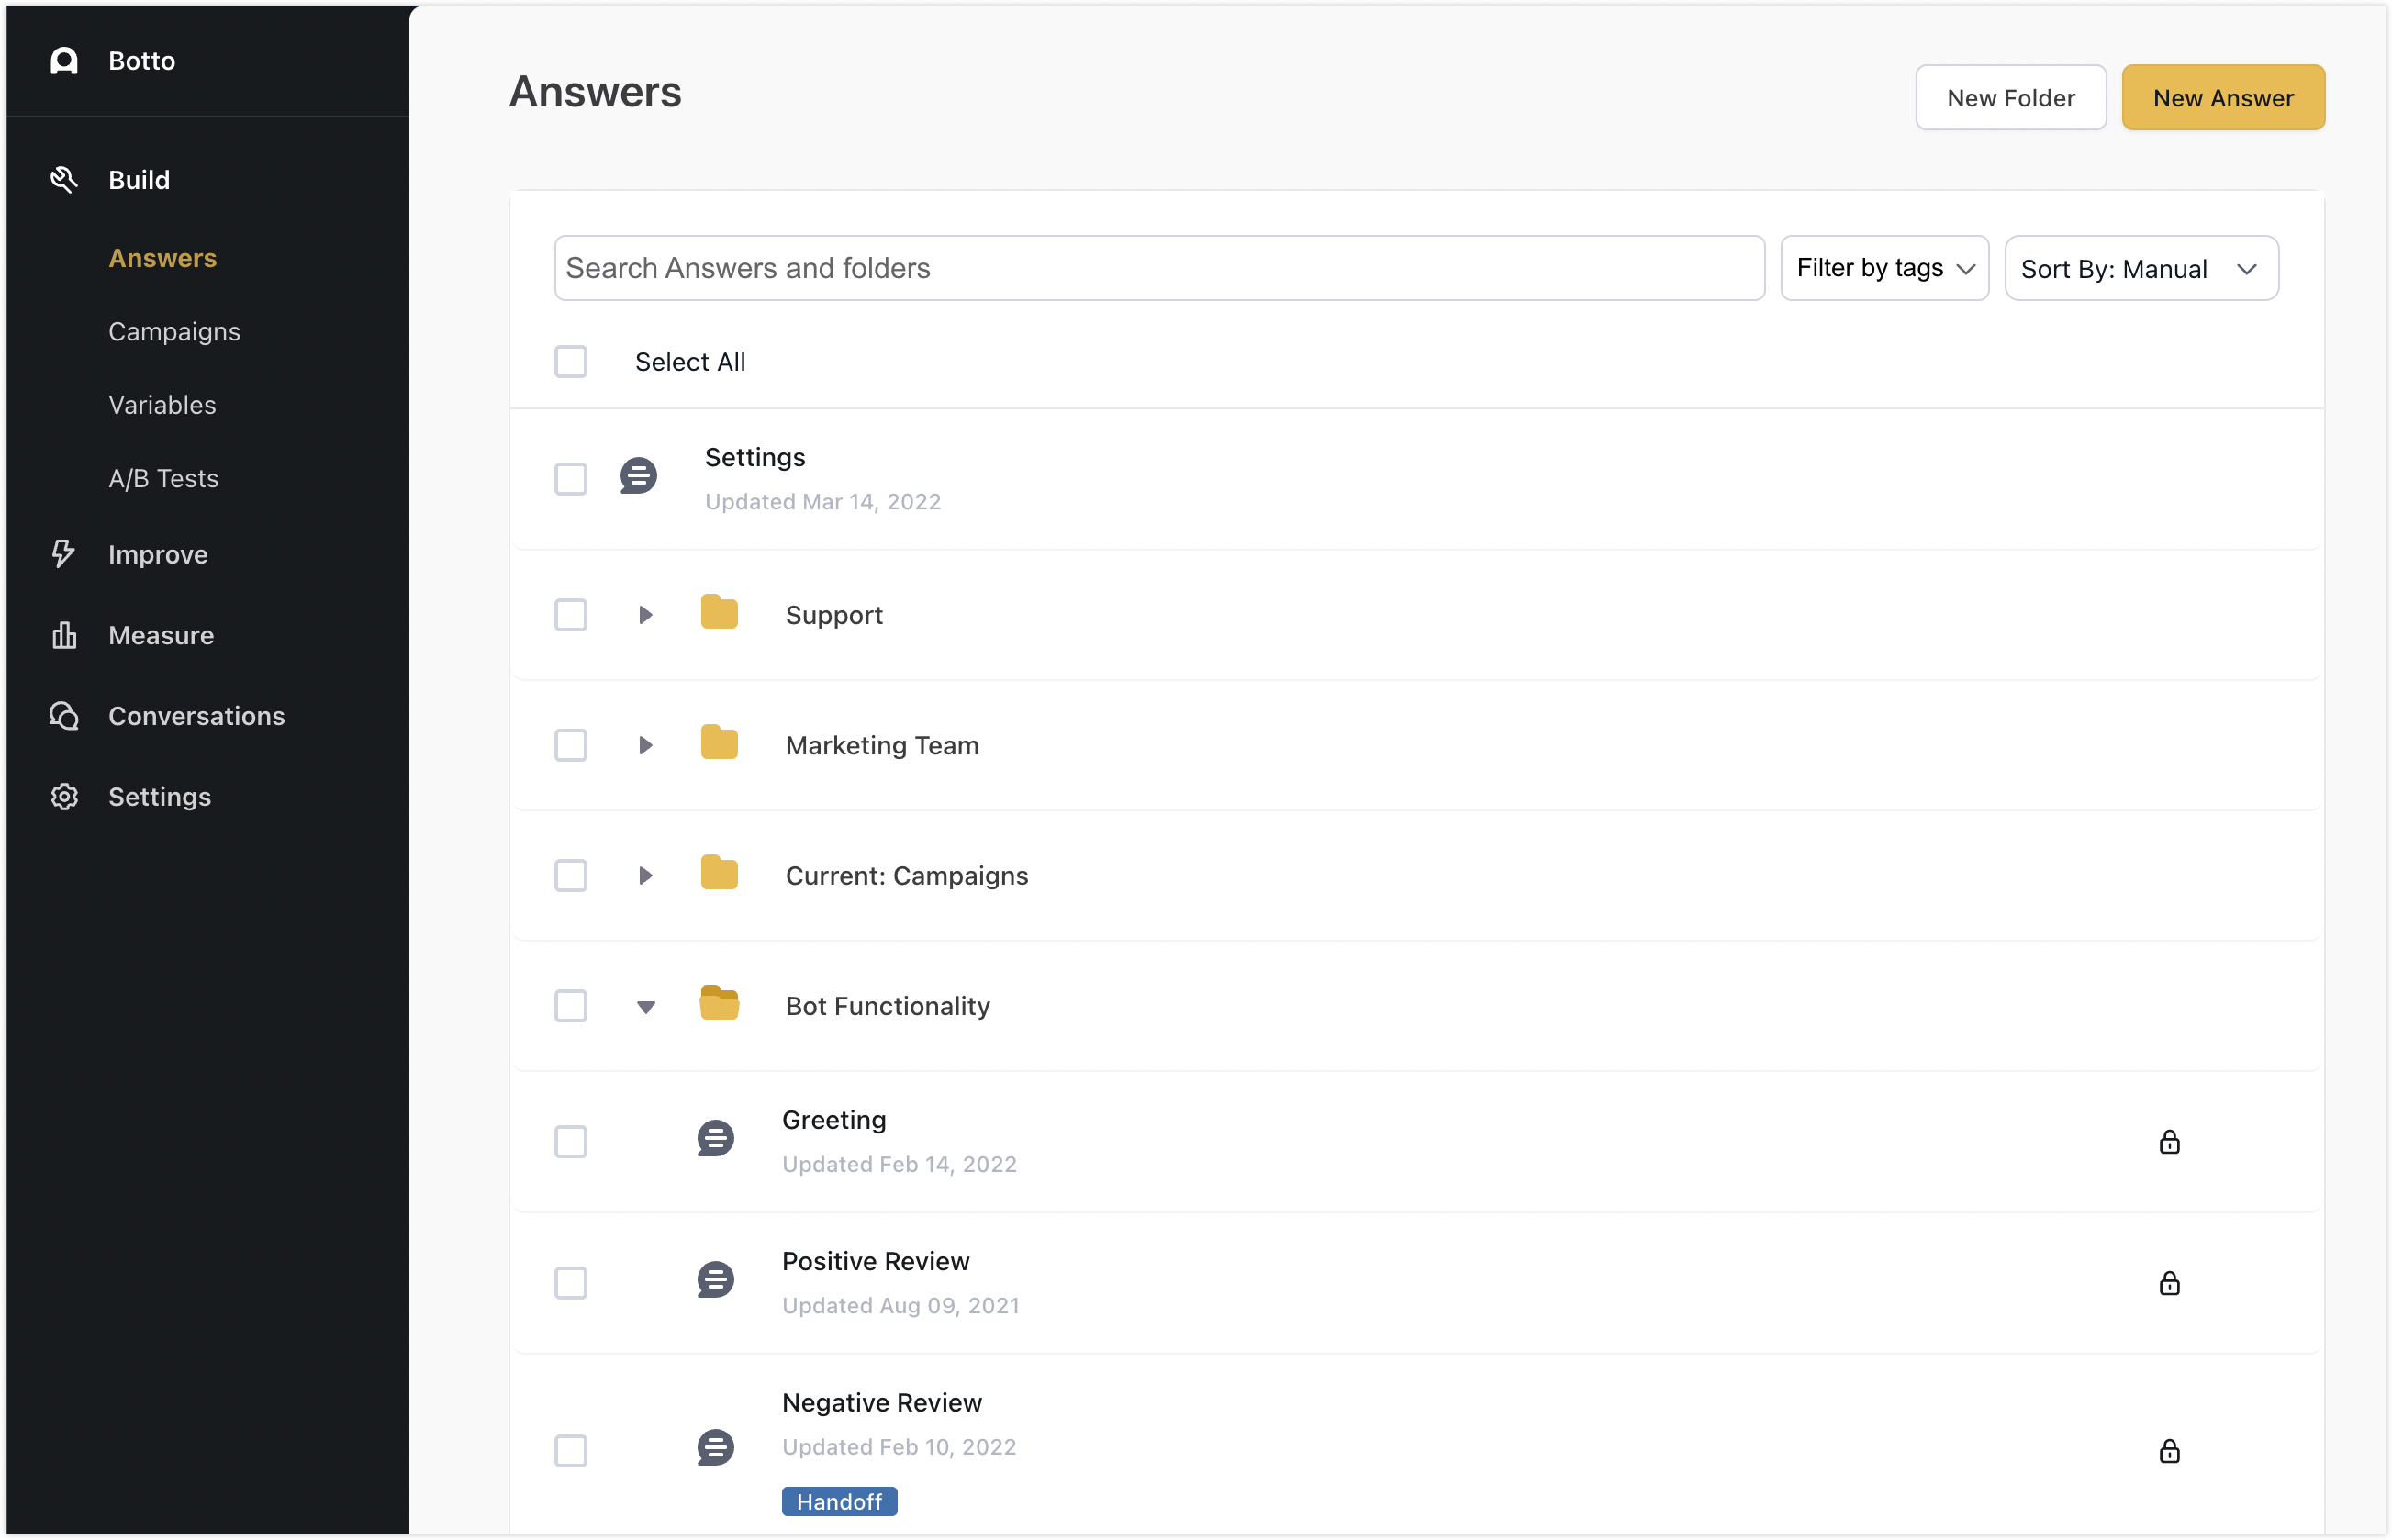
The Answer Index is a full-width view of the Answer list. Whenever you log into the Ada dashboard, this is the page where you first land.

Fundamentally, the Answer index is the same as the traditional sidebar Answer list, with a couple of added options to help with organization:
-
Check boxes let you select more than one Answer or folder to move at a time.
-
Three-dot menu appears when you hover your mouse cursor over an Answer or Folder in the list. Click the three-dot menu to reveal the following folder and Answer management options:
Answer editor view
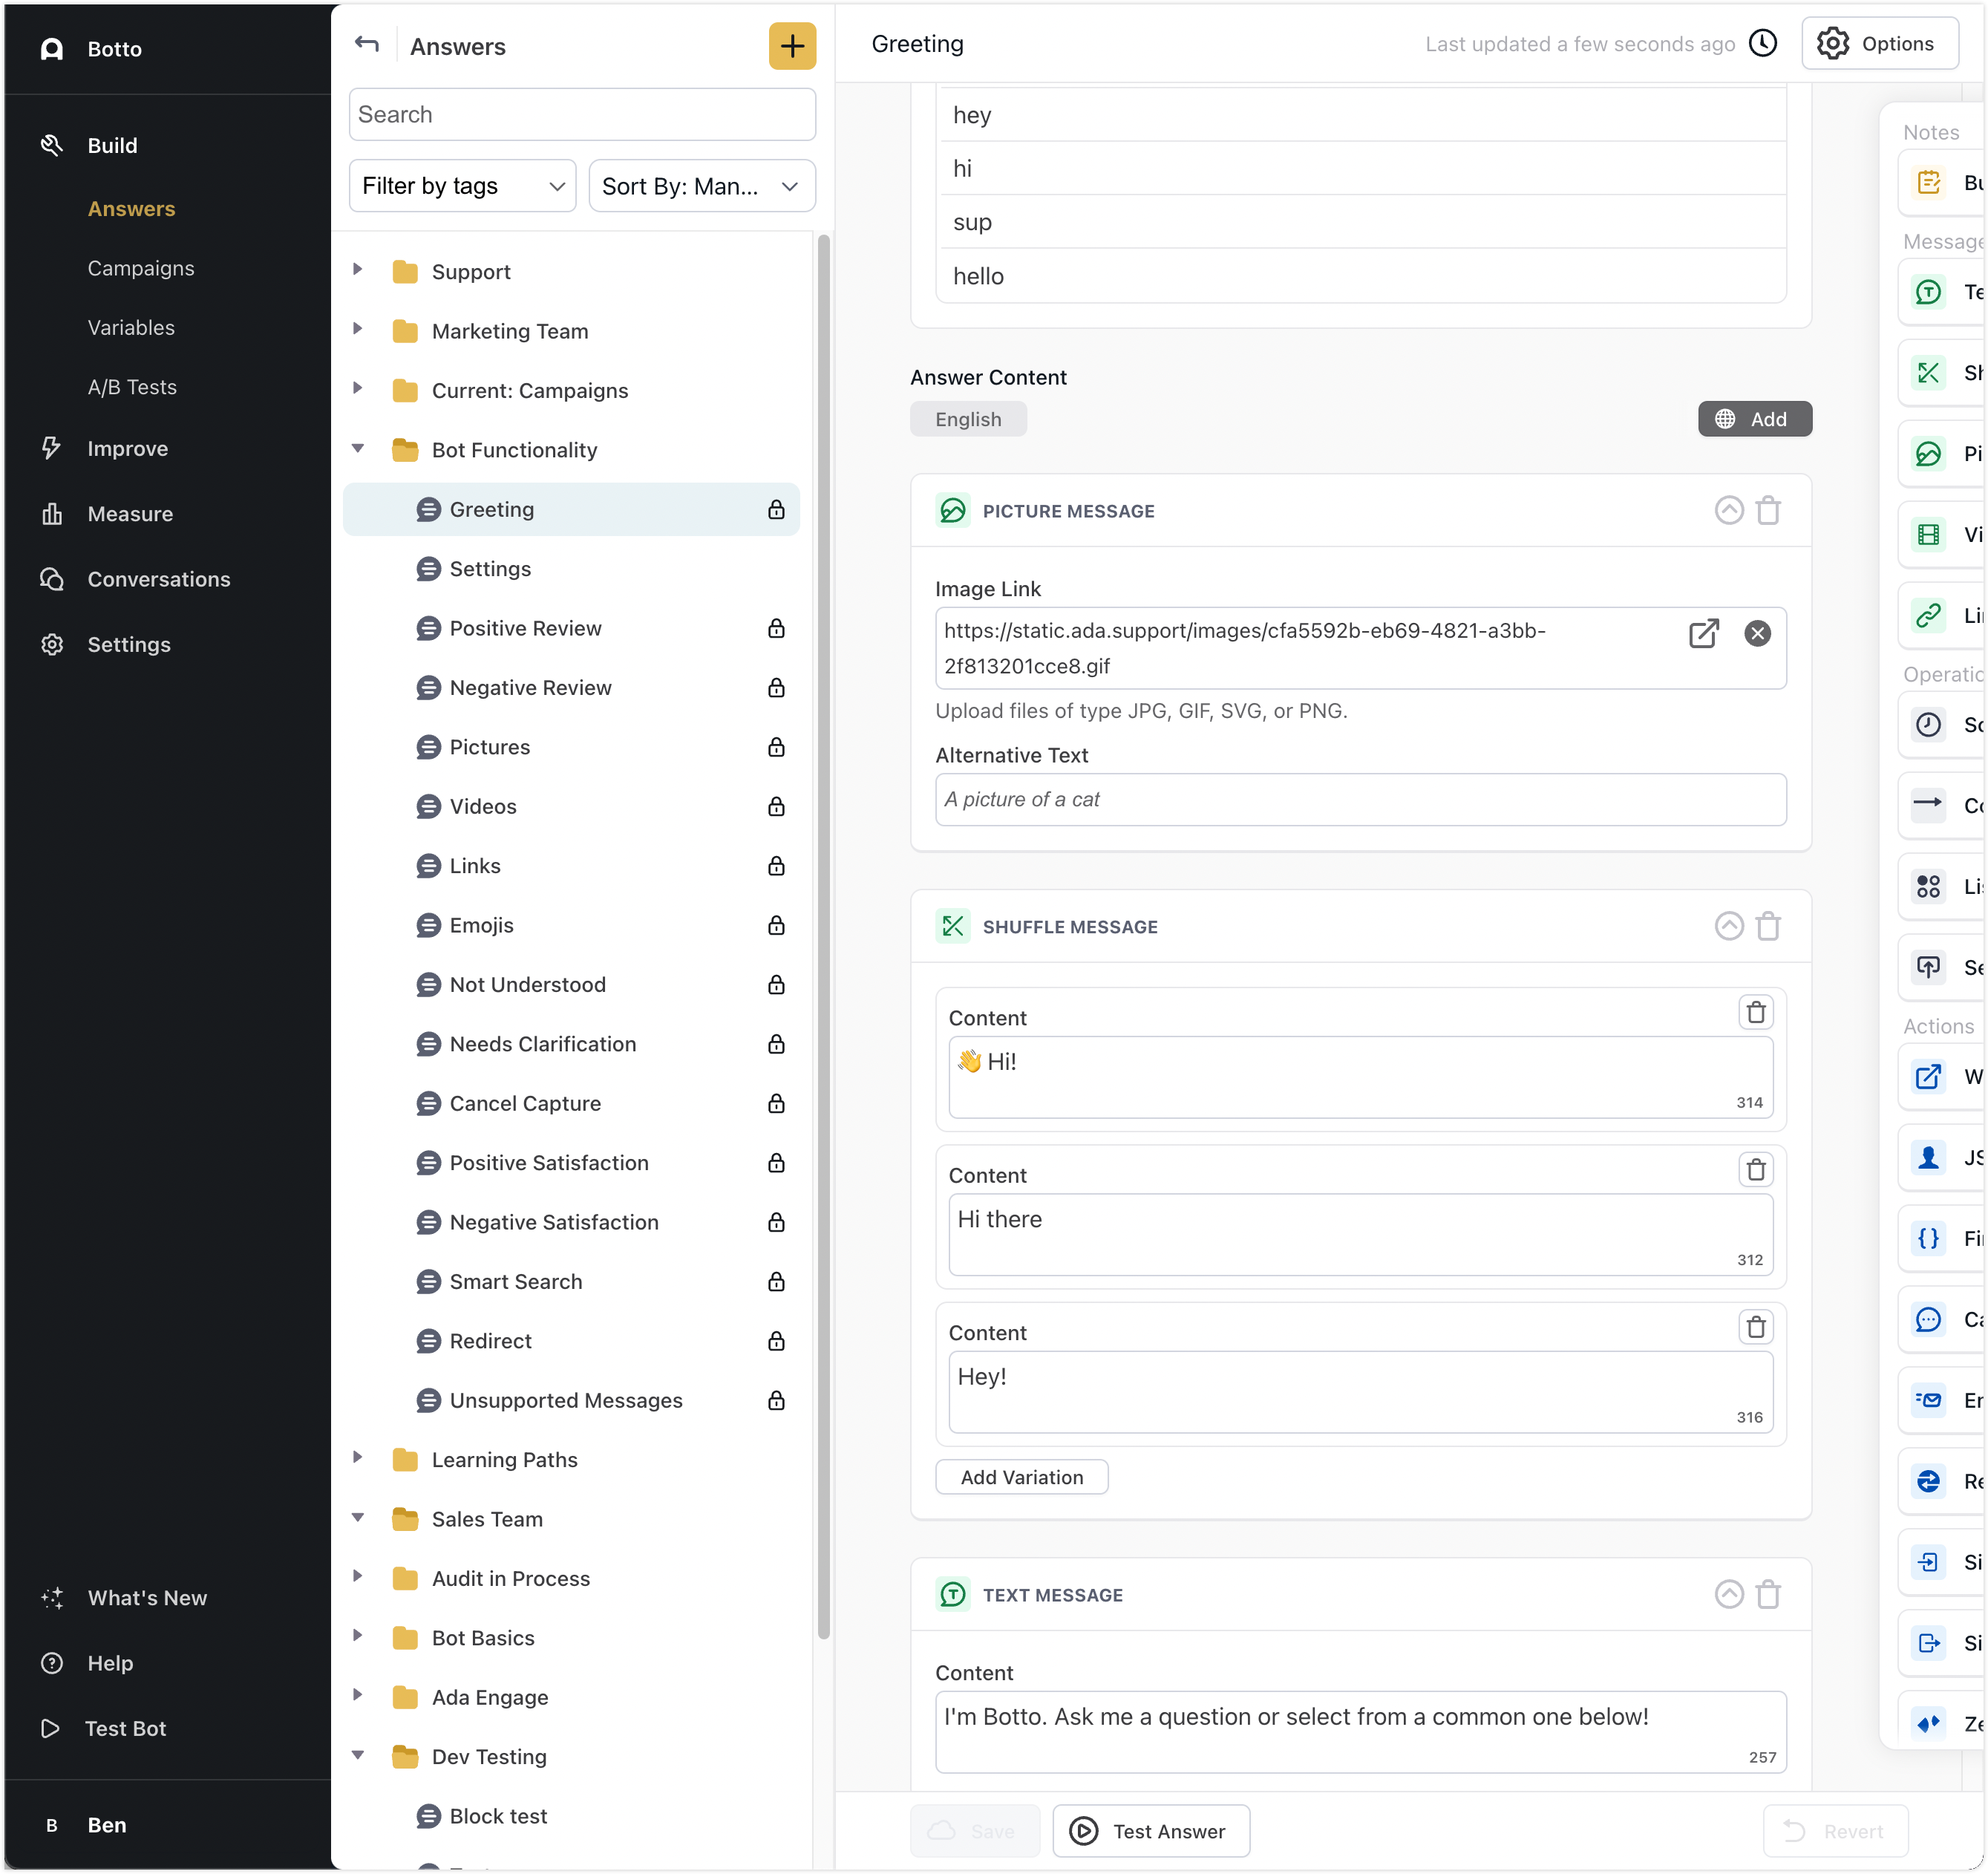
Clicking an Answer in the Answer list view opens the Answer content editor and snaps the Answer list to the left as a sidebar. The sidebar Answer list is nearly identical to the full Answer list view. The main difference is the lack of check boxes and three-dot menu.
Additionally, a back button appears at the top of the sidebar view. Click this to return to the full view.
Click the plus sign to reveal the New Folder and New Answer options.

Use Answer folders
Now that we know how Answer folders fits into the dashboard, let’s take a look at how to use folders.
Getting started
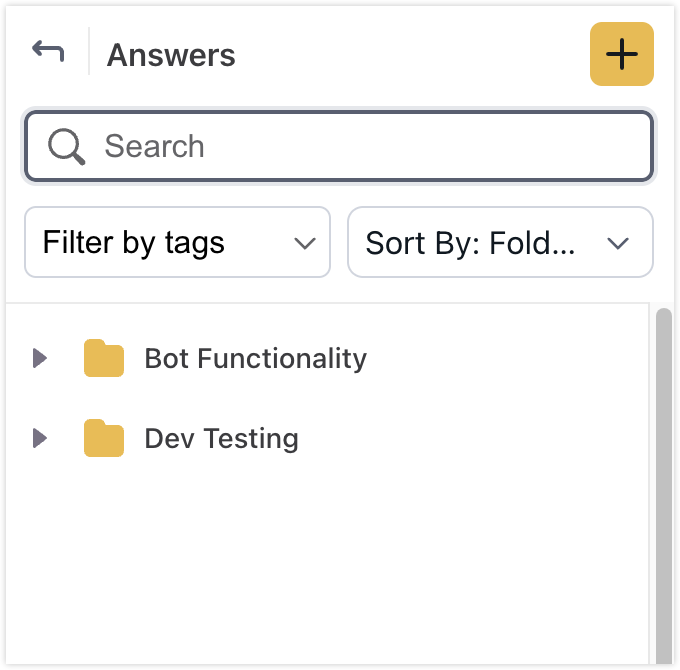
A brand new bot’s Answers view has two folders to start. Inside these folders you’ll find the default Answers with which all Ada chatbots begin life.
-
On the Ada dashboard, go to Build > Answers to see the two starting folders in your Answer list:
You are free to edit these folders as you see fit, including removing the default Answers from them. They are simply starting points for your folder structure.

If your bot already has an existing catalog of Answers, you’ll still the same starting folders as a new bot. They’ll appear at the top of your Answer list, with the locked and Test Answers moved to their respective folders automatically. Your custom Answers aren’t automatically organized. You’ll find them listed below the two starting folders.
Working with folders
As we’ve discussed, you can create an unlimited amount of folders for organizing your Answers, name them, rename or delete them, and nest them within each other. This gives you great flexibility in building your Answer organization system.
Create folders
-
In the Answers view, use one of the following methods to create a new Answer folder:
From the Answer index:
-
At the top of the Answer index page, click the Create folder button,
or
-
Hover over a folder in the list, click the three-dot menu that appears, then click New Folder.
From the Answer list sidebar:
- At the top of the sidebar, click the plus sign, then click New Folder.
-
-
In the Create a new folder dialog box, complete the Name and Description fields.
-
Click the Add to folder drop-down menu and select the location for your new folder. Select an existing folder to nest your new folder within, or select All Answers to create a new parent folder.
-
Click Create. Your new folder appears in the Answer list, in the location you chose.
Working with Answers
Create Answers
When you create an Answer, you can decide which folder to put your new Answer in right from the Answer settings dialog box.
-
In the Answer editor, in the Answer list side panel, click the plus button at the top, then click New Answer. The Answer settings dialog box appears.
-
Enter an Answer title, as well as any other details you want.
-
To nest the new Answer in an existing Folder, click the Add to Folder drop-down menu, then select the folder where you’d like to place the Answer. Choosing All Answers places the Answer in the main list, outside of any folders.
-
Click Save.
You can also create Answers from the three-dot menu of a specific folder.
-
In the Answer list, hover over the folder where you want your new Answer to live. This reveals a three-dot menu.
-
Click the three-dot menu, then click New Answer. The Answer settings dialog box appears.
-
Complete the Answer settings for your new Answer. The Add to Folder drop-down menu is already set to the folder you used to create the Answer. Feel free to switch this to a different folder if you change your mind about where you want your new Answer to live.
Move folders and Answers
You can move Answers and folders to organize them in your list as you need. They can be placed inside other folders to group them together, or just rearranged on the same level in a way that makes sense to you. Moving Answer list items is as simple as dragging and dropping into position.
You can move only one item at a time when in the Answer list sidebar of the Answer editor; however, the Answer index lets you move more than one item at at time. Use the checkboxes to select all the items you want to move.
Move a single item
In the Answer list, click and hold an Answer or folder, then drag and drop it where you want to place it.
-
To place your item in a folder, hover over the folder where you want to nest the item to reveal a black outline, then drop the item inside.
-
To rearrange items on the same level, hover over an area between items to reveal a placeholder line in your chosen position, then drop the item to place it.
Move multiple items
There are two ways you can move multiple items in the Answer index. You can drag and drop a group in the same manner as with single items, or you can select the target folder from a drop-down menu.
Drag and drop multiple items
When nesting items inside a folder in the Answer index, you must open that folder first.
-
In the Answer index, select the check boxes beside each Answer or folder you wish to move.
-
Click and hold any one of your selected items, then drag and drop it where you want to place it. The whole group will move together.
-
To place the group in a folder, hover over the folder where you want to nest it to reveal a black outline, then drop the item inside.
-
To rearrange items on the same level, hover over an area between items to reveal a placeholder line in your chosen position, then drop the item to place it.
-
Select a target folder from a drop-down list
-
In the Answer index, select the check boxes beside each Answer or folder you wish to move.
-
At the bottom of the dashboard, click Move Selected Items. A Move Items dialog box appears.
-
In the Move Items dialog box, click the Select Folder drop-down menu, then click to select the target folder where you want to place your items.
-
Click Move. The items move to your chosen folder.
Delete folders
You can delete any Answer Folder just as easily as you created it. Deleting a folder also deletes any items that folder contains.
Can I restore a deleted folder?
No. Answer Versions does log an event when you delete a folder; however, restoring folders from your version history is not currently available.
Can I restore an Answer contained in a deleted folder?
No—with an exception.
As with deleting a folder, Answer Versions does log an event for the deleted Answer; however, it is not currently possible to restore the Answer from that particular Version History entry. If you do want to restore any Answers contained in a folder you deleted, you’ll have to use an older version created when you edited the content, training, or settings for each of the deleted Answers. Keep in mind that your bot’s version history only tracks the previous 30 days.
Here’s how to delete an Answer folder:
-
In the Answer list or Answer index, hover over a folder row to reveal a three dots menu on the right side.
-
Click the three dots menu, then click Delete Folder.
Collaborating with colleagues
As you create and organize your folders and Answers, your colleague’s dashboards update automatically to reflect those changes. And the same is true for your dashboard; any changes they make appear for you automatically, as well.
Search

Answer search results display the folder the Answer is in at the bottom of each Answer it returns. You can click any returned folder search results to display only that folder’s content.